
Candle Wick Trimming: How To Trim A Candle Wick Safely
Every hand-poured candle we make at Small Flame Candle Company is designed to burn clean and fill your space with rich, true-to-life fragrance. But even the best candle needs a little upkeep, and knowing how to trim a candle wick is the single most important habit you can build as a candle owner. A properly trimmed wick means a steadier flame, less soot, and a longer-lasting candle, skip it, and you're leaving burn time (and money) on the table.
The good news? It takes about ten seconds and requires almost no skill. You just need the right length, 1/4 inch is the standard, and a basic tool to get there. Whether you use a dedicated wick trimmer or a pair of scissors, the technique is straightforward once you see it laid out.
This guide covers everything: why trimming matters, what tools work best, how to do it step by step, and the common mistakes that trip people up. By the end, you'll have the know-how to get a better burn out of every candle you light, from our hand-poured collection or anyone else's. Let's get into it.
Why trim wicks and what length to aim for
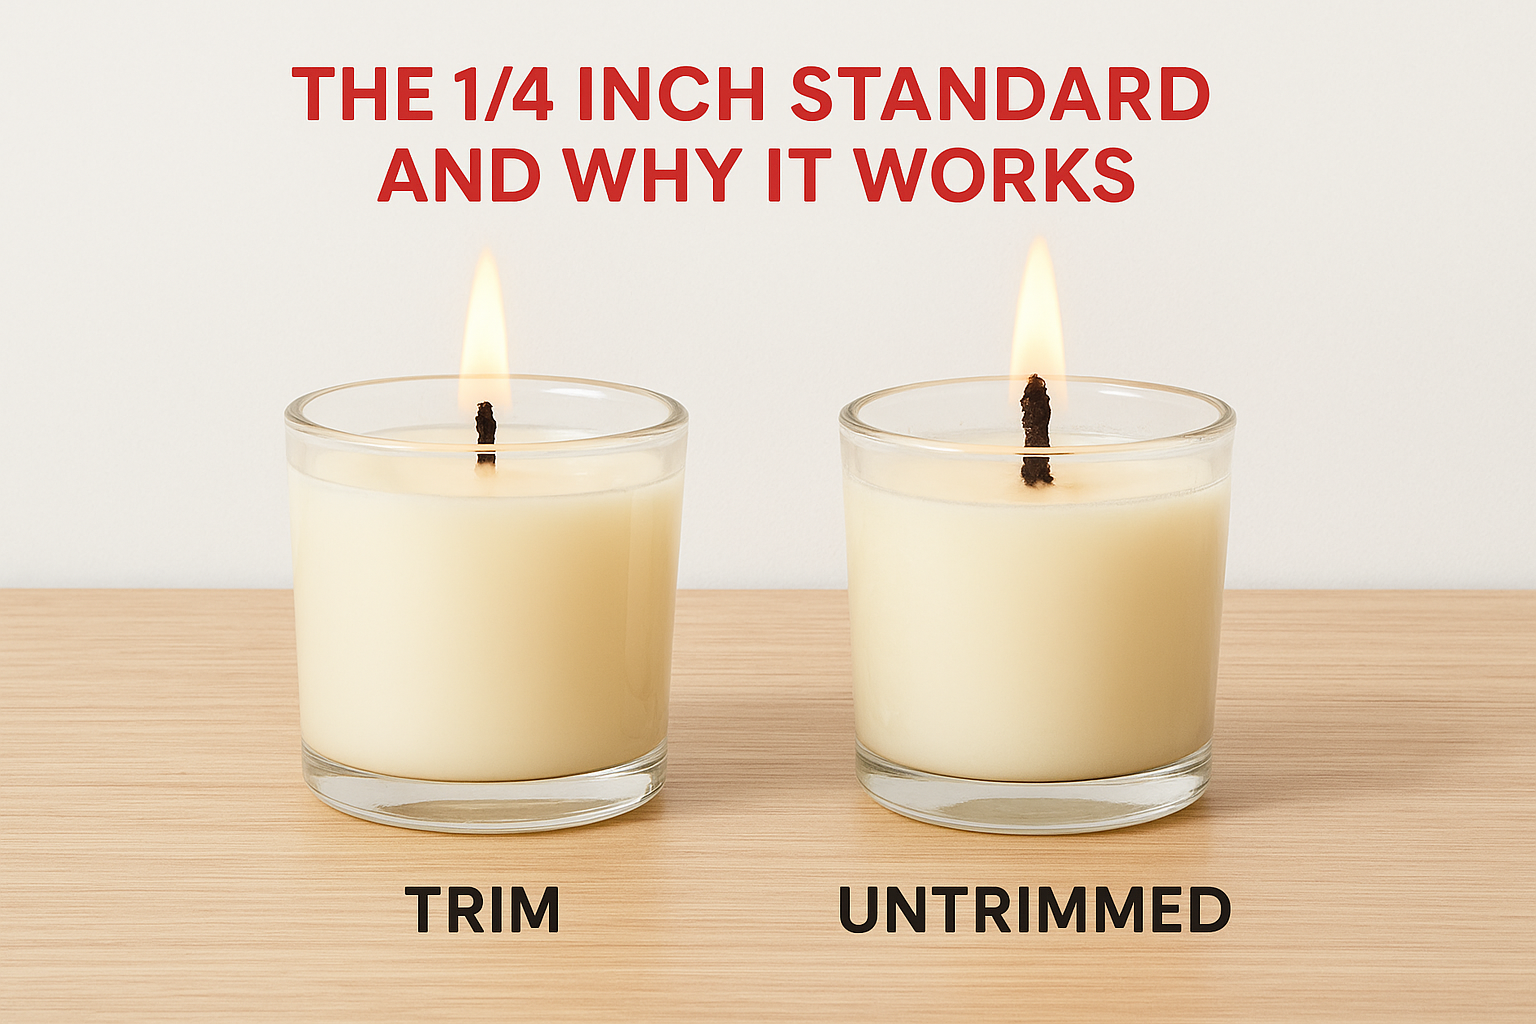
A long wick is the root cause of most candle problems. When you light a candle without trimming first, the excess wick burns unevenly, draws too much fuel at once, and creates a large, unstable flame. That oversized flame produces black soot, excessive smoke, and a mushroomed carbon tip, which only compounds the problem with every subsequent burn.
What an untrimmed wick actually does
When you skip trimming, the wick builds up a carbon deposit at its tip during each burn. This buildup absorbs too much wax, causing the flame to flare and flicker rather than burn steady. Over time, that cycle deposits black residue on the glass and shortens the overall burn time, and can even cause the wax to overheat near the jar's edges. Knowing how to trim a candle wick correctly breaks that cycle before it starts.
Skipping even one trim can reduce your candle's total burn time noticeably, because an oversized flame consumes wax faster than the wick is designed to handle.
Here is a quick comparison of what changes when you trim versus when you skip it:
| Factor | Trimmed wick (1/4 inch) | Untrimmed wick |
|---|---|---|
| Flame behavior | Steady and controlled | Large and flickering |
| Soot output | Minimal | Heavy black deposits |
| Burn time | Maximized | Reduced |
| Wax pool | Even, reaches jar edges | Uneven, tunneling risk |
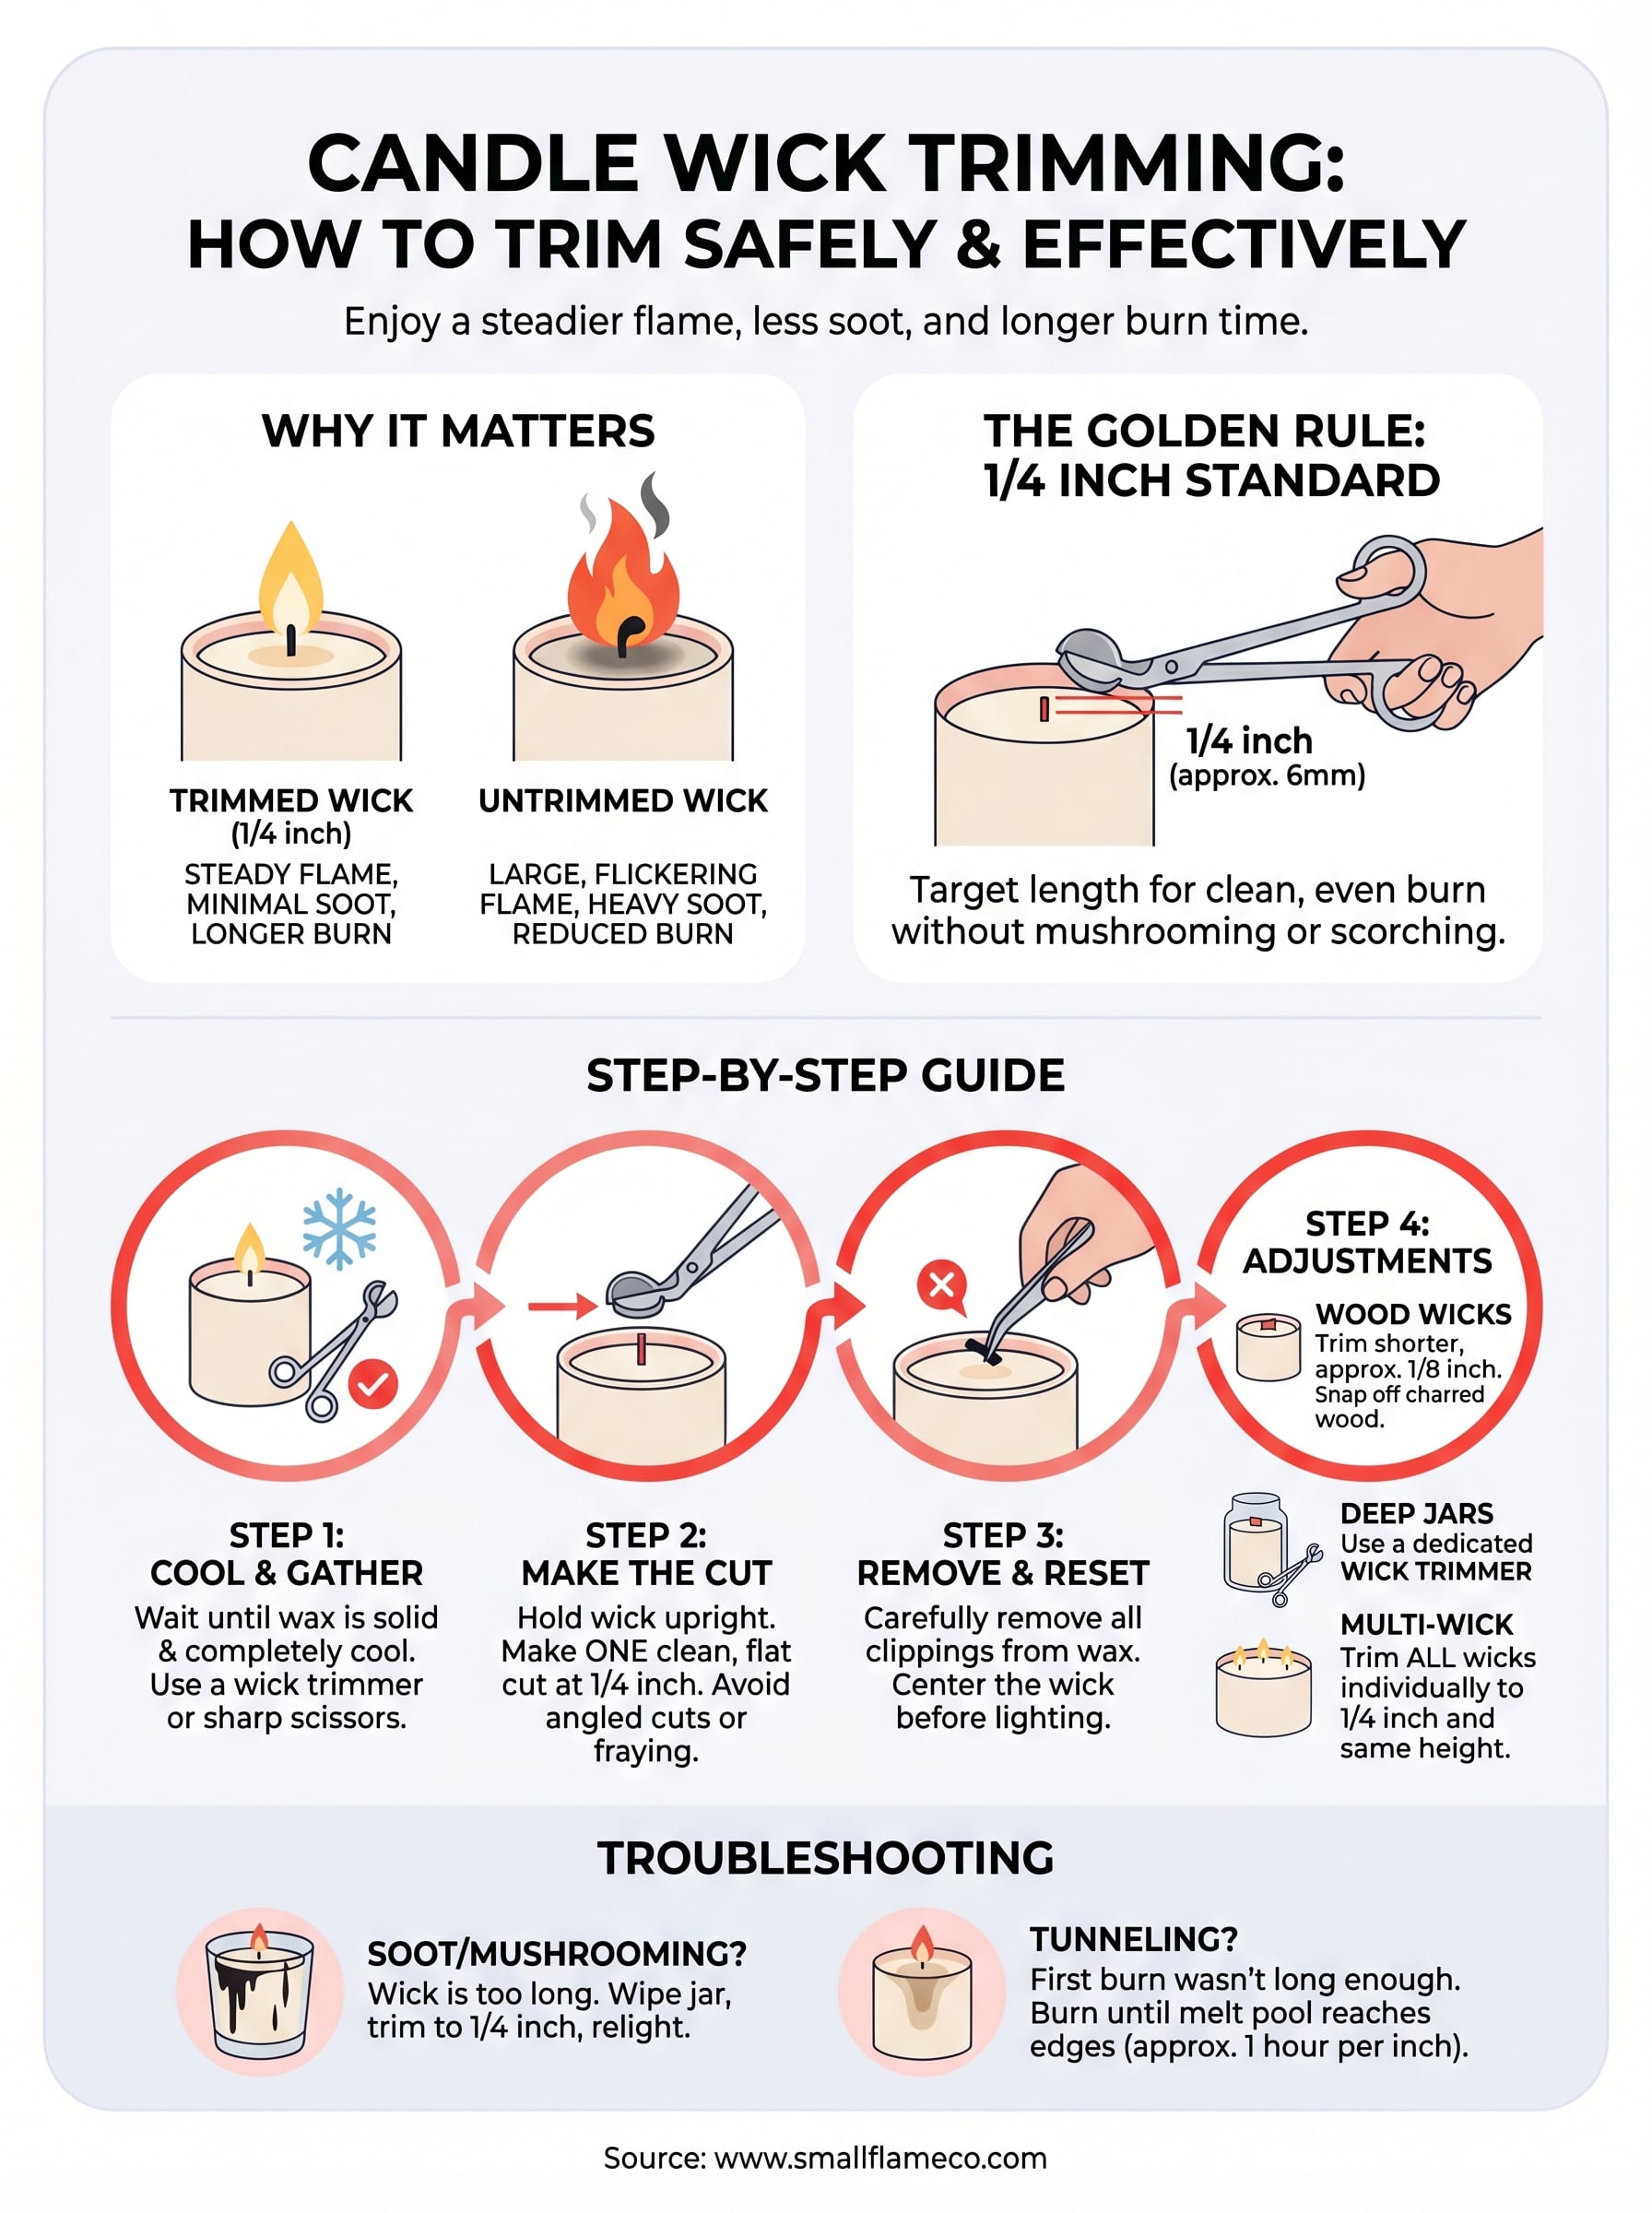
The 1/4 inch standard and why it works
One-quarter inch, roughly 6 mm, is the target length for almost every cotton wick candle available. At that length, the flame draws just enough wax to sustain itself without going into overdrive. You get a clean, even melt pool that reaches the jar's edges without scorching the glass or releasing excess smoke. Trimming shorter than 1/4 inch can starve the flame and snuff it out early, while leaving it longer brings back the mushrooming problem you were trying to avoid.
Step 1. Cool the wax and gather tools
Before you do anything else, make sure your candle is completely cool and the wax has fully solidified. Trimming a wick while the wax is still liquid is messy and inaccurate; you risk dropping clippings into the pool and setting yourself up for a poor next burn. Give your candle at least two hours after the last burn before you attempt any trimming.
Never trim a wick while the wax is still warm or soft, because the clippings sink in and can clog the wick on the next light.
The right tools for the job
Knowing how to trim a candle wick is much easier when you have the correct tool in hand. A dedicated wick trimmer is the best option because its angled blade lets you reach deep into a jar without touching the wax surface. If you don't own one yet, sharp scissors work fine for most candles, especially wider pillar styles or any candle with easy wick access.
Here is a quick comparison to help you choose:
| Tool | Best for | Drawback |
|---|---|---|
| Wick trimmer | Deep jar candles | Extra cost upfront |
| Sharp scissors | Pillar and wide candles | Hard to reach deep jars |
| Nail clippers | Travel or mini candles | Imprecise on thicker wicks |
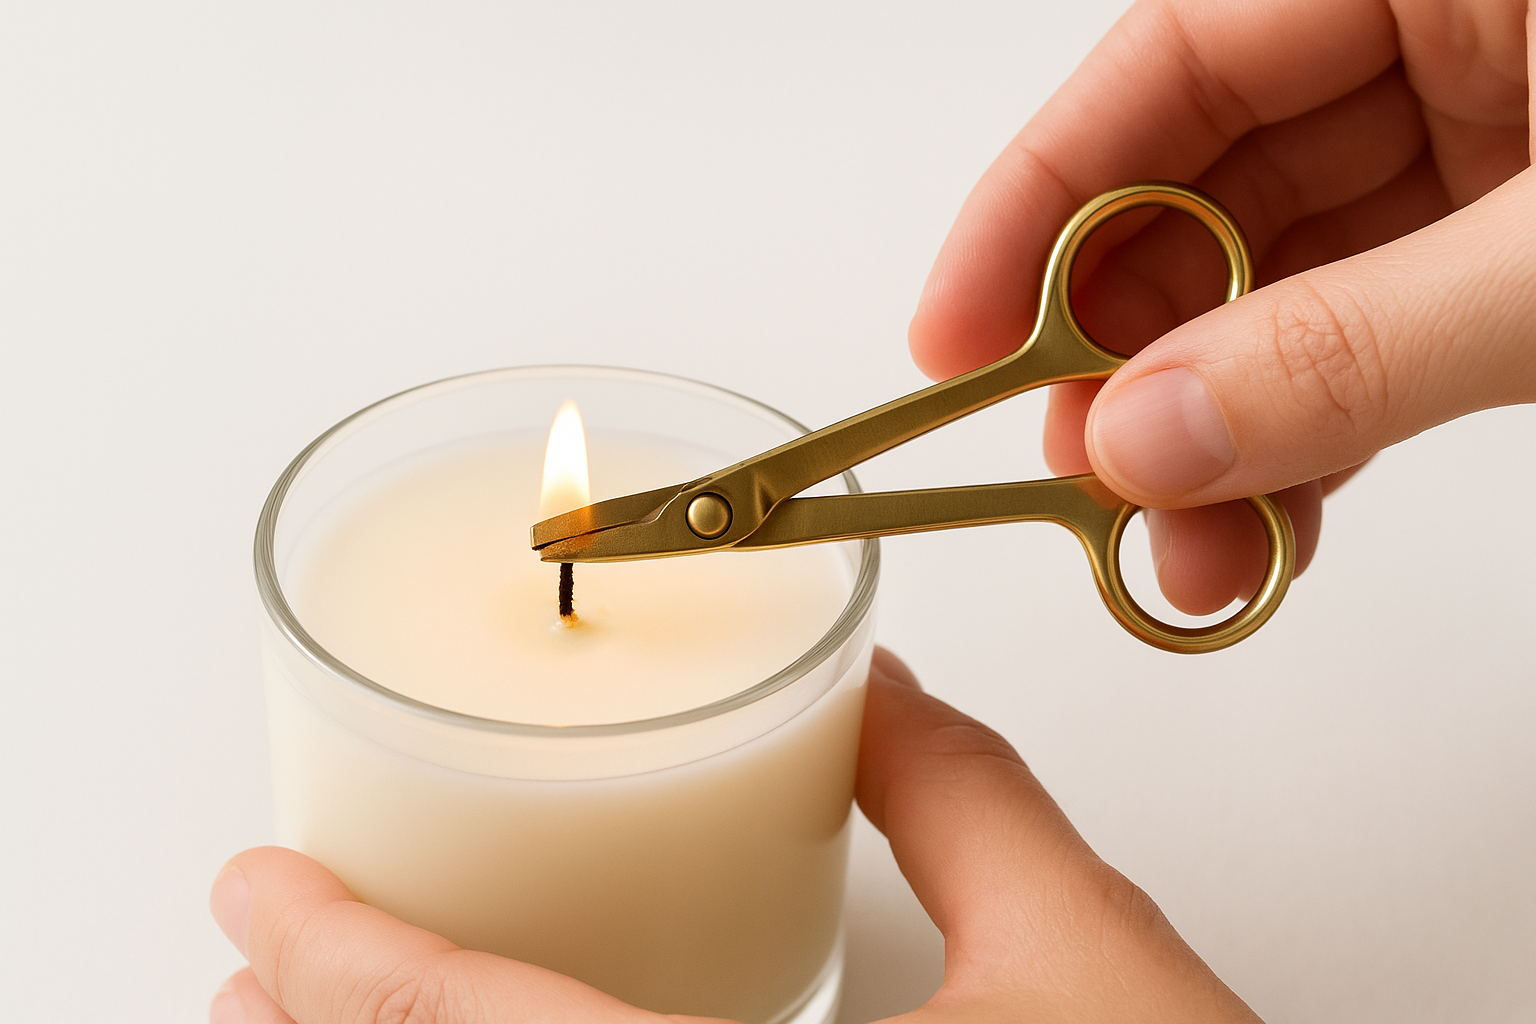
Step 2. Trim the wick cleanly to 1/4 inch
With your tools ready and the wax solid, you can now make the actual cut. Position your wick trimmer or scissors at a right angle to the wick, not at a steep diagonal, so the cut comes out flat and even. A clean, flat cut gives the flame a uniform surface to ignite from, which keeps it steady from the first second you light it.
How to make the cut
Learning how to trim a candle wick comes down to a simple sequence you can repeat in under ten seconds. Hold the wick upright between two fingers to keep it stable, then place your blade at the 1/4 inch mark and squeeze in one confident motion. Avoid sawing back and forth because that frays the wick tip and leads to uneven burning on the next light.
A single clean cut matters more than the specific tool you use. Frayed tips burn hotter and mushroom faster than a flat-cut wick does.
Follow these steps every time you trim:
- Pinch the wick gently to hold it straight.
- Place the blade at 1/4 inch from the wax surface.
- Make one firm, clean cut in a single motion.
- Inspect the tip to confirm it is flat, not angled.
- Check that no loose fibers hang off the end before you light.
Step 3. Remove trimmings and reset the wick
After the cut, you have a small piece of wick sitting on the wax surface or resting inside the jar. Leaving that clipping in the wax is a common mistake candle owners make, because it acts as a second wick the moment you light the candle. That extra fuel source creates a hot spot that can crack glass or scorch the wax unevenly.
Getting the clipping out
Use your fingers, a paper towel, or tweezers to lift the trimmed piece out of the jar completely. Avoid pushing it into the wax if any residual warmth remains near the surface, because it will embed and create a clog on the next burn. Drop the clipping in the trash rather than leaving it nearby where it could fall back in.
Always remove every piece of wick debris before you light, because even a small fragment can flare and create a safety hazard.
Centering the wick before lighting
Once the trimming is out, check that the wick stands upright and sits centered in the wax pool. A wick that leans toward one side will burn unevenly and melt wax faster on that side, which leads to tunneling. Knowing how to trim a candle wick correctly includes this final reset step, because a centered wick gives you a clean, even burn from the first second the flame catches.
Step 4. Adjust for wood, multi-wick, and jars
Not every candle follows the standard cotton wick rules. Wood wicks, multi-wick designs, and deep jar candles each need a small adjustment to your approach, and knowing how to trim a candle wick for each type keeps every burn safe and consistent.
Wood wicks
Wood wicks need a shorter trim than cotton, landing closer to 1/8 inch rather than the standard 1/4 inch. Snap off any charred wood from the previous burn by hand, then cut straight across with scissors to get a clean, flat edge.
If your wood wick flame dies out quickly after lighting, the trim is probably too short; nudge it to 3/16 inch and test again.
Multi-wick candles
Each wick in a multi-wick candle needs its own individual trim before every burn. Cut all wicks to 1/4 inch and confirm they all sit at the same height before lighting. Here is what to check on every multi-wick candle:
- All wicks trimmed to equal height
- No charred tips remaining on any wick
- All clippings removed from the wax surface
Deep jar candles
Tall, narrow jars are where a wick trimmer earns its place in your routine. Standard scissors cannot reach the wick cleanly, which leaves you with an imprecise cut and stray clippings on the wax surface. A trimmer with an angled blade solves both problems cleanly.
Step 5. Fix issues like soot, tunneling, and no flame
Even when you know how to trim a candle wick the right way, problems can surface if you missed a trim or the last burn ran too long. The good news is that most issues point back to the wick, so a targeted adjustment gets you back on track fast.
Soot and mushrooming
Black streaks on the glass or a carbon ball at the wick tip both mean the wick ran too long. Wipe the jar with a damp cloth, trim back to 1/4 inch, and the problem typically stops on the next burn.
If mushrooming keeps coming back after trimming, the wick may be sized wrong for your jar's diameter.
Tunneling
Tunneling forms when the wax center melts down and walls build up along the jar edges. The fix is a longer first burn, at least one hour per inch of jar diameter:
- Every burn: trim the wick to 1/4 inch before lighting
- First burn: let the melt pool reach all edges before extinguishing
Flame won't stay lit
A flame that dies within seconds usually means the wick is too short or clogged with debris. Clear any wax fragments from the surface and re-trim to exactly 1/4 inch before you relight.
Drafts are another common culprit. Even minor air movement from a fan or open window can overwhelm a short wick, so move the candle away from any airflow and try again.
Quick recap and next steps
Trimming your wick is a small habit with a measurable payoff. Here is a fast reminder of the full process: let the wax cool completely after each burn, cut to 1/4 inch using a wick trimmer or sharp scissors, remove the clipping from the jar, and check that the wick stands centered before you light. For wood wicks, trim closer to 1/8 inch, and cut every wick individually on multi-wick candles. That covers how to trim a candle wick from start to finish, for every candle style and situation you will run into.
Your trimming routine only gets better results when the candle itself is built to burn clean. Small Flame Candle Co. hand-pours every candle with lead-free cotton wicks and a premium coconut-soy wax blend designed for an even, soot-free burn from the first light to the last. Browse our hand-poured coconut wax candles and put everything you just learned to work on your very next burn.