

Martha Stewart Beeswax Candles: How To Make Them At Home
Martha Stewart has long been a go-to source for DIY home projects, and her approach to candle making is no exception. Her tutorials on Martha Stewart beeswax candles have inspired thousands of crafters to try their hand at pouring candles from one of nature's oldest and most beautiful waxes. Beeswax burns cleaner than paraffin, produces a subtle honey-like aroma on its own, and has a naturally warm golden color that looks great without any added dye. If you've been curious about making your own, her methods are a solid starting point.
The process is more straightforward than most people expect. You don't need a workshop full of equipment or years of experience, just a few key materials, some patience, and a willingness to get your hands a little waxy. That said, there are specific techniques and details that make the difference between a candle that burns beautifully and one that tunnels, smokes, or falls apart. Understanding those details before you start saves you time, money, and frustration.
At Small Flame Candle Company, we hand-pour every candle we sell, so we know firsthand what goes into making one that actually performs well. We built this guide to walk you through Martha Stewart's beeswax candle method step by step, adding practical tips from our own experience behind the pour pot. Whether you're making candles as gifts, for your own home, or just to see if you enjoy the craft, you'll have everything you need below to get it right on your first try.
What to know before you start with beeswax
Beeswax is a pleasure to work with, but it has a few quirks that trip up first-time candle makers. Before you follow any martha stewart beeswax candles tutorial or start melting, knowing how this wax actually behaves will help you set realistic expectations and avoid wasting materials on a batch that doesn't perform.
Beeswax has a high melt point and shrinks as it cools
Pure beeswax melts at around 145°F to 147°F, which is significantly higher than soy or paraffin wax. You'll need a reliable thermometer and a double boiler setup to heat it safely and evenly. Because of its density, beeswax contracts noticeably as it cools, which can leave a small sinkhole or dip in the center of poured candles. Pouring a thin top-off layer after the initial pour sets will close that gap before it becomes a permanent flaw.
Beeswax shrinks roughly 10% in volume as it solidifies, so always keep a small amount of melted wax ready for a second pour.
Beeswax is naturally fragrant and firm
One reason so many crafters love beeswax is that it carries a light, natural honey scent without any added fragrance oil. If you do plan to add a fragrance, keep in mind that beeswax doesn't hold scent as readily as soy wax. A safe fragrance load is typically 3% to 6% by weight. Beyond scent, beeswax produces harder, longer-burning candles than most other waxes, making it a strong choice for tapers, pillars, and rolled sheet candles.
Rolled beeswax sheet candles need no melting at all. You simply warm the sheet slightly with a heat gun or hair dryer to make it pliable, then roll it firmly around a wick. This approach is beginner-friendly and a core part of the Martha Stewart method.
Step 1. Gather supplies and prep your workspace
Getting organized before you melt anything saves cleanup time and prevents costly mistakes. Most failures with martha stewart beeswax candles come down to poor prep, not the technique itself. Having every tool and material within reach before you turn on the heat is the single most important habit you can build as a candle maker.
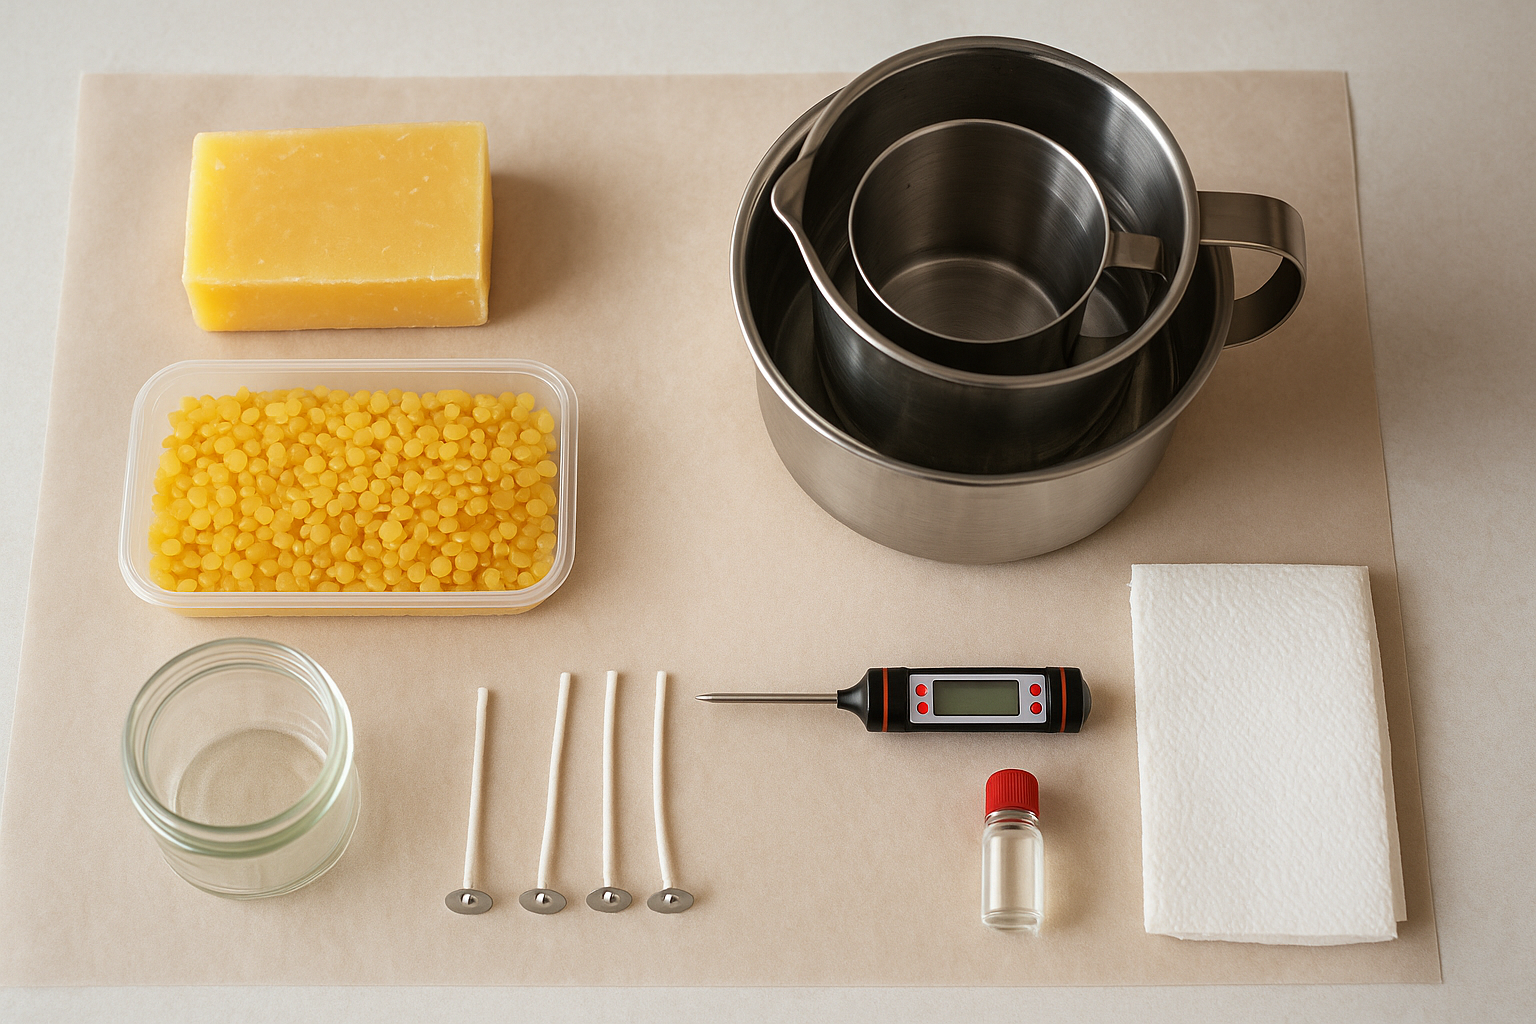
Lay out every tool and material before you melt your first ounce of wax. Beeswax hardens fast and doesn't wait for you to search for a thermometer.
What you need
Gather these supplies before you start:
- Beeswax: 1 pound of pellets or a block, pure and unblended
- Cotton wicks: Pre-tabbed, sized to your container or mold diameter
- Double boiler: A heat-safe pitcher inside a pot of simmering water
- Thermometer: Clip-on or digital, accurate within 5°F
- Mold or jar: A heat-safe glass jar or silicone mold for poured candles
- Workspace cover: Old newspaper or a silicone mat to protect your surface
How to prep your workspace
Clear a flat, heat-safe surface and cover it completely before you do anything else. Beeswax drips fast and sticks to almost everything, so protecting your work area upfront will save you scraping time later. Keep paper towels and rubbing alcohol nearby to wipe tools clean while the wax is still warm.
Step 2. Make a poured beeswax candle in a jar or mold
Poured candles follow a simple sequence: melt, pour, set, top off. Following the correct temperatures throughout each stage is what separates a smooth, even burn from a candle that tunnels or pools unevenly. The martha stewart beeswax candles method prioritizes slow, controlled heat at every step.
Melt and pour
Heat your beeswax in the double boiler until it fully melts, watching for a target pour temperature between 150°F and 155°F. While the wax heats, center your pre-tabbed wick in the jar or mold and hold it in place with a wick bar, pencil, or chopstick laid across the top. Pour the wax slowly and steadily, stopping about half an inch from the rim.
Pour beeswax at 150°F to 155°F. Pouring too cool causes surface cracks; pouring too hot worsens shrinkage.
Top off and trim
As the wax cools over the next two to three hours, a small dip will form around the wick. Reheat your remaining wax and pour a thin second layer to level the surface. Once fully set, trim the wick to one-quarter inch before the first burn to prevent smoking and sooting.
Step 3. Make a rolled beeswax candle from sheets
Rolled candles are the most beginner-friendly part of the martha stewart beeswax candles method, and they require no melting, no double boiler, and no thermometer. The result is a classic taper-style candle that burns cleanly and looks polished with minimal effort on your part.
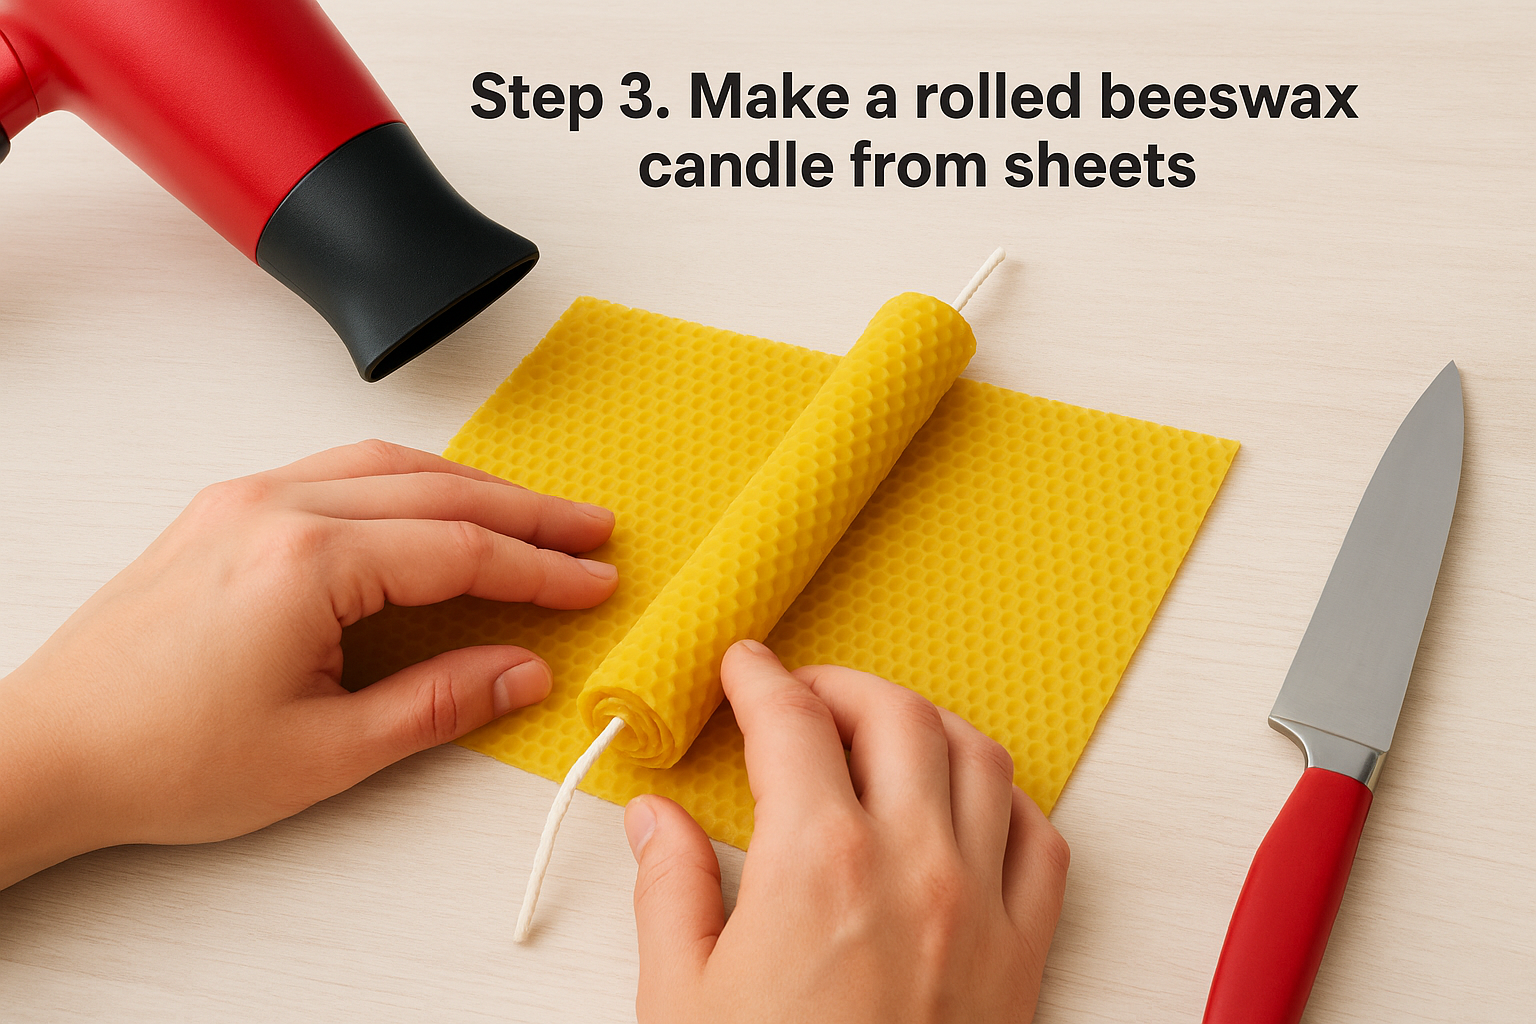
Warm, Roll, and Seal
Start by laying your beeswax sheet flat on your work surface. Use a hair dryer or heat gun on low to warm the sheet for 10 to 15 seconds until it feels soft and pliable but not sticky. Place your pre-cut cotton wick along one short edge, leaving about a half-inch of wick extending beyond the top of the sheet.
Wax that's too cold will crack as you roll; wax that's too warm will stick to your hands and distort the shape.
Roll the sheet firmly and evenly around the wick, pressing gently as you go to keep the layers tight and aligned. Once you reach the far edge, press it firmly against the candle body to seal it completely. Trim the base flat with a sharp knife so the candle stands level without rocking, and your rolled candle is finished and ready to burn.
Step 4. Cool, finish, and burn-test your candle
The last step in the martha stewart beeswax candles process is often rushed, and that's where quality slips. Cooling and testing your candle properly tells you whether your wick size, pour technique, and fragrance load actually worked together before you make another batch.
Let It Cool Completely
Set your candle on a flat, level surface away from drafts, air vents, and direct sunlight. Beeswax needs at least 24 hours to cure before you attempt any finishing or testing. Moving it too early can leave uneven surfaces that are difficult to correct after the wax fully sets.
Never place a freshly poured beeswax candle in the refrigerator to speed cooling; rapid temperature changes cause surface cracking and structural stress in the wax.
Run a Burn Test
Trim the wick to one-quarter inch, then light the candle and let it burn for one full hour. Watch for a clean, steady flame with a melt pool that reaches the jar's edge. A flame that mushrooms or produces heavy soot means your wick is too large for the vessel.
Check for these signs during the test:
- Flame height: Steady, around 1 inch tall
- Melt pool: Reaches the container edge within 60 minutes
- Soot: Minimal to none on the jar rim or surrounding surface
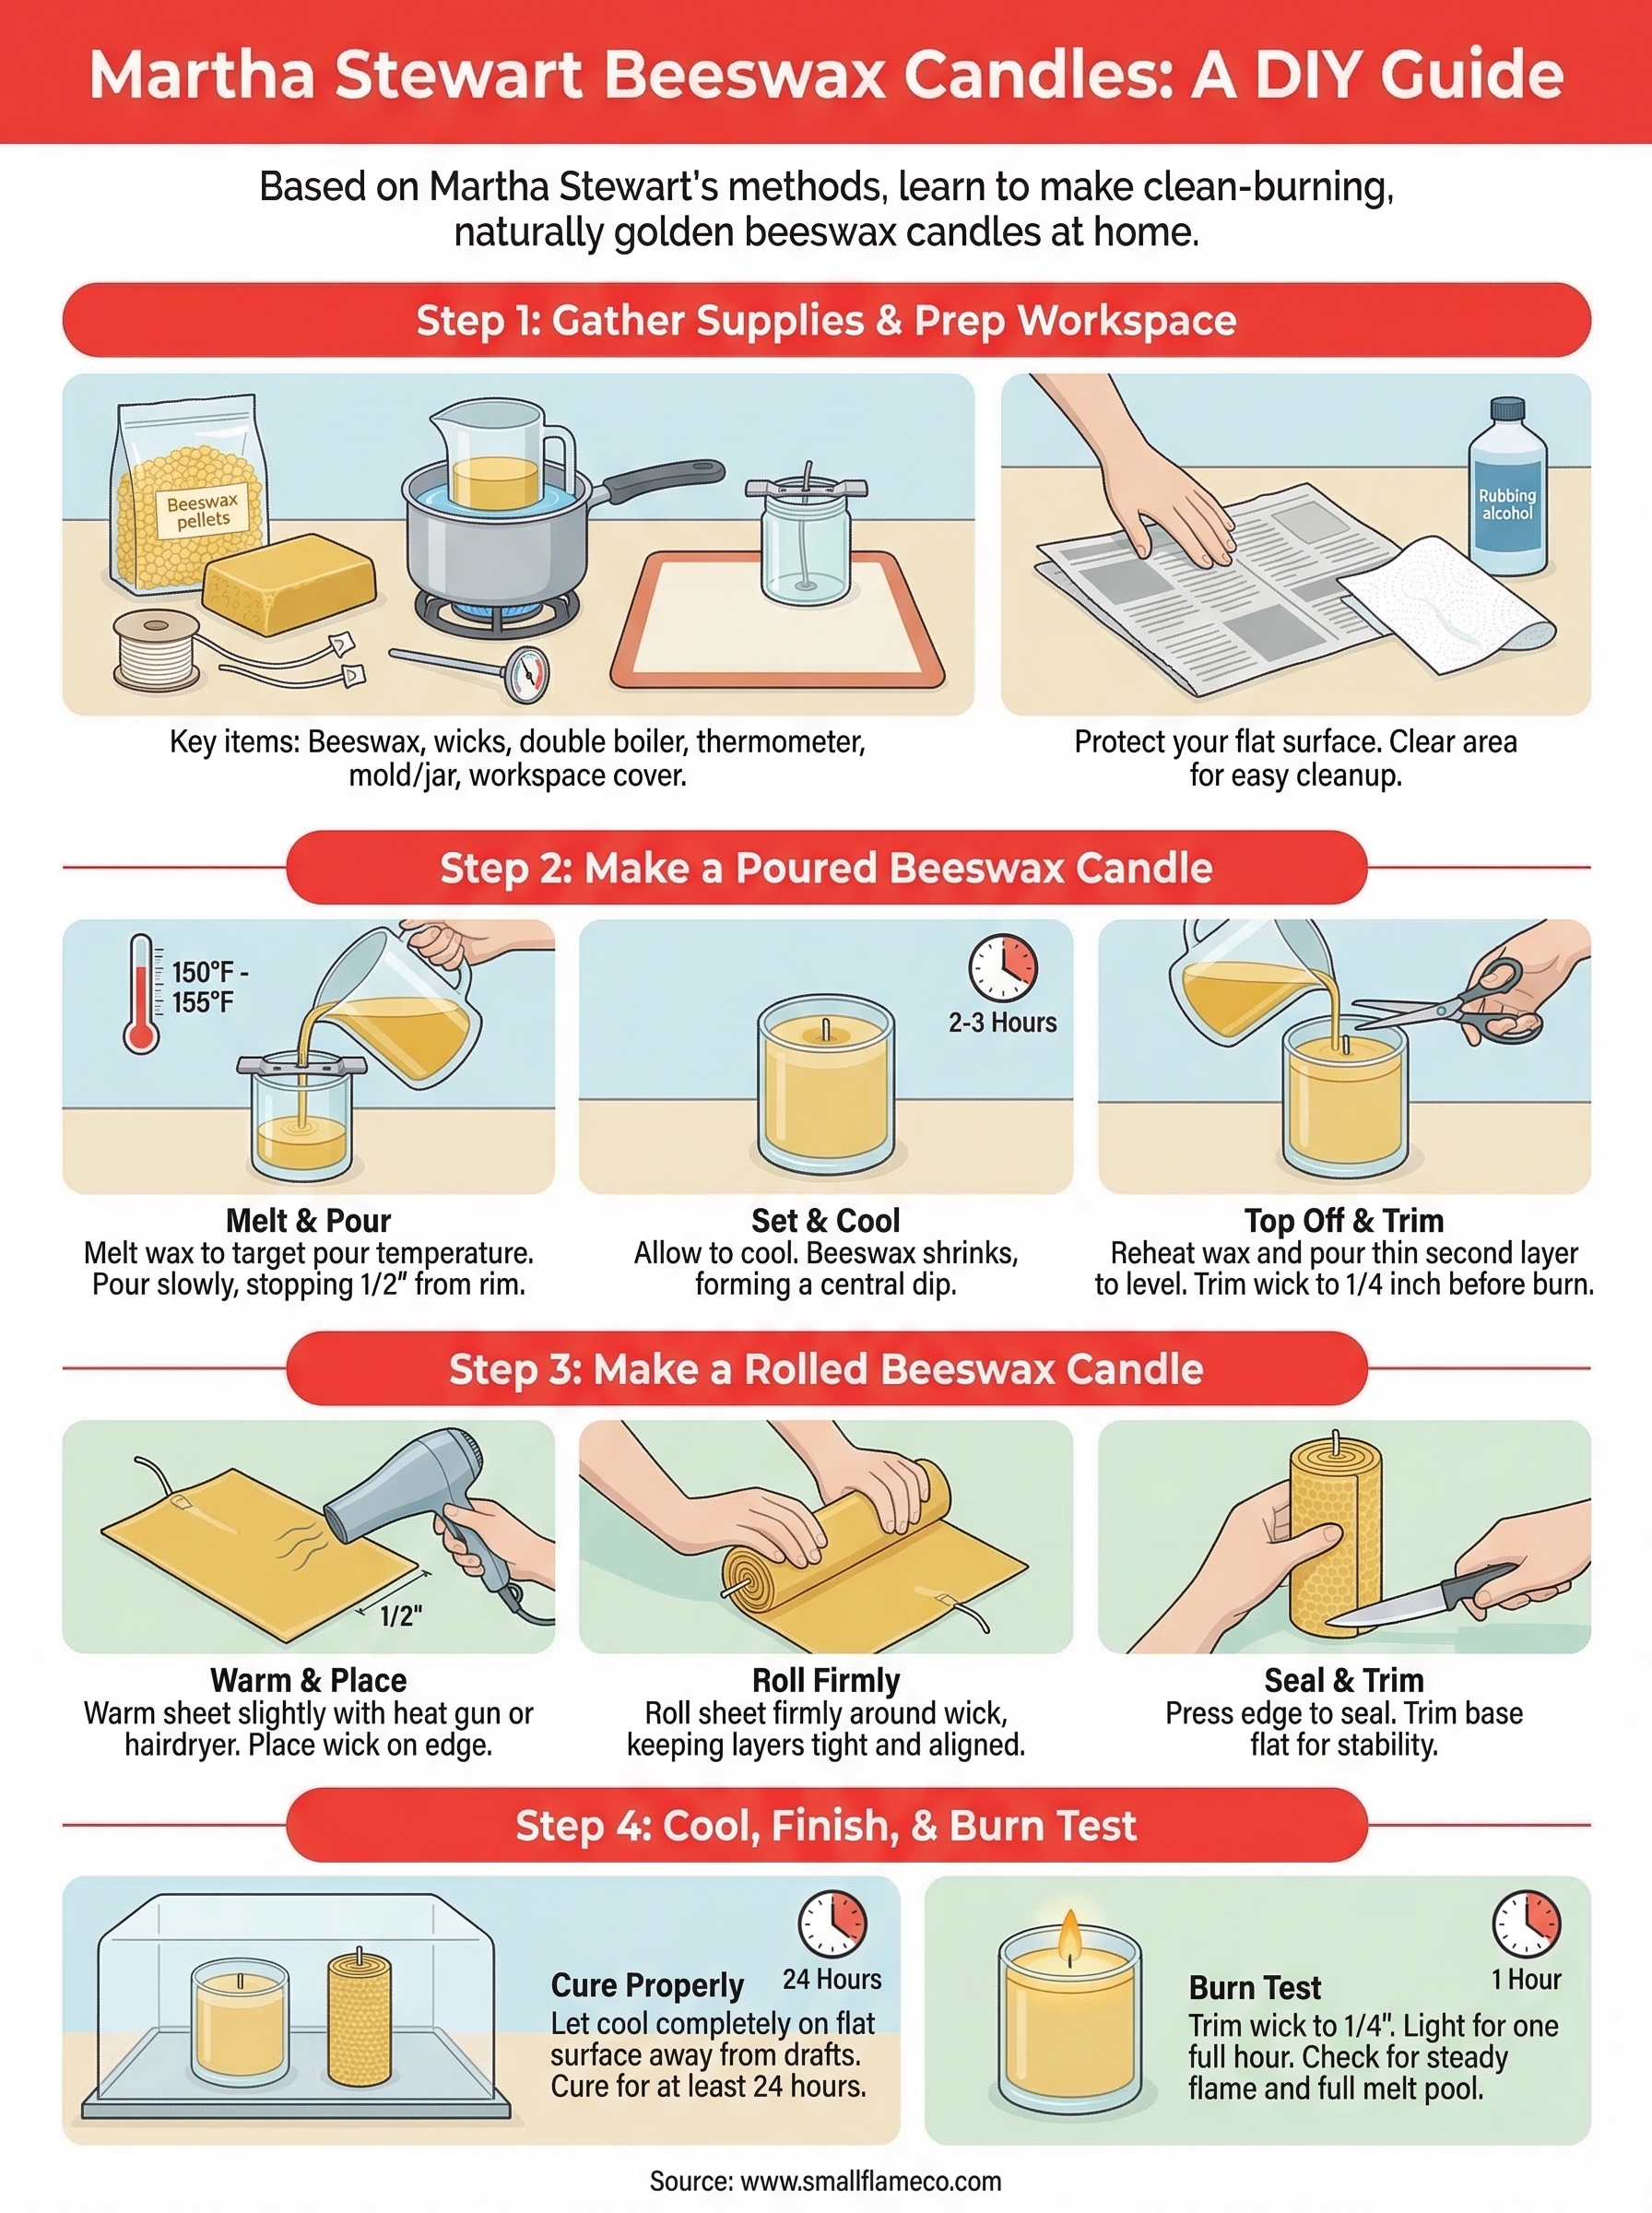
Ready to Light Your Candle
You now have everything you need to follow the martha stewart beeswax candles method from start to finish. Whether you poured a jar candle, rolled a sheet taper, or tried both, the skills you practiced here carry over to every batch you make after this one. Each candle you produce will burn better as you dial in your wick sizing, pour temperatures, and cooling routine.
Beeswax is a rewarding wax to work with, but it does take practice to get consistent results. Keep notes on each batch, including pour temperature, wick size, and burn test results, so you can repeat what works and fix what doesn't. Small adjustments compound quickly into noticeably better candles.
If you want to explore more hand-poured options while you build your candle-making skills, browse the Small Flame Candle Co. coconut wax candle collection for clean-burning, artisan-crafted candles made with premium ingredients.