
Quick Fixes & Prevention: How To Fix Candle Tunneling Today
You lit your favorite candle, walked away for an hour, and came back to find a narrow tunnel burning straight down the center, wax clinging stubbornly to the sides of the jar. It's frustrating, especially when that candle cost you good money. Knowing how to fix candle tunneling is one of those simple skills that saves candles (and cash), and the good news is you probably already have everything you need at home to fix it right now.
At Small Flame Candle Company, we hand-pour every candle we sell, so we spend a lot of time thinking about how wax behaves, and what happens when a burn goes sideways. We've tested the common fixes, seen what actually works, and learned which habits prevent tunneling before it starts. This guide walks you through the most reliable methods to rescue a tunneled candle and keep it from happening again.
What candle tunneling is and why it happens
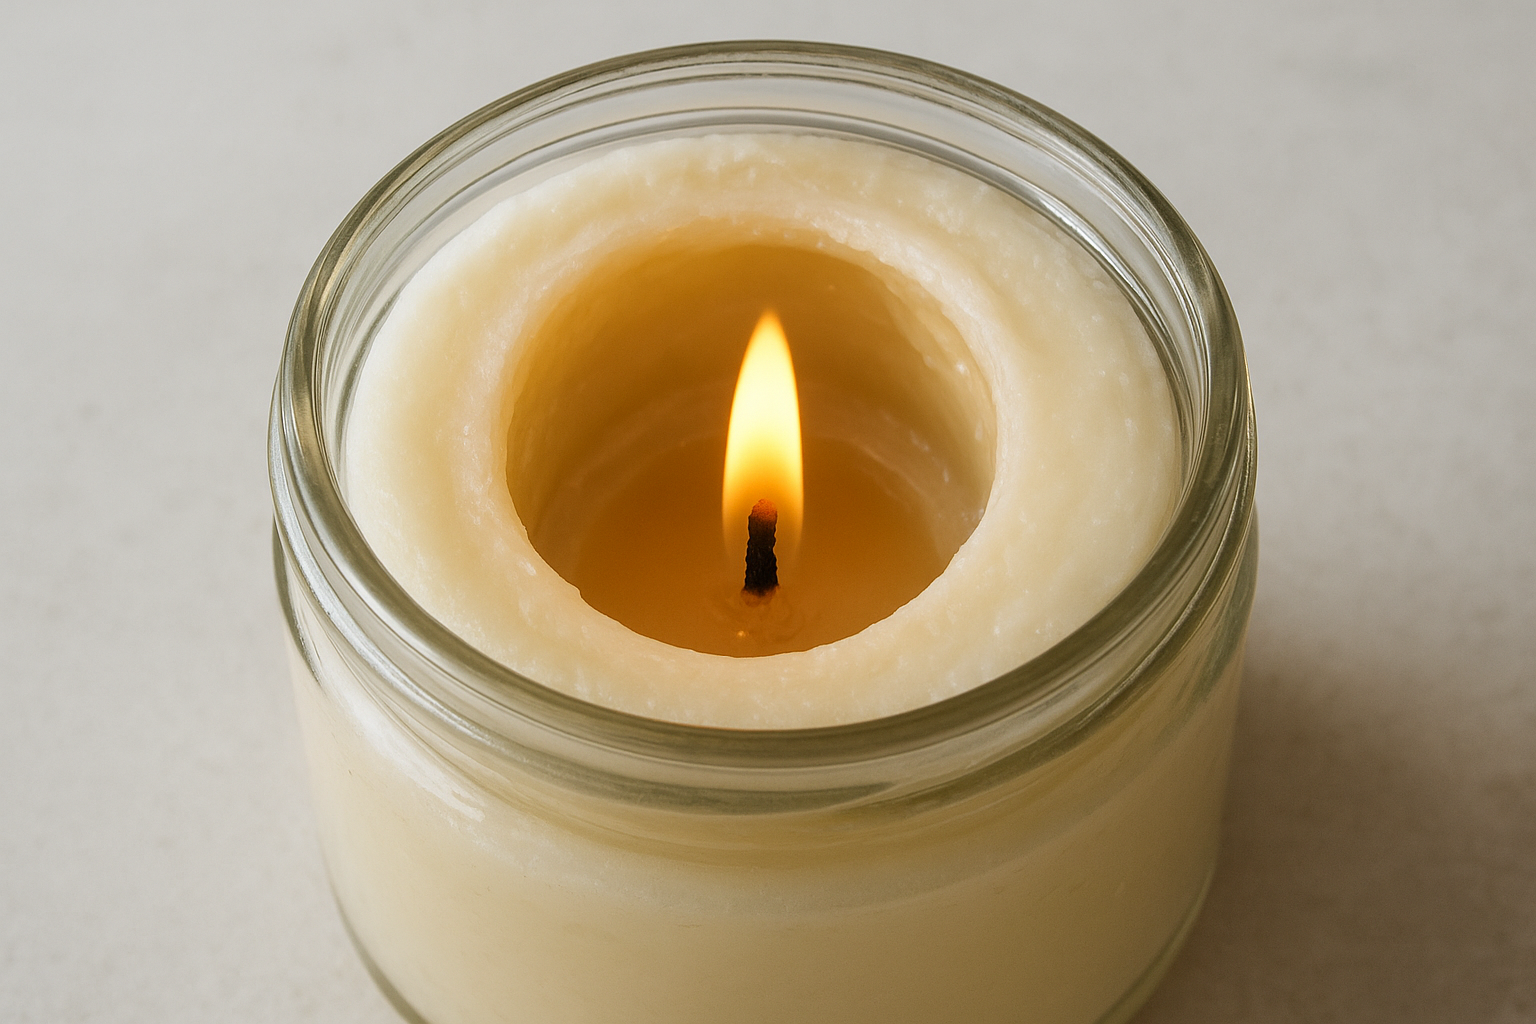
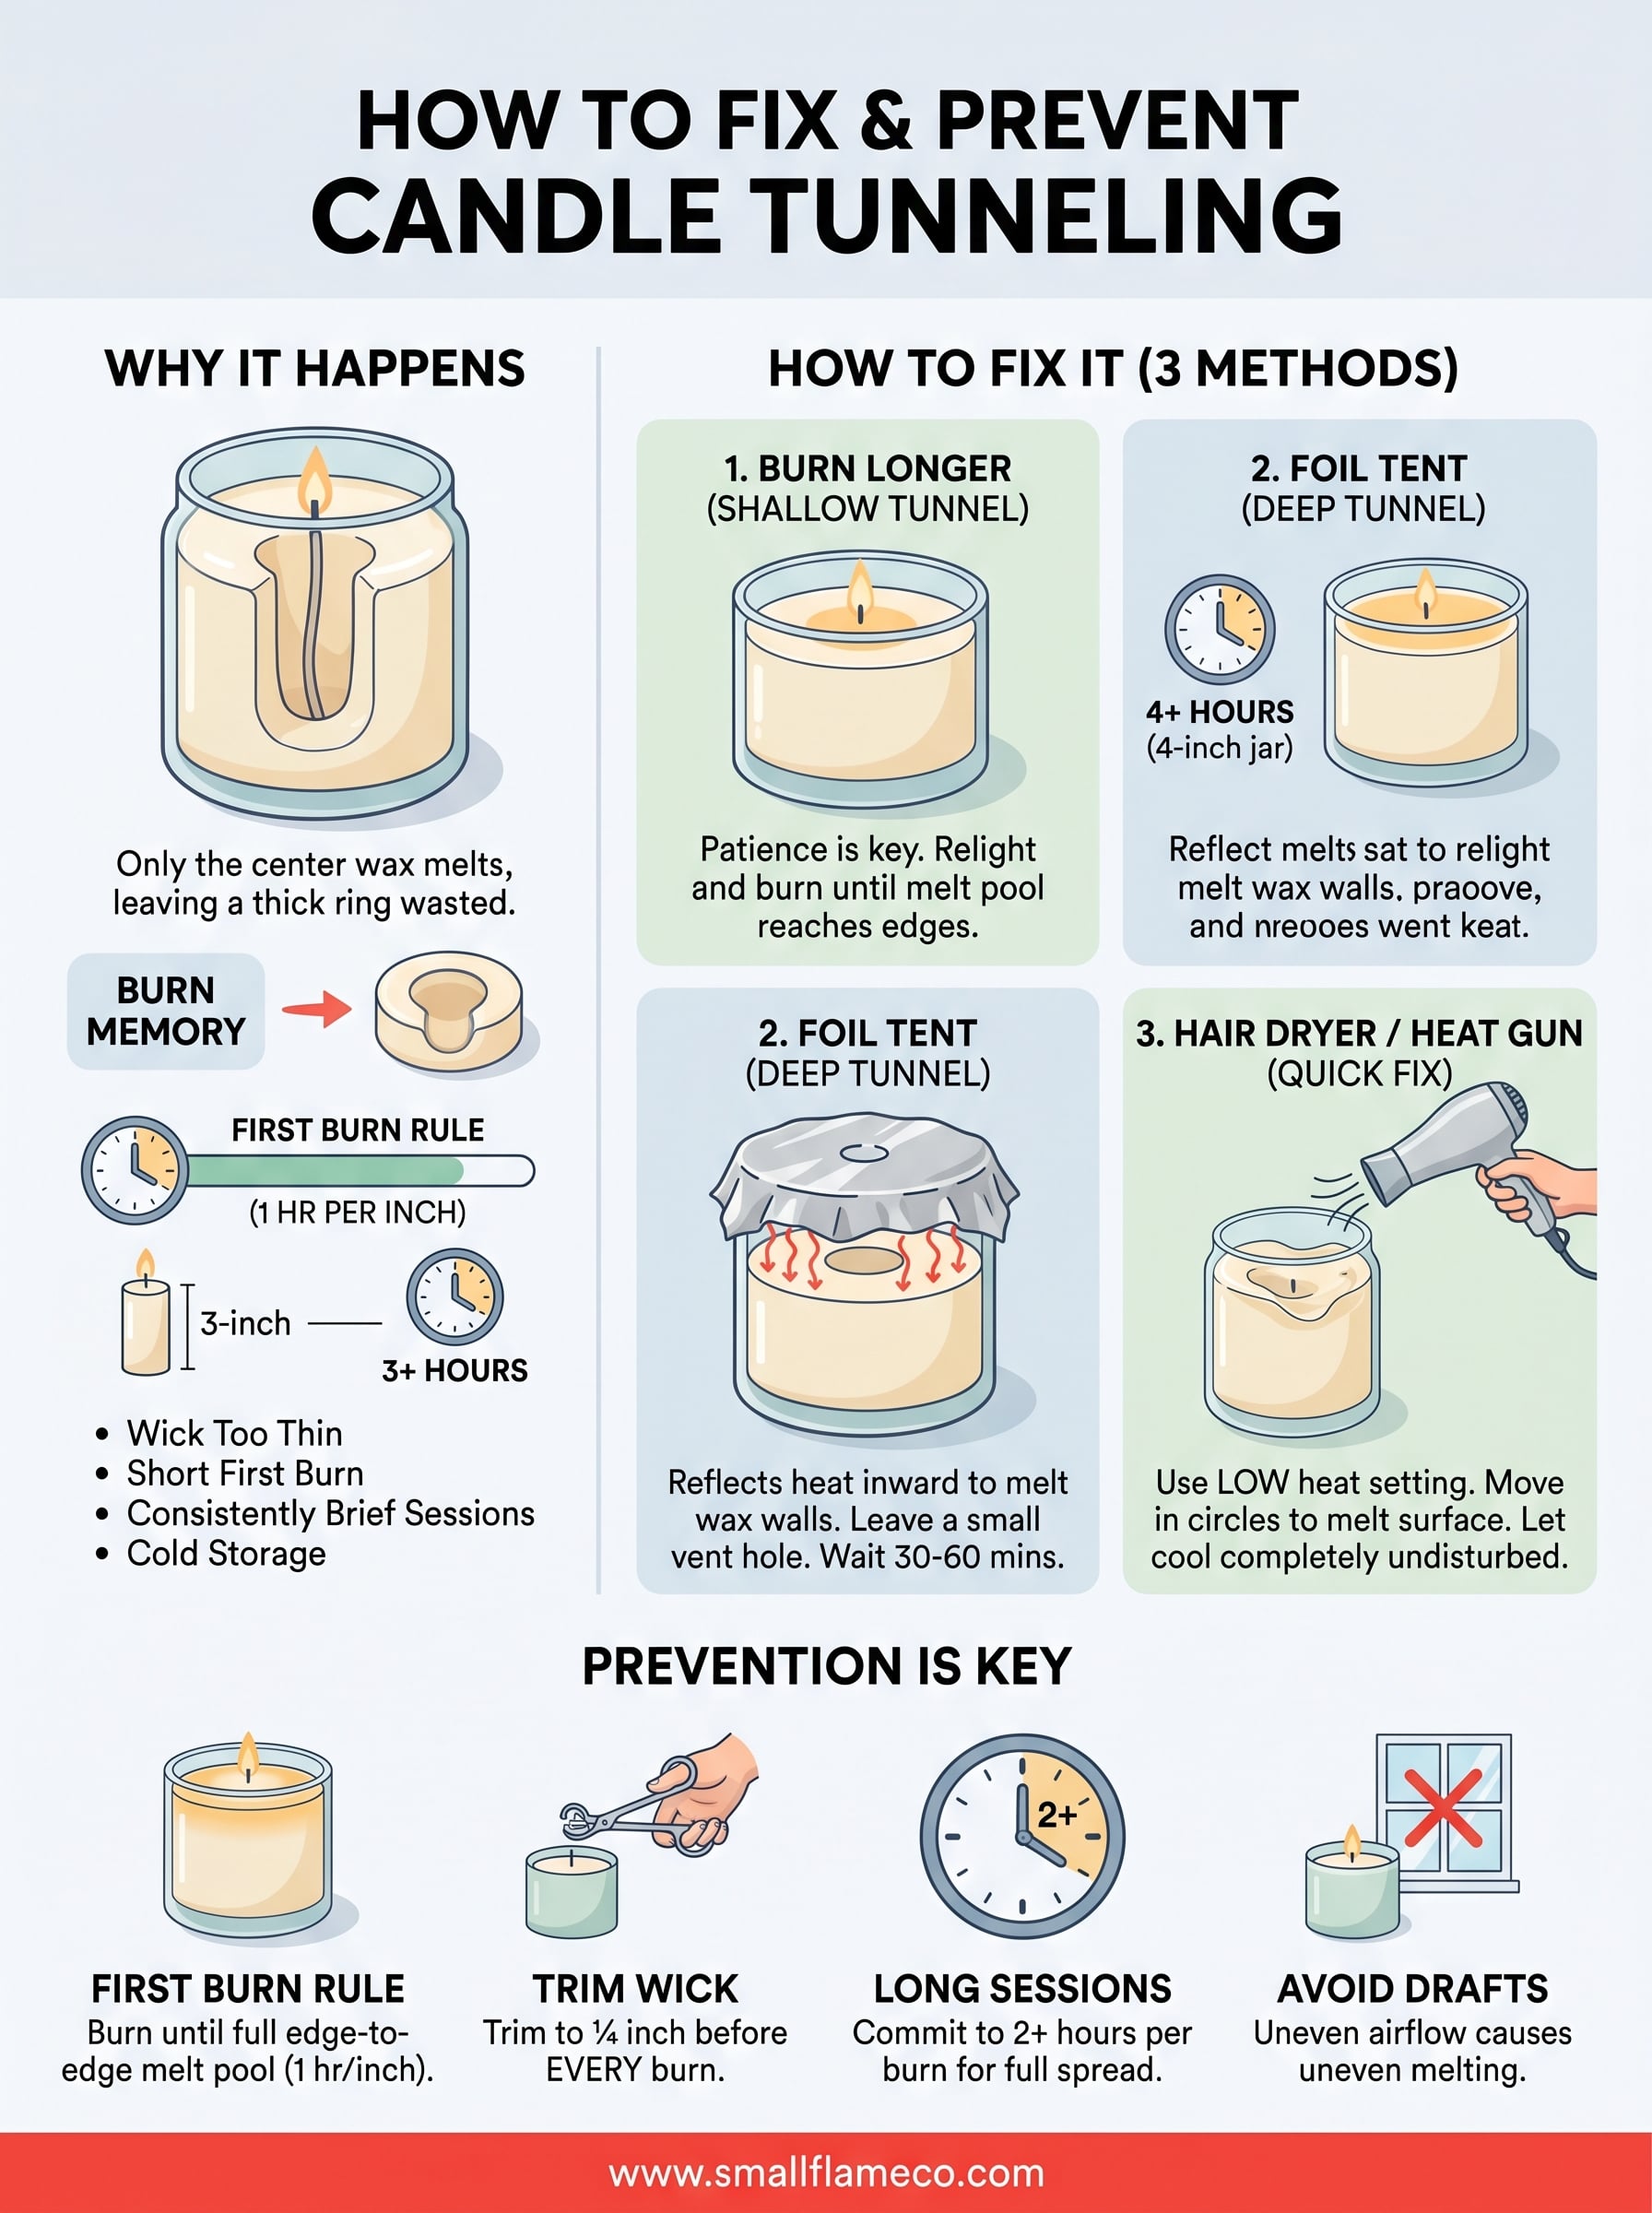
Candle tunneling happens when only the wax directly around the wick melts instead of the entire surface layer. You end up with a narrow channel burning straight down through the center while a thick ring of unmelted wax clings to the inside of the jar. That trapped wax goes to waste: once the tunnel grows deep enough, the flame smothers itself in its own melt pool and goes out, leaving behind a candle you can no longer use.
Why the first burn sets the pattern
The first time you light a candle is the most critical burn of its entire life. Wax holds something called burn memory: the melt pool from your very first burn creates a template that every future burn will follow. If you blow out the candle before that melt pool reaches the edge of the jar, the wax hardens into a raised ring, and every subsequent burn simply repeats that same narrow path deeper into the center.
Burn a new candle for roughly one hour per inch of its diameter, so a three-inch jar candle needs at least three hours on the very first burn to establish a full melt pool.
What makes some candles more prone to tunneling
Not every candle tunnels for the same reason. Wick size relative to jar diameter is the primary culprit: a wick that is too thin for the vessel cannot generate enough heat to pull wax all the way to the sides. Wax type also plays a role, since soy wax melts at a lower temperature than paraffin and is slightly more forgiving, but an undersized wick will still cause problems regardless of the wax blend. Recognizing these root causes is the first step toward knowing how to fix candle tunneling, because some problems start long before you ever strike a match.
Common causes of tunneling:
- Wick is too thin for the jar's diameter
- First burn was cut short before the melt pool reached the edges
- Burn sessions are consistently too brief
- Candle was stored in cold temperatures before being lit
Fix 1: Burn it long enough to reset the melt pool
If the tunnel in your candle is shallow (less than half an inch deep), you may be able to fix it without any tools at all. Simply re-lighting and burning the candle long enough for the melt pool to reach the jar's outer edge can gradually reset the wax surface over one or two sessions. This is the gentlest approach to how to fix candle tunneling, and it works best when you catch the problem early.
Set a timer and let the melt pool spread
Patience is the entire strategy here. Light your candle and let it burn until the liquid wax extends fully to the glass on all sides. For most standard jar candles, that means burning for at least one hour per inch of the jar's diameter, so a four-inch candle needs four full hours before you blow it out. Cutting that burn short restarts the same cycle.
Never leave a burning candle unattended, and always follow the safety guidelines printed on the label by the manufacturer.
Once the melt pool reaches the edges, the wax cools and resolidifies into a flat, even surface. Repeat this full-length burn on the next session, and the tunnel should shrink noticeably within two or three uses.
Fix 2: Use the foil tent method for deep tunnels
When a tunnel has gone deeper than half an inch, simply burning longer probably will not level out the wax on its own. The foil tent method pushes heat back down into those stubborn wax walls, melting them from the inside out. This is one of the most effective techniques for how to fix candle tunneling that has already progressed well into the jar.
What you need and how to do it
You only need a single sheet of aluminum foil to pull this off. Tear off a piece large enough to drape over the top of the jar, then fold it loosely over the candle's opening, leaving a small hole in the center (roughly one inch wide) directly above the wick. Light the candle through that hole and let the foil reflect heat back toward the unmelted wax walls. After 30 to 60 minutes, the trapped wax will soften and collapse inward toward the flame.
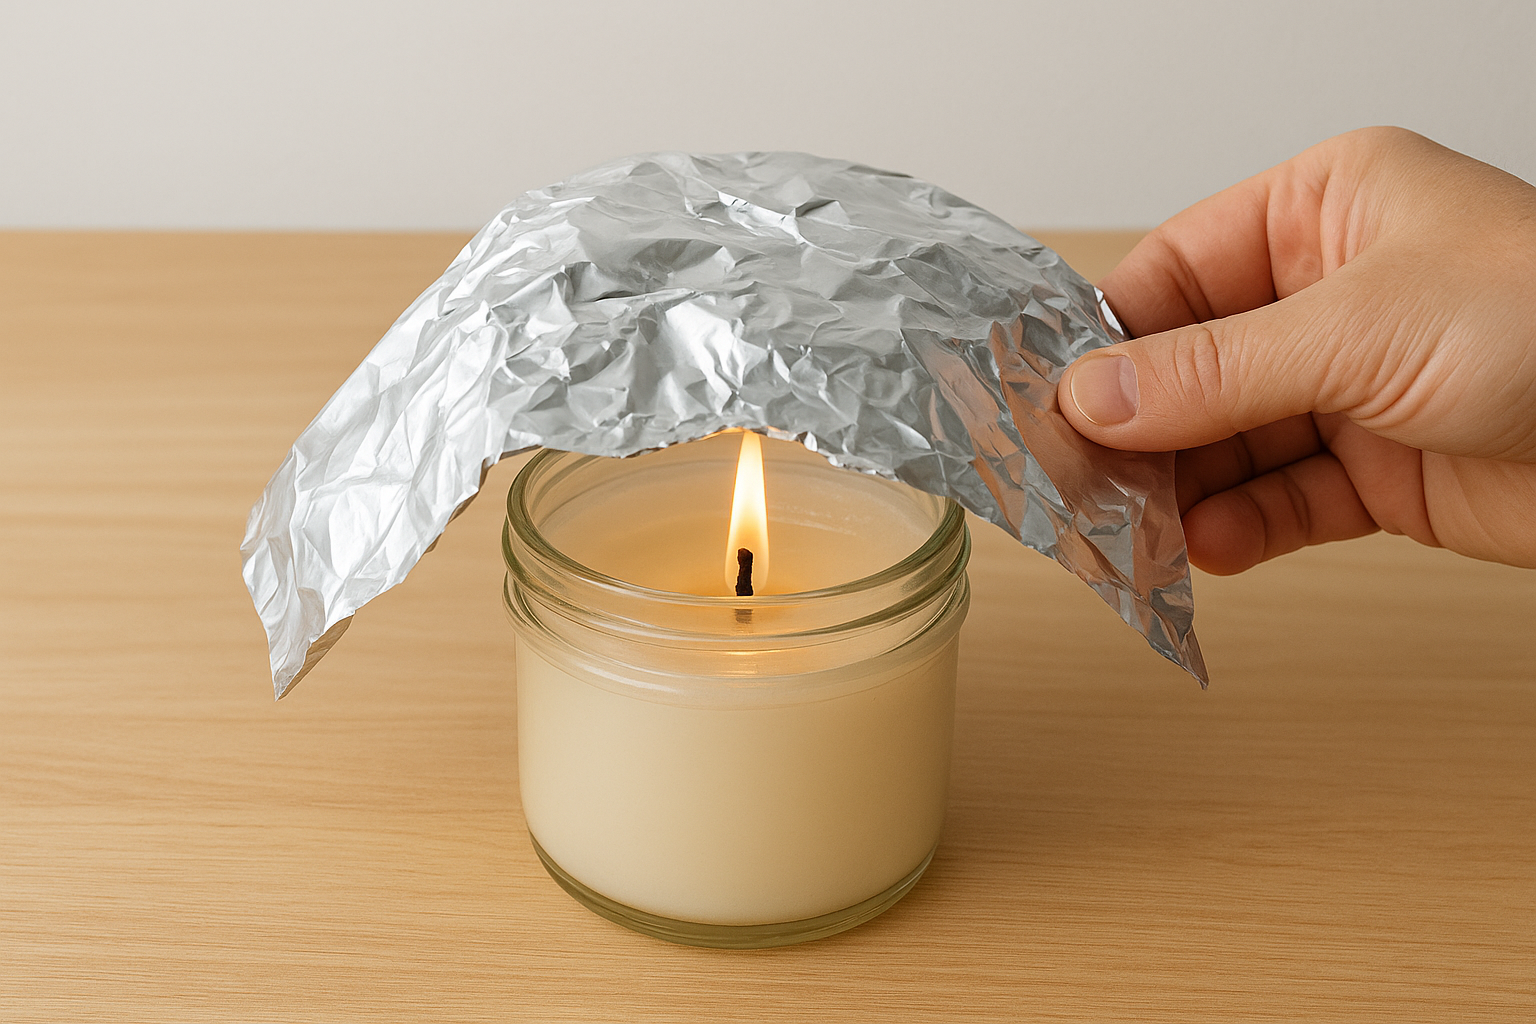
Never seal the foil completely over the jar, since a candle needs airflow to stay lit and a fully sealed tent can overheat the glass.
Once the surface levels out, remove the foil carefully using tongs or an oven mitt, blow out the flame, and let the wax cool completely undisturbed before your next burn.
Fix 3: Smooth the top with a hair dryer or heat gun
Sometimes you want to fix the surface of a candle without relighting it at all. A hair dryer or heat gun gives you direct, controlled heat that can melt uneven wax walls and smooth them into a flat surface quickly. This approach works especially well when the tunnel is shallow but the wax has hardened unevenly, and it's one of the fastest ways to address how to fix candle tunneling on a surface level without committing to a full burn session.
How to use a hair dryer to level the wax
Hold your hair dryer 4 to 6 inches above the candle's opening and set it to the lowest heat setting. Move the nozzle in slow, circular motions over the wax surface so the heat distributes evenly rather than concentrating in one spot. The wax will begin to soften within 30 to 60 seconds, and the raised edges will start collapsing toward the center.
Use the low heat setting throughout, since high heat can cause uneven melting, push liquid wax toward the wick, or crack the glass jar.
Once the surface looks level and glossy, stop applying heat and let the candle sit completely undisturbed on a flat surface until the wax fully solidifies. Avoid moving or tilting the jar during this cooling period, because liquid wax shifts easily and can re-solidify at an uneven angle, leaving you back where you started.
How to prevent tunneling on every future burn
Knowing how to fix candle tunneling is useful, but preventing it from happening in the first place saves you the trouble entirely. Every tunneling problem traces back to one of a handful of predictable habits, which means you can eliminate the risk almost completely by adjusting how you burn your candles from the very first light.
Burn habits that protect every candle
Your first burn is non-negotiable. Light the candle and keep it going until the melt pool reaches the jar's outer edge all the way around before you extinguish it. For most candles, that takes one hour for every inch of diameter, so a three-inch jar needs at least three hours on that initial session.
Trim your wick to roughly one-quarter inch before every single burn to keep the flame at the right size for your jar's diameter.
After the first burn, commit to sessions of at least two hours so the melt pool has time to spread fully each time. Avoid burning in drafty spots, since uneven airflow pushes the flame to one side and creates an uneven melt. Short burns and moving air are the two most consistent causes of tunneling, and cutting both out of your routine keeps your candle burning flat and clean from start to finish.
A simple wrap-up
Candle tunneling looks like a dead end, but every method covered here gives you a real path back to a clean, even burn. Whether you used a longer burn session, the foil tent, or a hair dryer to level the surface, you now have a clear toolkit for how to fix candle tunneling at any stage. The first burn rule and the wick-trimming habit are the two changes that prevent the problem from showing up again on every candle you own going forward.
Good technique only goes so far if the candle itself starts from a poor foundation. A well-made candle with the right wick size for its jar diameter and a clean wax blend makes every one of these fixes more effective and prevention far easier to maintain. If you want a candle built to burn correctly from the start, browse the hand-poured coconut wax candle collection at Small Flame Candle Co.