
CandleScience Wick Guide: How To Choose The Right Wick Size
Picking the wrong wick can ruin an otherwise perfect candle. Too small, and you get tunneling, a narrow hole straight down the center with wax stuck to the sides forever. Too large, and you're dealing with excessive soot, mushrooming, and an unsafe flame. At Small Flame Candle Company, we've burned through plenty of test candles (literally) to dial in the right wick for every pour we make. So when people ask us about the CandleScience wick guide, we have opinions worth sharing.
CandleScience offers one of the most widely used wick selection tools in the candle making community, and for good reason, it takes the guesswork out of matching wick type and size to your specific wax and container. But the guide alone doesn't tell the whole story. Variables like fragrance load, dye, and even room temperature affect how your candle burns, and no chart can account for all of that without some hands-on testing.
This guide breaks down how to use CandleScience's wick recommendations effectively, what each wick series is best suited for, and how to test your way to a clean, even burn. Whether you're pouring your first candle or your hundredth, getting the wick right is the single most important step in the process, and we'll show you exactly how to do it.
What the CandleScience wick guide tells you
The CandleScience wick guide is essentially a lookup tool organized around two primary variables: wax type and container diameter. You start by identifying your wax, then cross-reference the interior diameter of your container, and the guide returns a recommended wick series along with a suggested size within that series. It won't guarantee a perfect burn on the first pour, but it gives you a solid, data-backed starting point instead of guessing blind and wasting supplies on failed test candles.
The wick series CandleScience covers
CandleScience carries several wick series, and each one is optimized for a specific wax type or burn profile. Knowing what each series is built for helps you identify the right category before you even look at sizing. Here's a breakdown of the most commonly used series:
| Wick Series | Best For |
|---|---|
| CD (Coreless Cotton) | Paraffin, paraffin blends, high fragrance loads |
| ECO | Soy, soy blends, natural waxes |
| LX | Paraffin container candles, steady consistent flame |
| Premier | Coconut wax, softer waxes needing a stronger burn |
| Wood Wicks | Any wax where a crackling, fireplace-style aesthetic is the goal |
Each series behaves differently because of how the wick is physically constructed. A CD wick has a paper core that keeps it rigid and produces a slight curl when burning, which helps it self-trim in paraffin. An ECO wick uses a flat cotton braid designed to fold over in softer soy waxes, allowing it to self-trim naturally. Put an ECO wick in a hard paraffin blend and you'll likely end up with a weak flame and incomplete melt pool coverage across the surface.
How container diameter drives the size recommendation
Once you know your wick series, container diameter becomes the deciding measurement for which specific size you select within that series. CandleScience organizes its sizing guidance by diameter ranges, typically in half-inch increments. A 3-inch diameter container might start you at a CD-18, while a 3.5-inch container could push you toward a CD-20 or CD-22 depending on your wax and fragrance combination.
Always measure the interior diameter at the widest point of your container, not the outer edge. A quarter-inch difference can move you into the next wick size entirely.
Fragrance load also plays a role here. A heavy fragrance load above 10% by weight can restrict combustion, which means you may need to size up one step from the guide's initial suggestion. The guide gives you a foundation, but your specific formula always influences the final call.
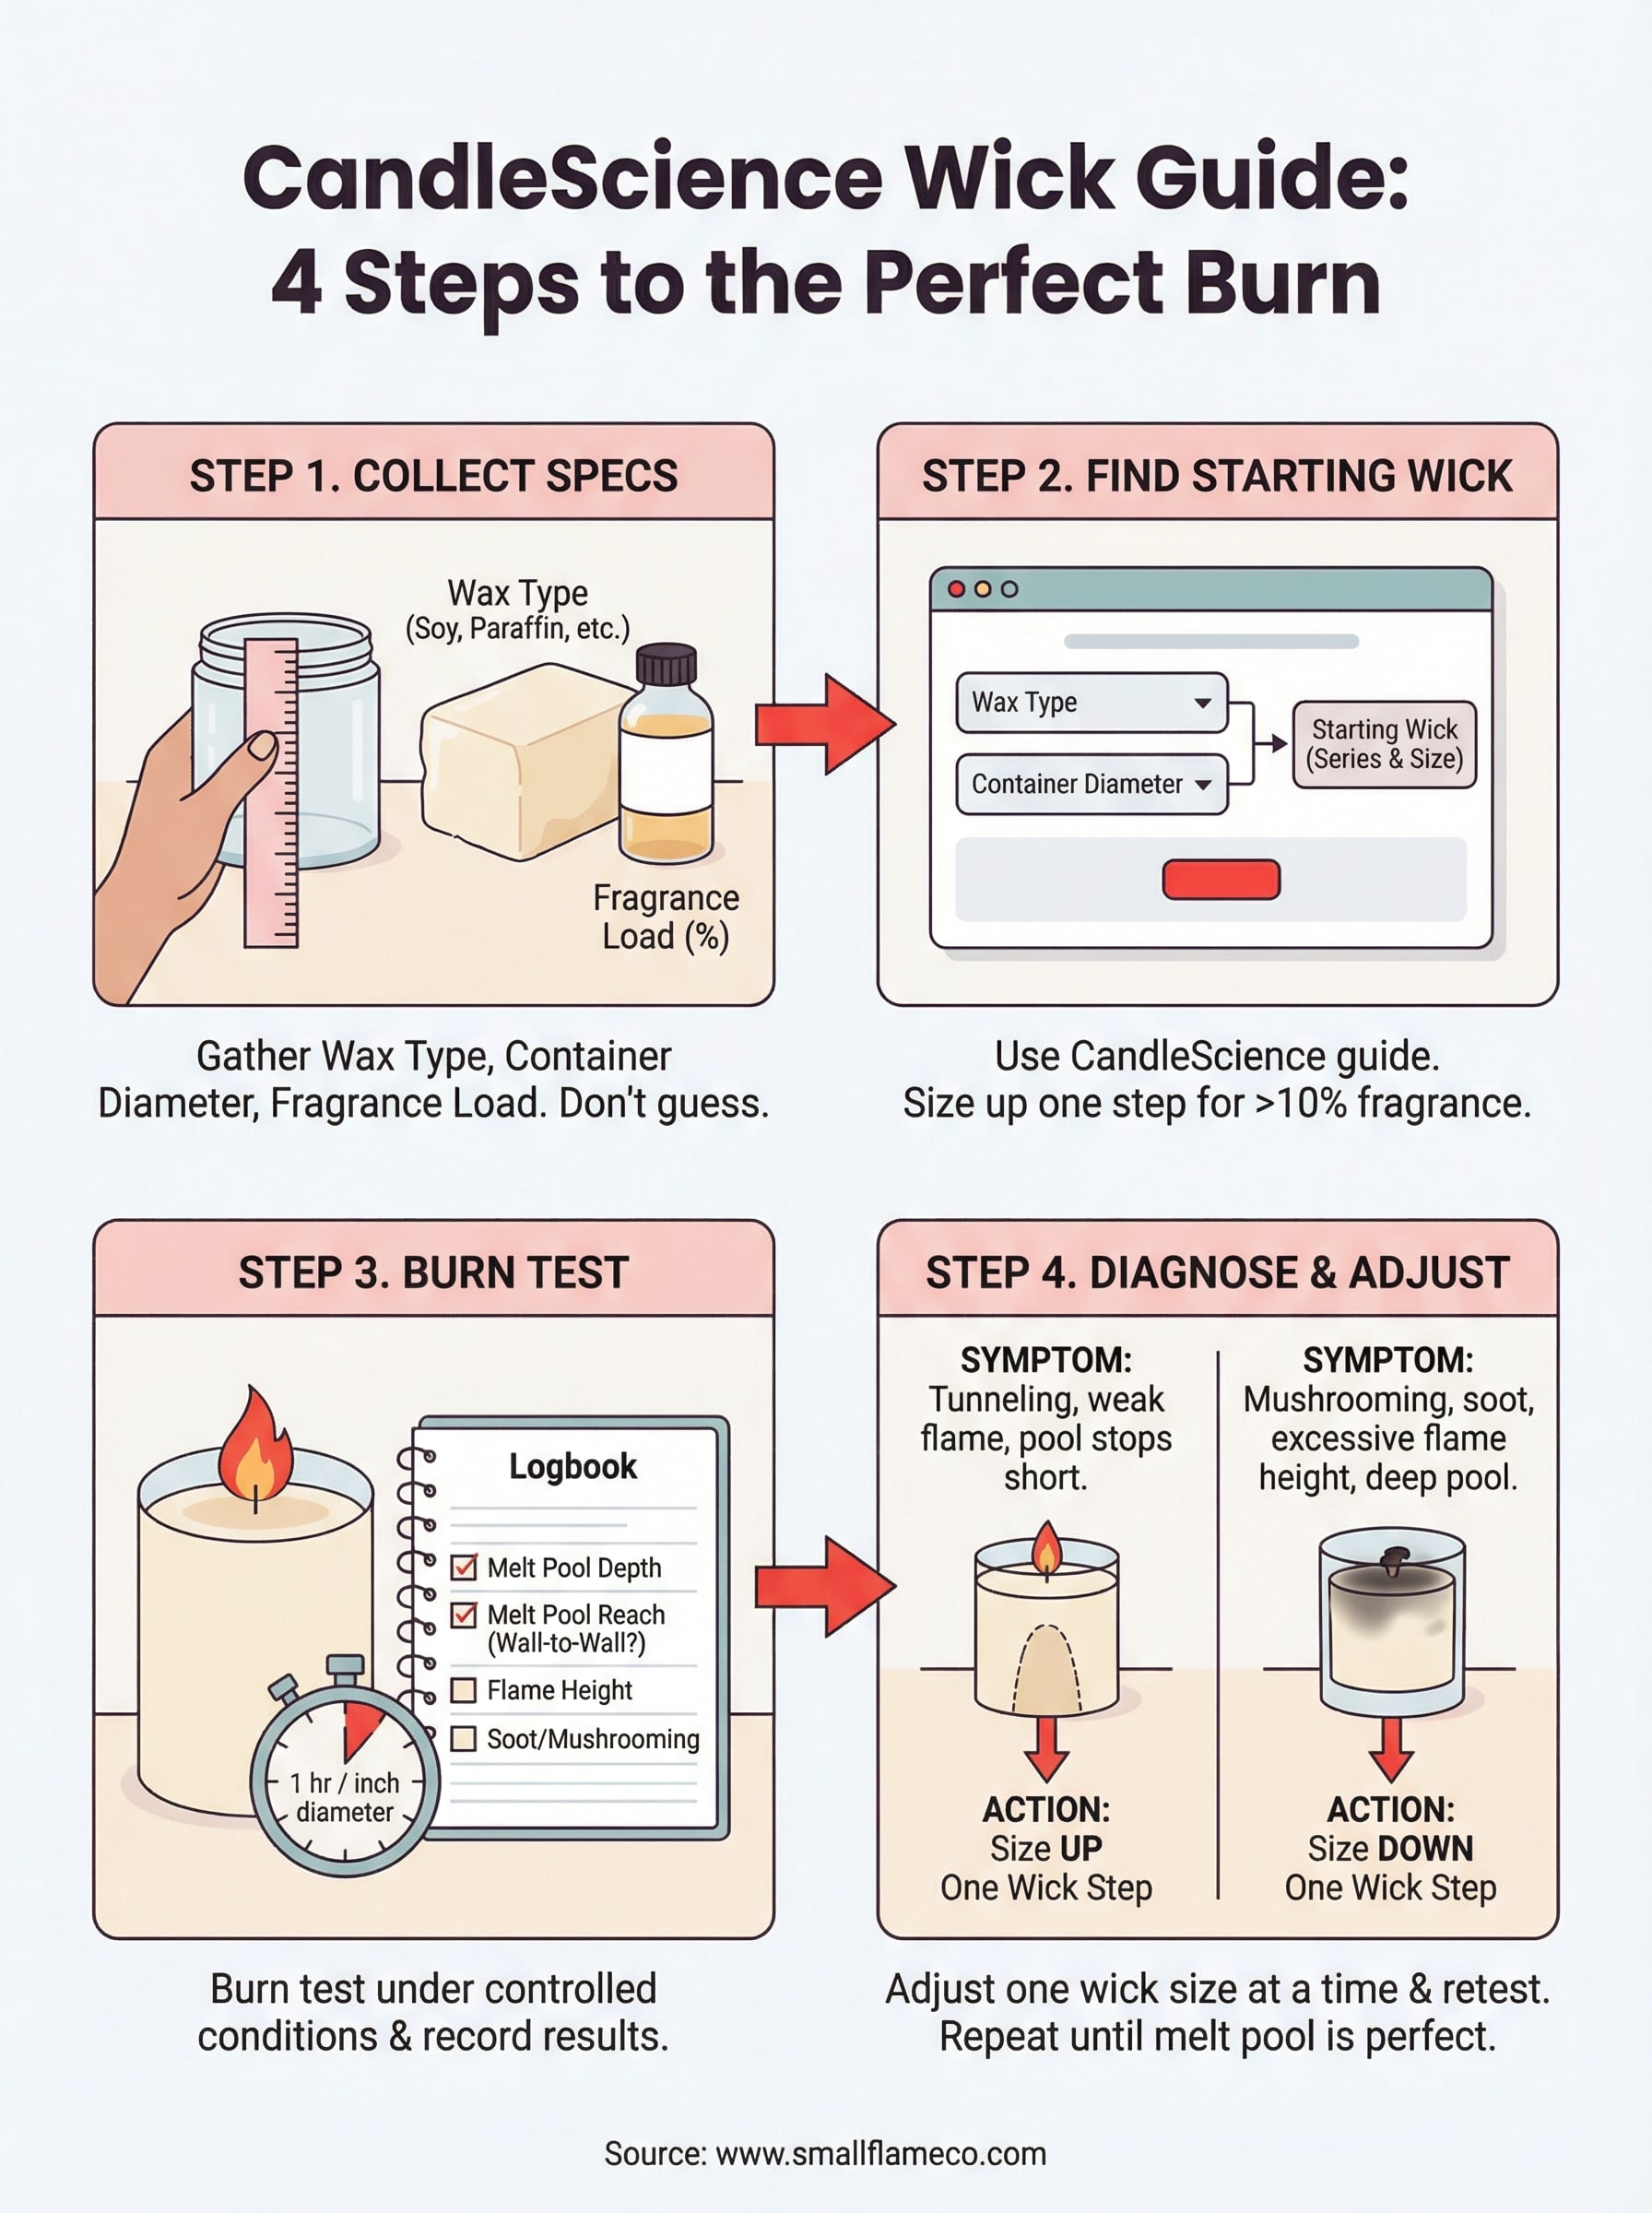
Step 1. Collect your wax and container specs
Before you open the CandleScience wick guide, gather two pieces of information: your wax type and the interior diameter of your container. Without both of these, you can't navigate the guide accurately. Skipping this step and guessing leads to wasted supplies and frustrating test results.
What to note about your wax
Different waxes burn at different rates and hold fragrance differently, which directly affects which wick series the guide points you toward. At minimum, you need to know whether your wax is soy, paraffin, coconut, or a blend, along with the specific product name if you have it.
If you're using a blended wax, treat it based on the dominant wax type unless the manufacturer specifies otherwise.
Your fragrance load matters here too. Write down your fragrance percentage by weight, because anything above 10% by weight can restrict combustion and may require you to size up one step. Keep a simple log before you move forward:
| Variable | Your Info |
|---|---|
| Wax type | e.g., Golden 464 Soy Wax |
| Fragrance % | e.g., 9% |
| Dye used? | Yes / No |
How to measure your container
Grab a ruler or calipers and measure the interior diameter of your container at its widest point. Never measure the outside edge or the rim. A difference of even a quarter inch can shift you one full wick size in the guide.
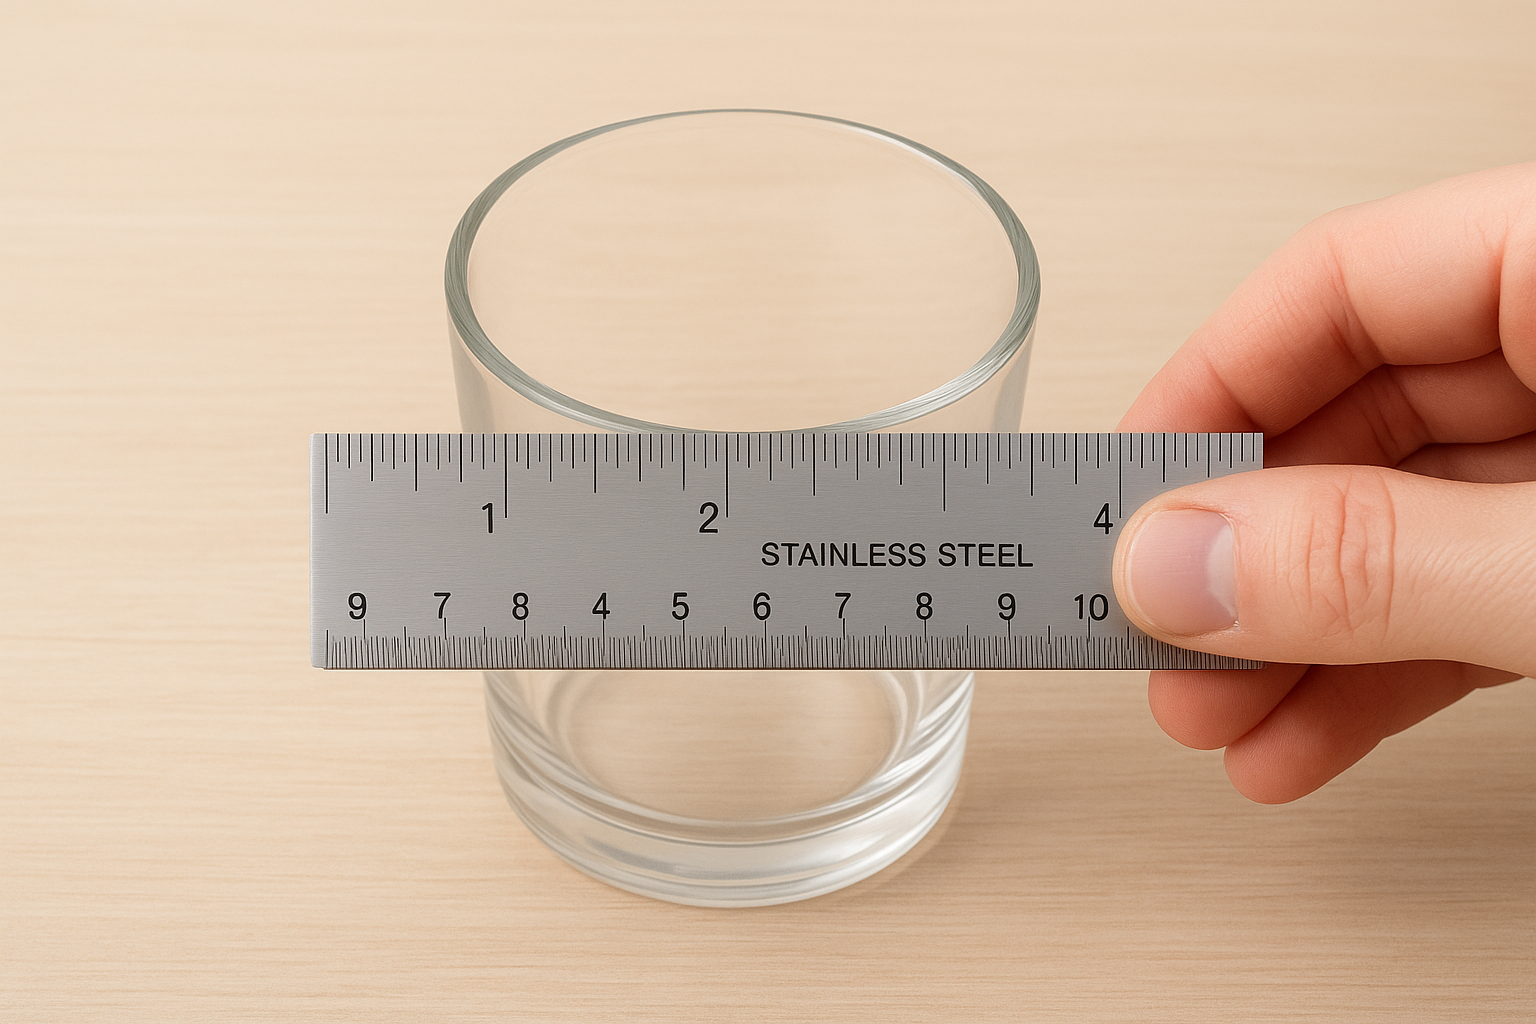
Record this number before you open any chart. If you're working with a tapered container, use the widest interior measurement, not the top opening. That single number drives most of the wick selection decision you'll make in the next step.
Step 2. Find a starting wick in the guide
With your wax type and container diameter written down, you're ready to pull up the CandleScience wick guide and look up your starting point. Navigate to the wick selection section on the CandleScience website and locate the chart that corresponds to your wax type. The guide will return a recommended wick series and size range based on the diameter you recorded in Step 1.
How to navigate the wick selector
The guide organizes recommendations by wax type first, then by container diameter. Find your wax category, then scan across to your diameter measurement. The guide typically gives you a single wick series and one or two size options within that series. When two sizes appear, always start with the smaller of the two so you have room to size up if needed, rather than starting too large and overshooting.
If your container diameter falls between two listed ranges, start with the wick suggested for the smaller range and test from there.
Use this simple log to record what the guide returns before you move to testing:
| Field | Your Notes |
|---|---|
| Recommended wick series | e.g., ECO |
| Starting wick size | e.g., ECO-6 |
| Container diameter | e.g., 3.25 inches |
| Fragrance % | e.g., 8% |
Adjusting before you pour
Before you commit to pouring a full test candle, factor in your fragrance load one more time. If your fragrance percentage exceeds 10% by weight, go up one wick size from what the guide listed. Heavy fragrance oils add density to the wax and restrict how the wick draws fuel, which produces a weaker flame and an incomplete melt pool that won't reach the container edges.
Step 3. Burn test the candle the right way
Pouring a test candle based on the CandleScience wick guide's recommendation is only half the work. You need to burn the candle under controlled conditions and observe what happens before you draw any conclusions about wick sizing. A single burn without documentation tells you almost nothing useful, and skipping this step wastes the supplies you already spent on the test pour.
Always burn your test candle for one hour per inch of container diameter during the first session, then record your results immediately while the wax is still liquid.
What to record during each burn session
Set aside at least two or three separate burn sessions before you decide whether a wick works or needs to change. Each session should last the appropriate time for your container diameter, and you should log the same measurements every time so you can compare results across sessions. Use this tracking log for each burn:
| Measurement | Session 1 | Session 2 | Session 3 |
|---|---|---|---|
| Burn duration (hours) | |||
| Melt pool depth (mm) | |||
| Melt pool diameter (inches) | |||
| Flame height (inches) | |||
| Mushrooming observed? | |||
| Soot on glass? |
How to read the melt pool
The melt pool is your most reliable signal for whether a wick is performing at the right level. After the first full burn session, check whether liquid wax reaches the edge of the container all the way around. A melt pool that extends wall to wall, without exceeding half an inch in depth, indicates the wick is drawing fuel at a healthy rate.
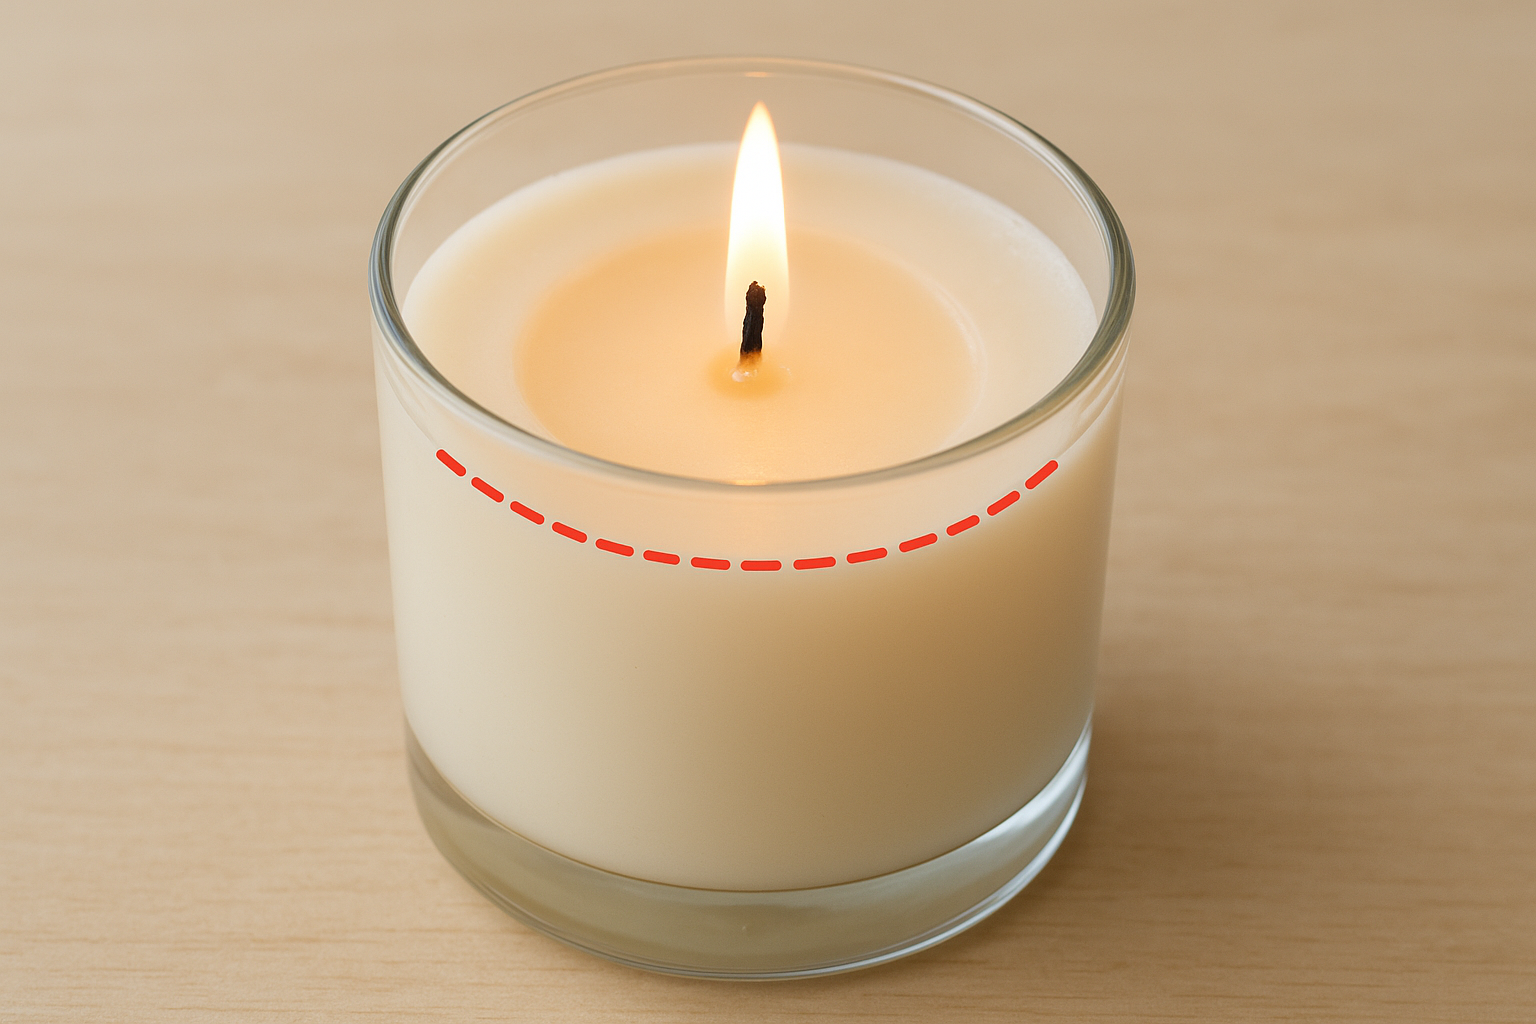
If the melt pool stops short of the container walls, your wick is likely undersized. A pool that exceeds half an inch in depth after a standard burn session points to a wick that runs too hot and pulls too much wax at once, which requires sizing down.
Step 4. Diagnose issues and adjust wick size
Your burn log from Step 3 now becomes your diagnostic tool. Every problem you see has a specific cause, and most trace back to wick size being one step too large or too small. The CandleScience wick guide gives you a starting point, but your burn results tell you which direction to move from there.
Read the symptoms against the fix
Use the table below to match what you observed during your burn sessions to the correct adjustment. Move one wick size at a time and run the full burn test cycle again before drawing any conclusions.
| Symptom | Likely Cause | Adjustment |
|---|---|---|
| Melt pool doesn't reach container walls | Wick too small | Size up one step |
| Flame exceeds 1.5 inches consistently | Wick too large | Size down one step |
| Heavy mushrooming after each session | Wick too large | Size down one step |
| Soot building on inside of glass | Wick too large | Size down one step |
| Tunneling after multiple burns | Wick too small | Size up one step |
| Flame flickers excessively without draft | Wick too small | Size up one step |
Never adjust two variables at the same time. If you change wick size and fragrance load simultaneously, you won't know which change fixed the problem.
When one adjustment doesn't solve it
Sometimes a single size change doesn't resolve the issue completely. If you size up and still see tunneling, check your fragrance percentage before assuming you need to go up another step. A high fragrance load above 10% restricts combustion and can mask what would otherwise be a properly sized wick. Reduce your fragrance load by one percent, retest with the same wick, and then decide whether another size change is actually necessary.
Next steps
You now have a repeatable process for working through the CandleScience wick guide from start to finish. Gather your wax and container specs, pull your starting wick recommendation, run structured burn tests, and adjust one variable at a time until your melt pool behaves correctly. Most wick problems resolve within two or three test rounds when you follow this sequence consistently.
Your formula is only as good as the materials behind it. Wick type, wax quality, and fragrance compatibility all work together, and cutting corners on any one of them makes the testing process longer than it needs to be. If you want to skip the trial-and-error phase on wax selection, starting with a proven blend makes a real difference.
Check out the Small Flame Candle Co. coconut wax candle collection to see what a clean-burning, properly wicked candle looks and smells like when every variable is dialed in.