
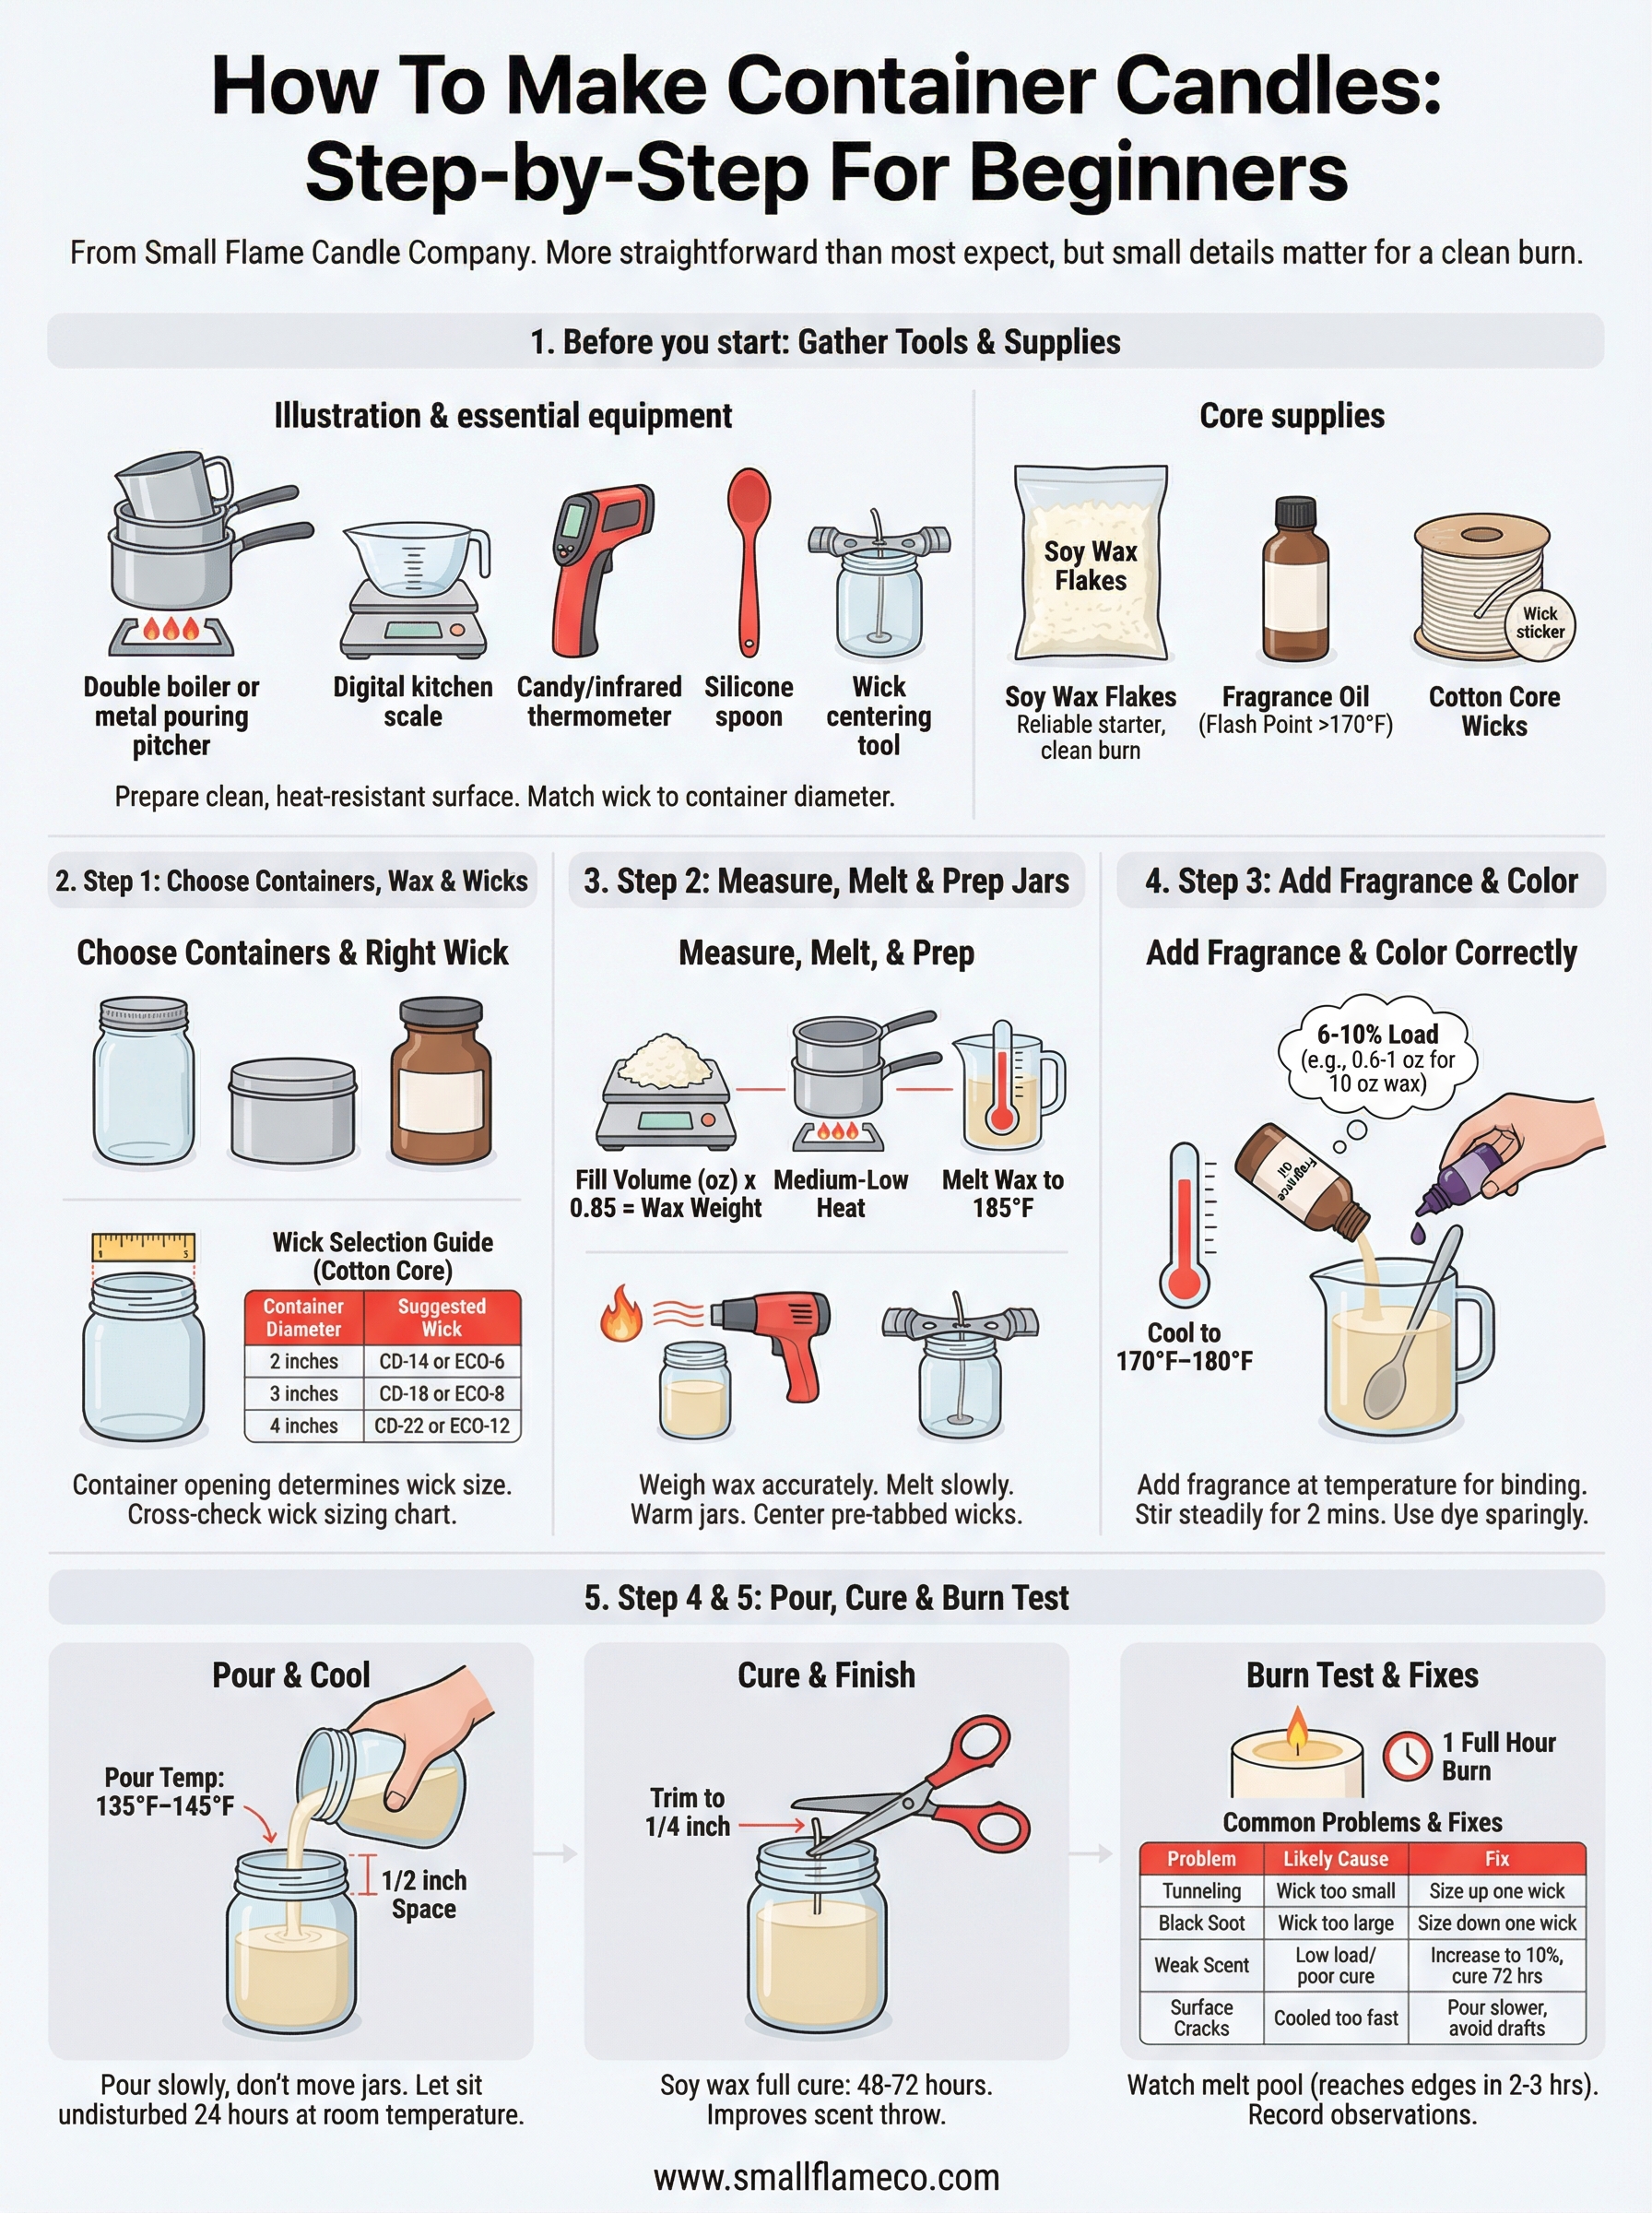
How To Make Container Candles: Step-by-Step For Beginners
At Small Flame Candle Company, every candle we sell starts the same way, with a container, some wax, and a whole lot of intention. We've hand-poured thousands of candles across dozens of scent profiles, so we know firsthand what works (and what turns into a messy, tunneling disaster). Learning how to make container candles is one of the most rewarding DIY projects you can pick up, and it's more straightforward than most people expect.
That said, small details matter. The type of wax you choose, how you prep your wick, the temperature at which you add fragrance oil, each step affects whether your finished candle burns clean or becomes a shelf decoration. Getting these basics right from the start saves you time, wasted materials, and a lot of frustration. We've made plenty of mistakes so you don't have to.
This guide walks you through the entire process, from gathering your supplies to pouring and curing your first candle. Whether you want to make candles as gifts, start a small hobby, or just understand what goes into a quality hand-poured candle, you'll have everything you need by the end. Let's get your first container candle made the right way.
What you need before you start
Before you pour a single drop of wax, having the right materials within arm's reach makes the whole process smoother. Learning how to make container candles goes much better when you're not scrambling for tools mid-project. Set everything up on a clean, heat-resistant surface before you touch the stove.
Tools and equipment
You don't need a professional setup to make great candles at home. A basic double boiler or a metal pouring pitcher set inside a saucepan of simmering water works perfectly for melting wax without scorching it. You'll also need a digital kitchen scale to measure wax and fragrance oil by weight, since measuring by volume almost always leads to inconsistent results between batches.
Here's a practical equipment checklist to have ready before you start:
| Tool | What it's for |
|---|---|
| Digital kitchen scale | Accurate wax and fragrance measurements |
| Double boiler or pouring pitcher + saucepan | Safe, even wax melting |
| Candy or infrared thermometer | Monitoring wax and pour temperatures |
| Silicone or wooden spoon | Stirring without scratching your pitcher |
| Wick centering tool or pencil | Keeping wicks centered while the wax sets |
Wax, fragrance, and wicks
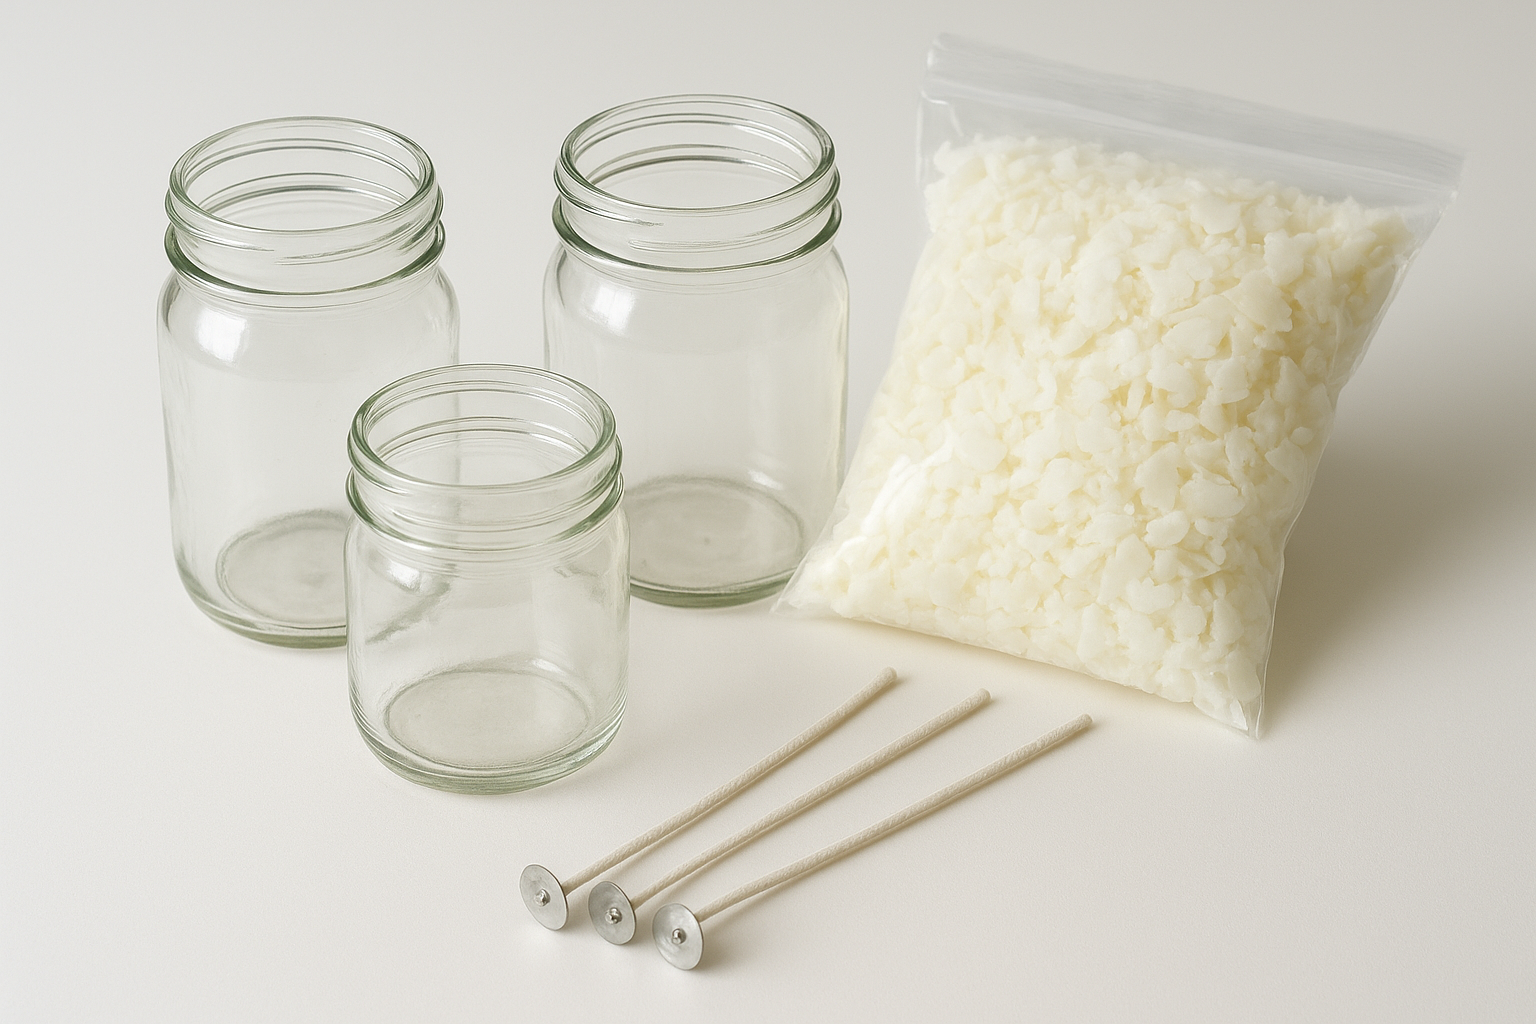
Your three core supplies are wax, fragrance oil, and wicks, and the quality of each one directly affects your final candle. For beginners, soy wax flakes are a reliable starting point because they're widely available, easy to melt, and hold fragrance well. Fragrance oils made specifically for candle-making behave differently than essential oils, so check that yours lists a flash point above 170°F on the label.
Match your wick diameter to your container width before buying in bulk. A wick that's too small will tunnel straight down; one that's too large will smoke and overheat the glass.
Step 1. Choose containers, wax, and the right wick
Your first decisions set the foundation for everything that follows. The container you pick determines which wick size you need, and your wax type affects how well fragrance oil binds and how cleanly the candle burns. Pick these three elements together rather than separately to avoid wasting supplies on a combination that won't perform.
Container and wax
Glass jars with straight or slightly tapered sides work best for beginners because they're easy to wick and widely available. For wax, soy wax flakes hold fragrance at a higher load than paraffin and produce a cleaner burn, making them the right starting point for most containers.
- Good container options: Mason jars, straight-sided tins, apothecary jars
- Skip: containers with narrow necks or strong inward curves
Your container's opening diameter is the single most important measurement in learning how to make container candles, so measure it before you buy anything else.
Wick selection
Cotton core wicks labeled with a diameter range are the easiest starting point for beginners. Always cross-check the wick manufacturer's sizing chart against your specific wax type before committing to a full pack.
| Container diameter | Suggested wick |
|---|---|
| 2 inches | CD-14 or ECO-6 |
| 3 inches | CD-18 or ECO-8 |
| 4 inches | CD-22 or ECO-12 |
Step 2. Measure, melt, and prep your jars and wicks
Accurate measurements and proper prep separate a candle that burns beautifully from one that cracks or sinks. Weighing your wax rather than estimating by eye is a fundamental skill when learning how to make container candles, and it keeps your results consistent batch after batch.
Measure and melt your wax
Fill your chosen container with water, then pour that water onto your scale to find the fill volume in ounces. Multiply that number by 0.85 to get your starting wax weight. Melt your wax in the double boiler over medium-low heat, stirring occasionally until it turns fully liquid. Keep your thermometer in the pitcher and pull the wax off the heat once it reaches 185°F.
Never leave melting wax unattended on the stove, as wax can ignite if it overheats past its flash point.
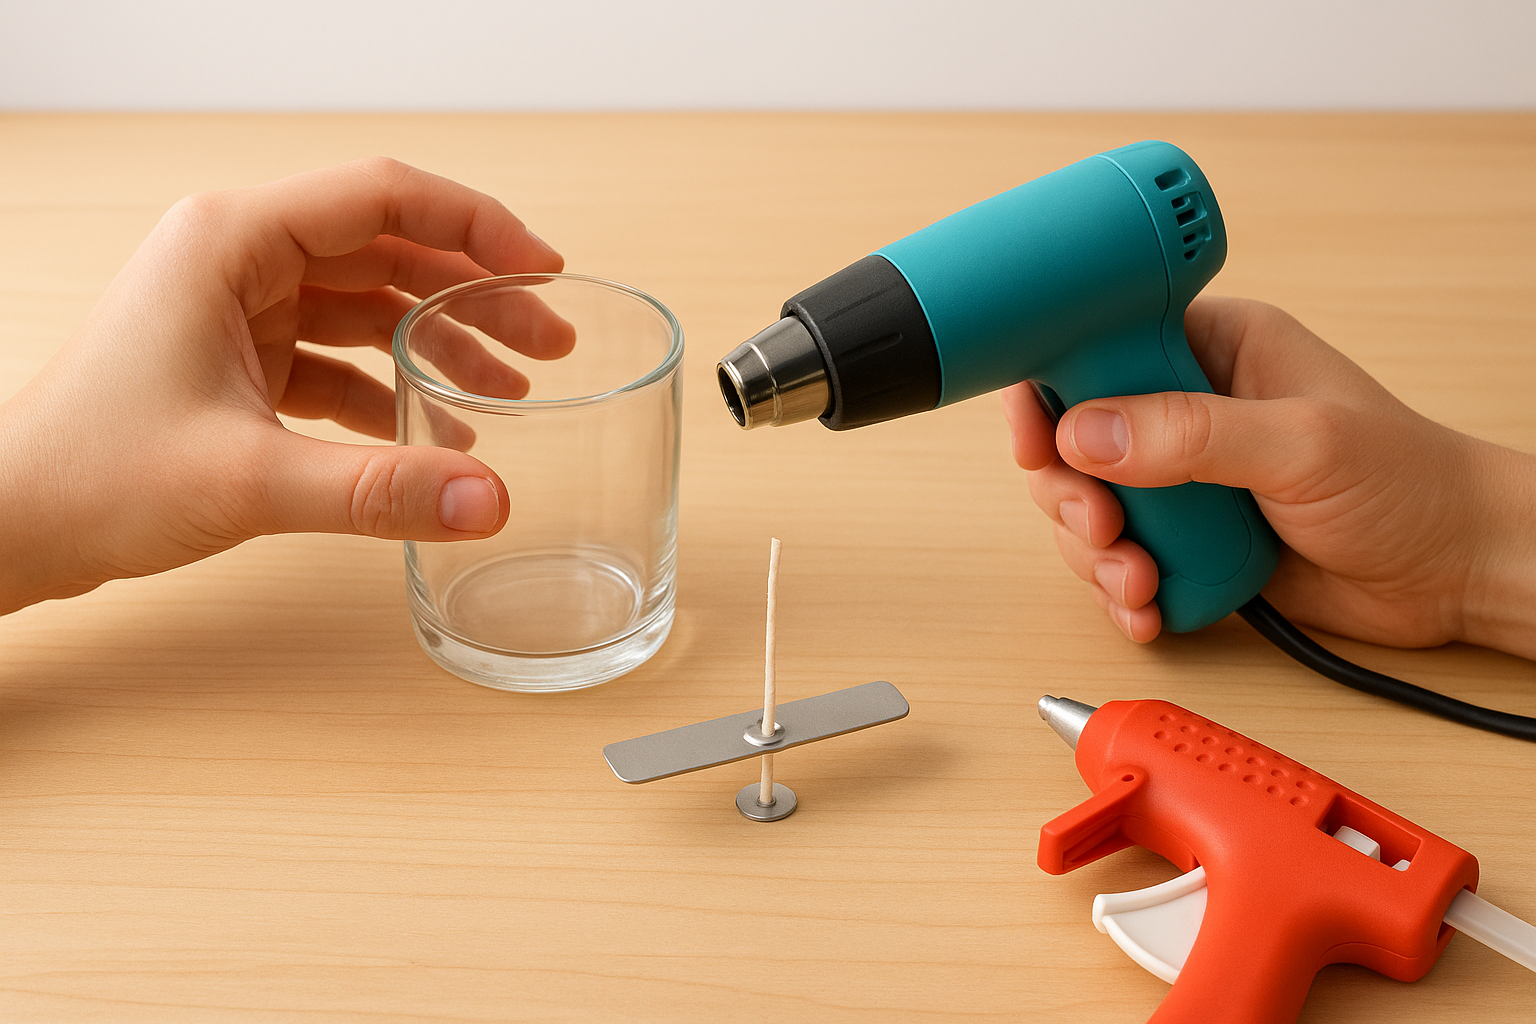
Prep your jars and set your wicks
Warm your jars slightly with a heat gun or briefly in a low oven before pouring. This step reduces air bubbles and wet spots on the glass. Press a pre-tabbed wick to the center of the jar bottom using a wick sticker or a small dot of hot glue, then thread the wick through a centering tool resting across the rim to hold it straight while the wax sets.
Step 3. Add fragrance and color the right way
This is the step where fragrance load and timing make or break your finished candle. Adding fragrance too hot burns off the scent before the wax sets, and adding it too cool creates poor binding. Both additions need to happen within the right temperature window to get consistent results.
Adding fragrance oil
Let your melted wax cool to between 170°F and 180°F before pouring in your fragrance oil. At this range, the wax bonds with the oil without scorching it. A standard fragrance load for soy wax is 6 to 10 percent of your wax weight, so for 10 ounces of wax, add 0.6 to 1 ounce of fragrance oil. Stir slowly and steadily for two full minutes to fully incorporate it.
Adding fragrance above 185°F is one of the most common mistakes in learning how to make container candles, and it weakens scent throw significantly.
Adding color
Candle dye chips or liquid dye blend most evenly when you add them right after the fragrance, while the wax is still fluid. Use dye sparingly since too much can clog your wick over time. Start with these guidelines before scaling up:
- Dye chips: one chip per pound of wax
- Liquid dye: 1 to 2 drops per pound of wax
- Always test your shade with a small pour before committing to a full batch
Step 4. Pour, cool, cure, and finish your candles
Once your wax hits the right temperature and your fragrance is fully mixed in, the actual pour is the fastest part of learning how to make container candles. Work carefully here, and don't rush the cooling and curing stages that follow.
Pour and cool
Pour your wax slowly into the center of each prepped jar at around 135°F to 145°F, leaving about half an inch of space at the top. Avoid moving the jars once you've poured, and let them sit undisturbed at room temperature for at least 24 hours. Drafts, fans, or cold surfaces cause uneven cooling and surface cracks.
Pouring too hot speeds up the process but often creates sinkholes in the center of your candle as the wax contracts while cooling.
Cure and finish
Soy wax needs a full cure of 48 to 72 hours before you trim the wick or put on a lid. Curing allows the fragrance oil to fully bind with the wax, which improves scent throw noticeably during the first few burns.
Use this finishing checklist before calling your candle done:
- Trim the wick to 1/4 inch
- Apply your label once the jar is completely cool
- Add a lid or dust cover if using one
Step 5. Burn test and fix common problems
A burn test is the final step in learning how to make container candles that actually perform well. Light your candle and let it burn for one full hour, then check the melt pool and wick condition before blowing it out.
How to run a burn test
Watch for a melt pool that reaches the edges of the container within two to three hours of your first burn. If the wax only melts in a small circle around the wick, your wick is undersized. Record your observations after each burn session so you can compare results across batches and catch problems early.
A full melt pool on the very first burn usually means your wick is too large, which causes overheating and excess soot on the glass.
Fixing common problems
Most issues you run into have a straightforward fix once you know what to look for. Use this table to diagnose and correct the most common ones:
| Problem | Likely cause | Fix |
|---|---|---|
| Tunneling | Wick too small | Size up one wick |
| Black soot on glass | Wick too large | Size down one wick |
| Weak scent throw | Low fragrance load or poor cure | Increase to 10% load, cure 72 hours |
| Surface cracks | Cooled too fast | Pour slower, avoid drafts |
Next steps
You now have everything you need to know about how to make container candles from scratch. Each step builds on the last, so your results will improve noticeably once you complete a full batch and run a proper burn test. Don't skip the cure time; it's the one step most beginners rush and later regret.
From here, the natural next move is experimenting with different wax blends, fragrance combinations, and container styles to find what works best for your space or gift list. Keep a simple batch log noting your wick size, pour temperature, and fragrance load for every candle you make. If you want to see what a professionally hand-poured candle looks and smells like, browse the Small Flame coconut wax candle collection. Every candle there is crafted with a coconut-soy wax blend and toxin-free fragrance oils, making them a solid benchmark for your own work.