

How To Remove Wax From A Wax Warmer: Safe, Mess-Free Steps
Wax warmers are one of the easiest ways to fill a room with fragrance, until it's time to swap scents. If you've ever stared at a dish of old wax wondering how to remove wax from a wax warmer without making a mess, you're not alone. It's one of the most common questions we get at Small Flame Candle Company, and the answer is simpler than you might think.
Whether you're working with liquid wax that's still warm or a hardened disc that won't budge, there's a clean method for each scenario. The approach you choose depends on your warmer type, we sell both Edison bulb illumination warmers and fan warmers, and how much wax is left in the dish.
Below, we'll walk you through several tried-and-true removal methods step by step, along with tips to keep your warmer in good shape for the long run. No special tools required, and no wax down the drain (seriously, don't do that).
What to know before you start
Before you tackle how to remove wax from a wax warmer, a few quick checks will save you time and prevent damage. Your warmer type and the state of the wax (liquid vs. hardened) are the two biggest factors that determine which method works best. Rushing in without this baseline knowledge is how you end up with scratched dishes or wax in places it doesn't belong.
Know your warmer type
Electric warmers, like the Edison bulb illumination warmers and fan warmers we carry at Small Flame, heat wax gently from below or with circulated air. Tealight warmers use an open flame, which means the wax stays liquid as long as the candle burns underneath. The removal method that works well on one type may not suit the other, so identify yours before you start.
| Warmer type | Heat source | Wax state when off |
|---|---|---|
| Edison bulb warmer | Light bulb | Hardens quickly |
| Fan warmer | Heated fan | Hardens quickly |
| Tealight warmer | Open flame | Hardens once cooled |
Safety basics to follow every time
Never pour liquid wax down the sink. Wax solidifies inside pipes and causes clogs that are genuinely difficult to clear. Instead, pour it into a lined trash can or let it harden first, then pop it out solid. Keep paper towels or cotton balls nearby before you begin, since having them ready cuts cleanup time in half.
Always let your warmer cool for at least two minutes after you turn it off before touching the dish, even if the wax still looks fully liquid.
Hot wax burns skin fast, and the dish retains heat longer than you'd expect. A short wait protects your hands and keeps the whole process clean from start to finish.
Step 1. Pick the safest removal method for your wax
Choosing the right method before you start is the most important part of how to remove wax from a wax warmer without making a mess. Your wax state (still warm and liquid, or fully hardened) determines which approach to use. Picking the wrong method wastes time and risks cracking a glass dish.
The warm-liquid method
This method works best when your warmer has been on recently and the wax is still soft or fully melted. You simply soak up the liquid wax with cotton balls or paper towels before it hardens. It's fast, clean, and requires no extra tools.
Use this method if you plan to swap scents regularly; it keeps your dish residue-free with minimal effort.
The freeze method
When wax has already hardened, the freeze method is your best option. Put the dish into the freezer for 10 to 15 minutes and the wax contracts, making it easy to pop out in one solid piece. No scraping required, which protects the dish surface from scratches.
| Wax state | Best method |
|---|---|
| Warm and liquid | Cotton ball absorption |
| Fully hardened | Freeze and pop |
Step 2. Remove wax while warm without burning yourself
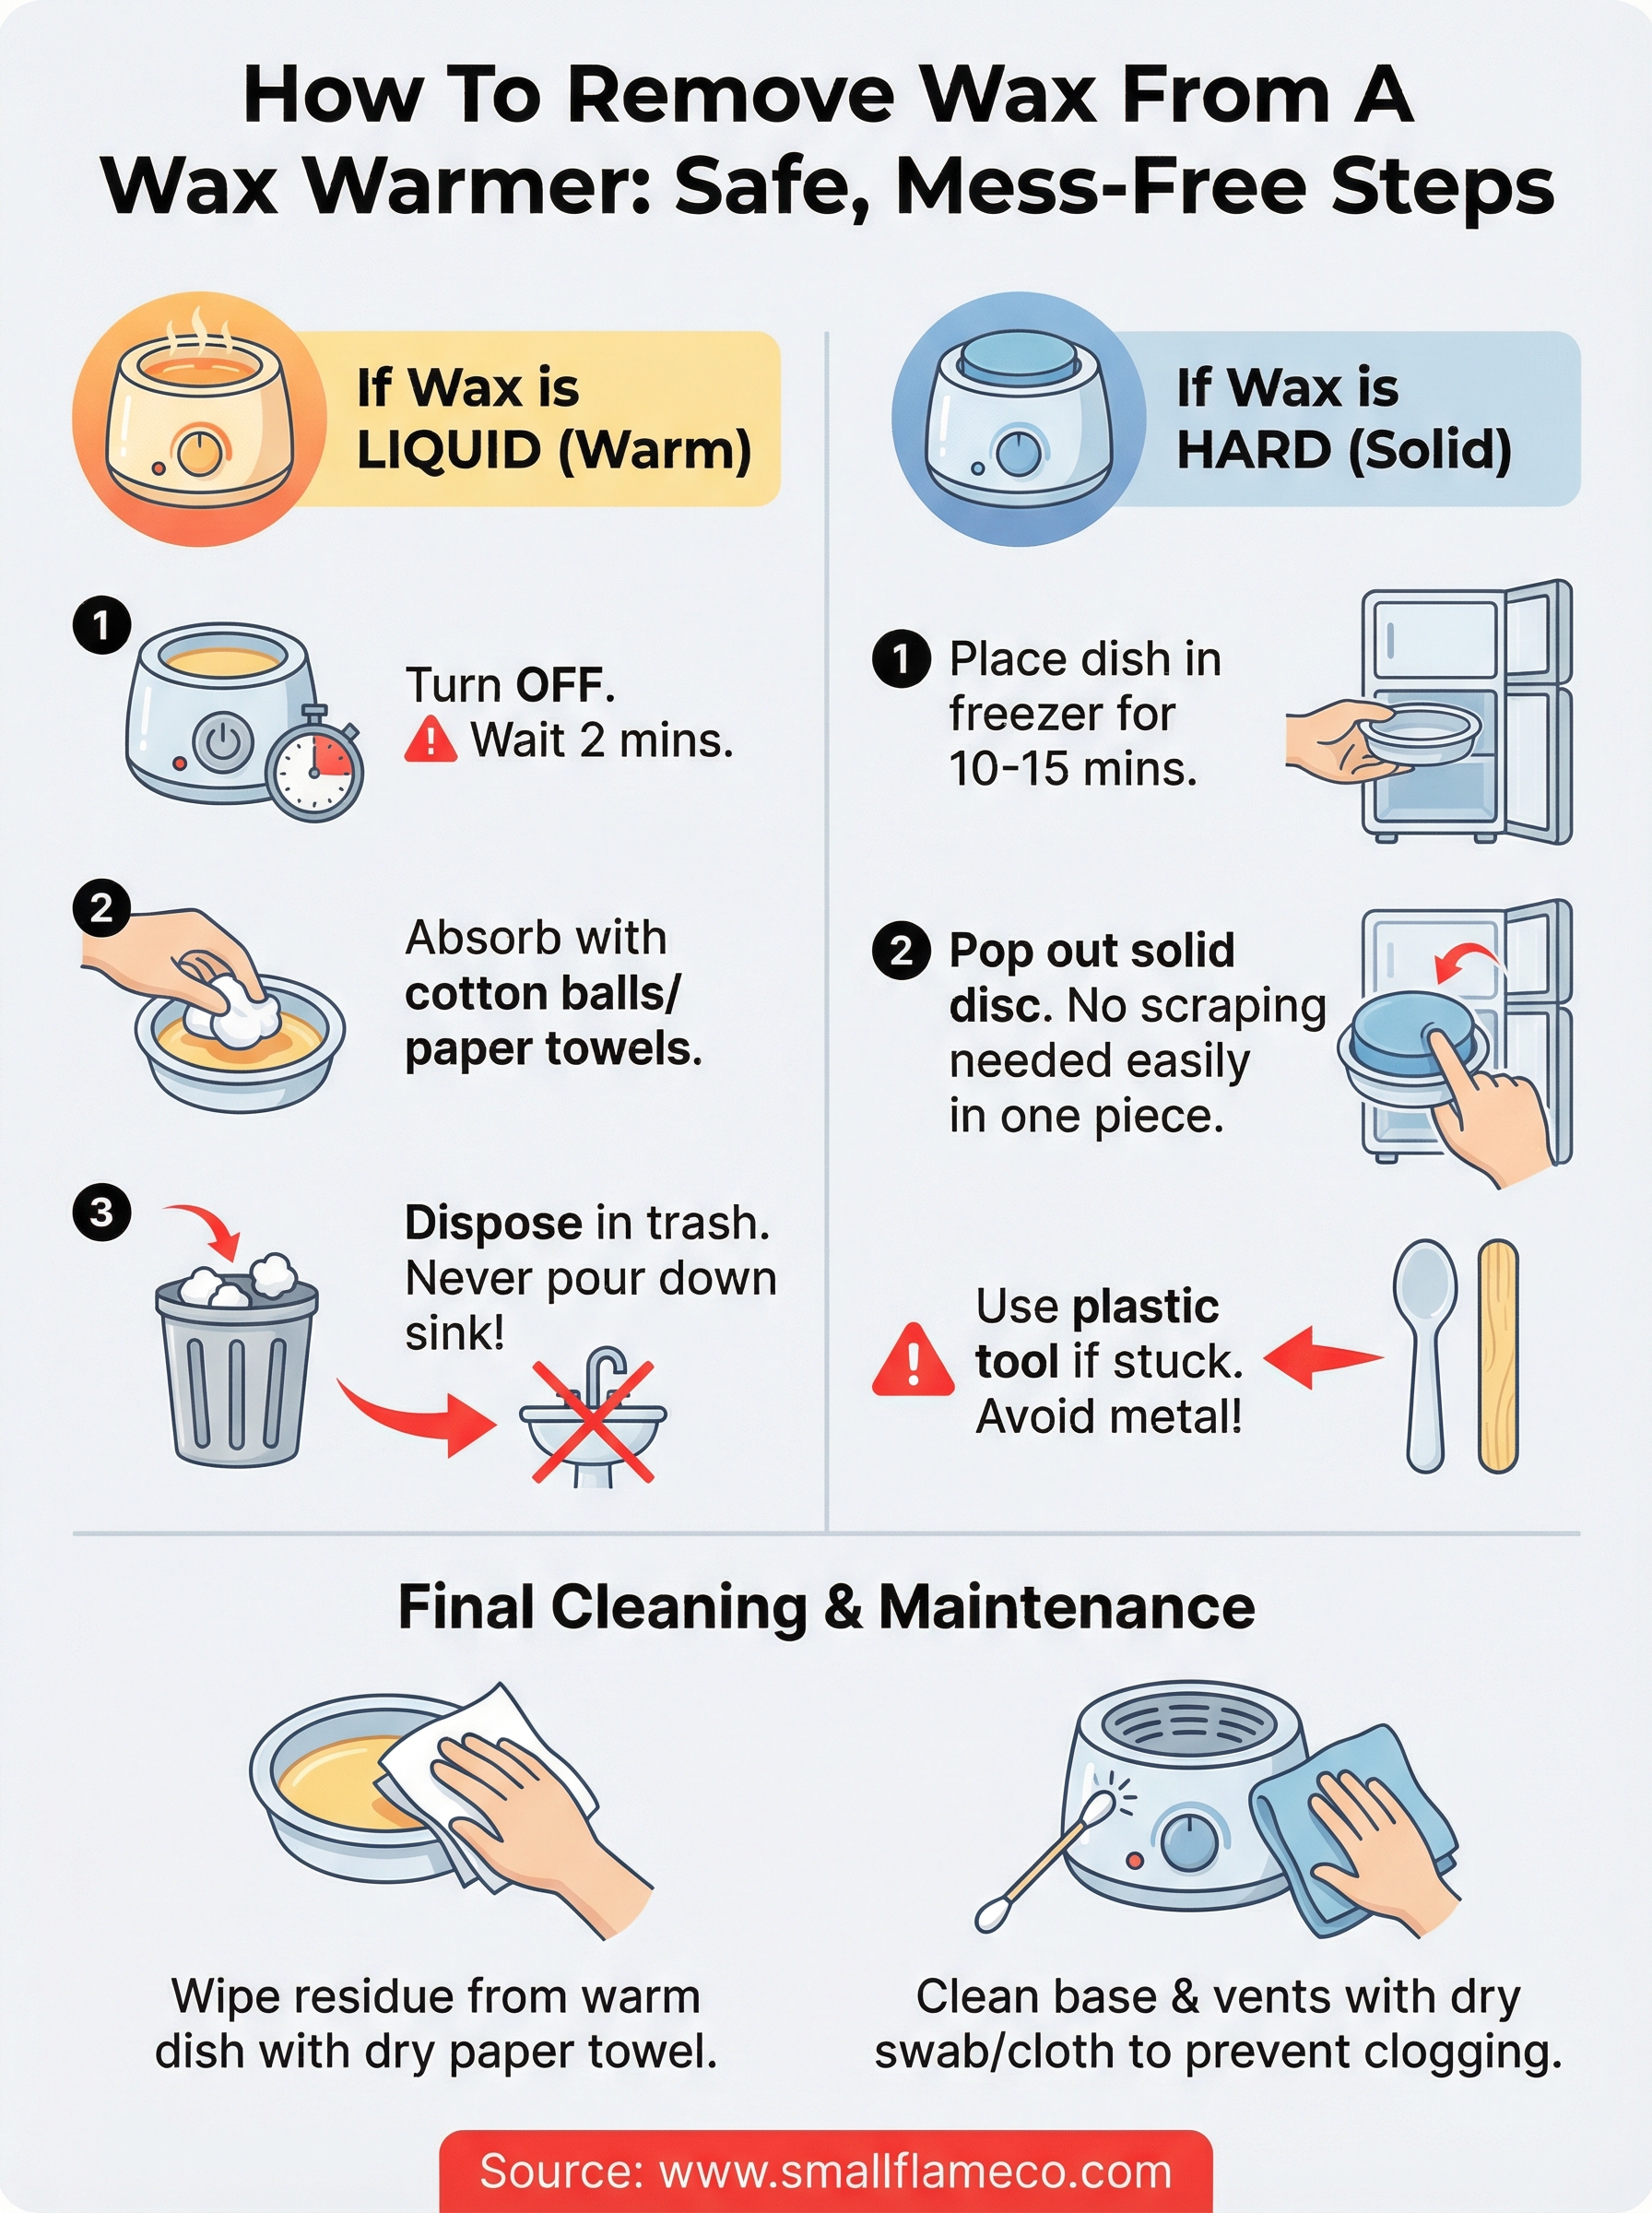
The warm-liquid method is the quickest way to handle how to remove wax from a wax warmer between scent changes. Turn off your warmer and wait two full minutes before touching anything. The wax stays workable for several minutes after the heat cuts out, giving you a clean window to act.
Use cotton balls or paper towels
Grab three to five cotton balls or a folded paper towel and press them directly into the liquid wax. Let them soak for five to ten seconds, then lift straight up and out. Repeat until the dish holds only a thin film.
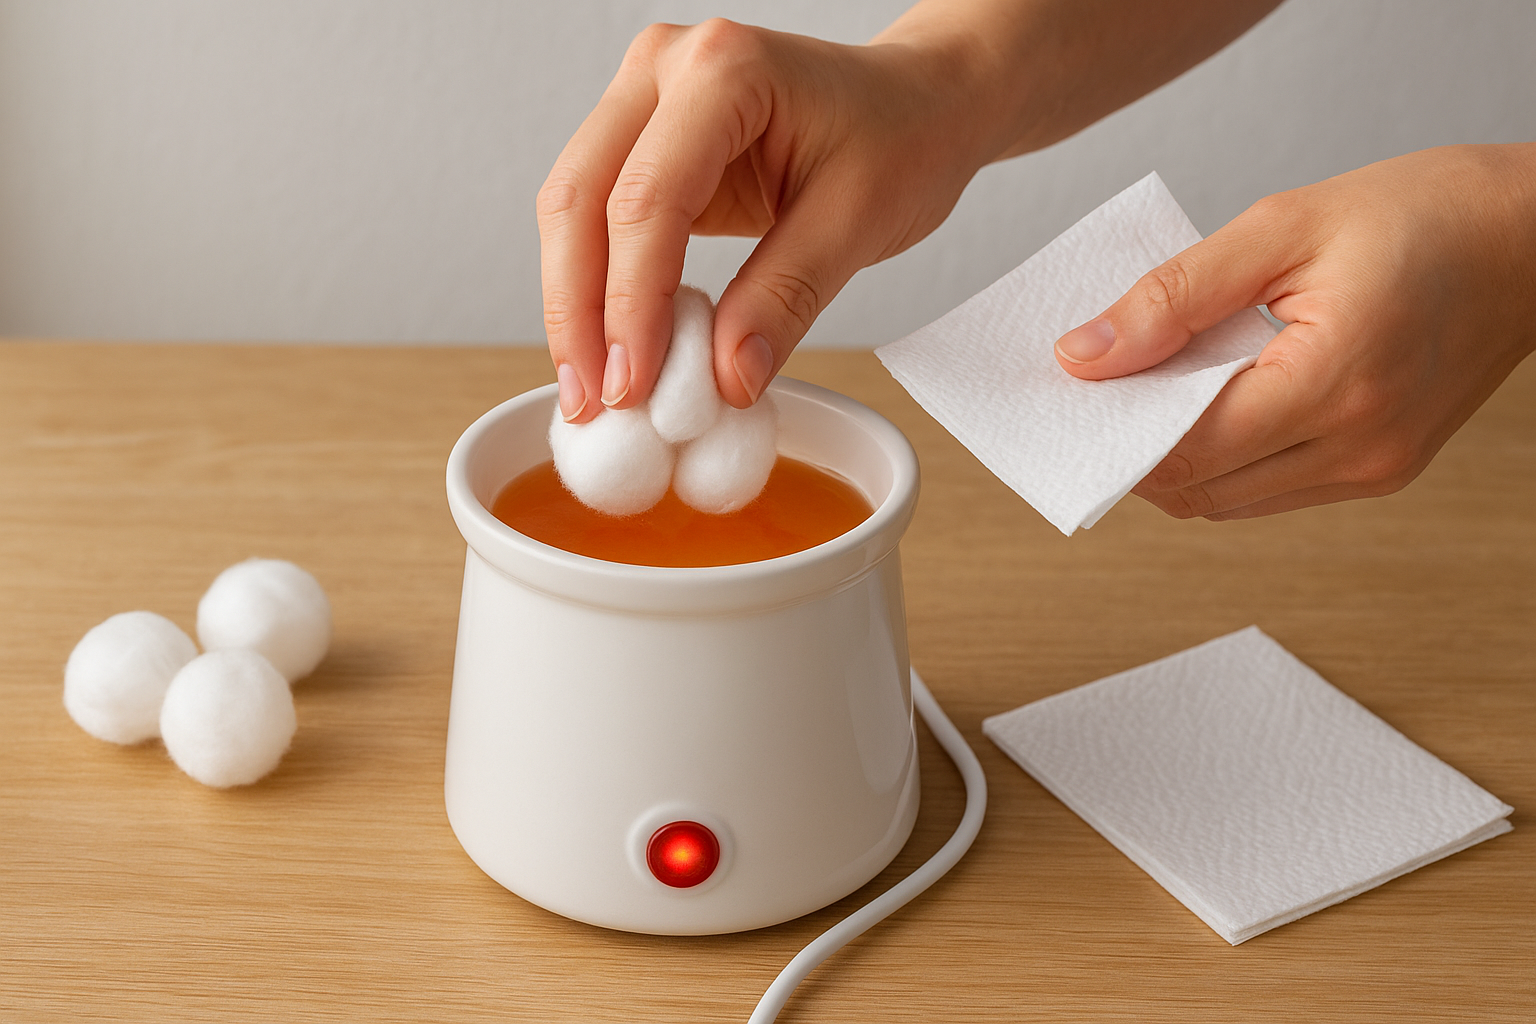
Don't squeeze the saturated cotton balls over the dish; move them straight to the trash to avoid drips.
Work in small sections if the dish is large. One cotton ball per pass keeps the process tidy and prevents wax from spilling over the edge.
Dispose of used wax safely
Drop the saturated cotton balls or paper towels into a small trash bag and seal it before tossing. Never wring them out over the sink. If a thin wax film remains, wipe it away with a dry paper towel while the dish is still slightly warm.
Step 3. Remove hardened wax with the least mess
When the wax in your warmer has fully solidified, the freeze method is the cleanest way to handle how to remove wax from a wax warmer without scratching the dish. Remove the dish from the warmer base first, then place it in the freezer.
Use the freezer to your advantage
Set the dish on a flat freezer shelf for 10 to 15 minutes. As the wax cools further, it contracts slightly and pulls away from the dish walls on its own.
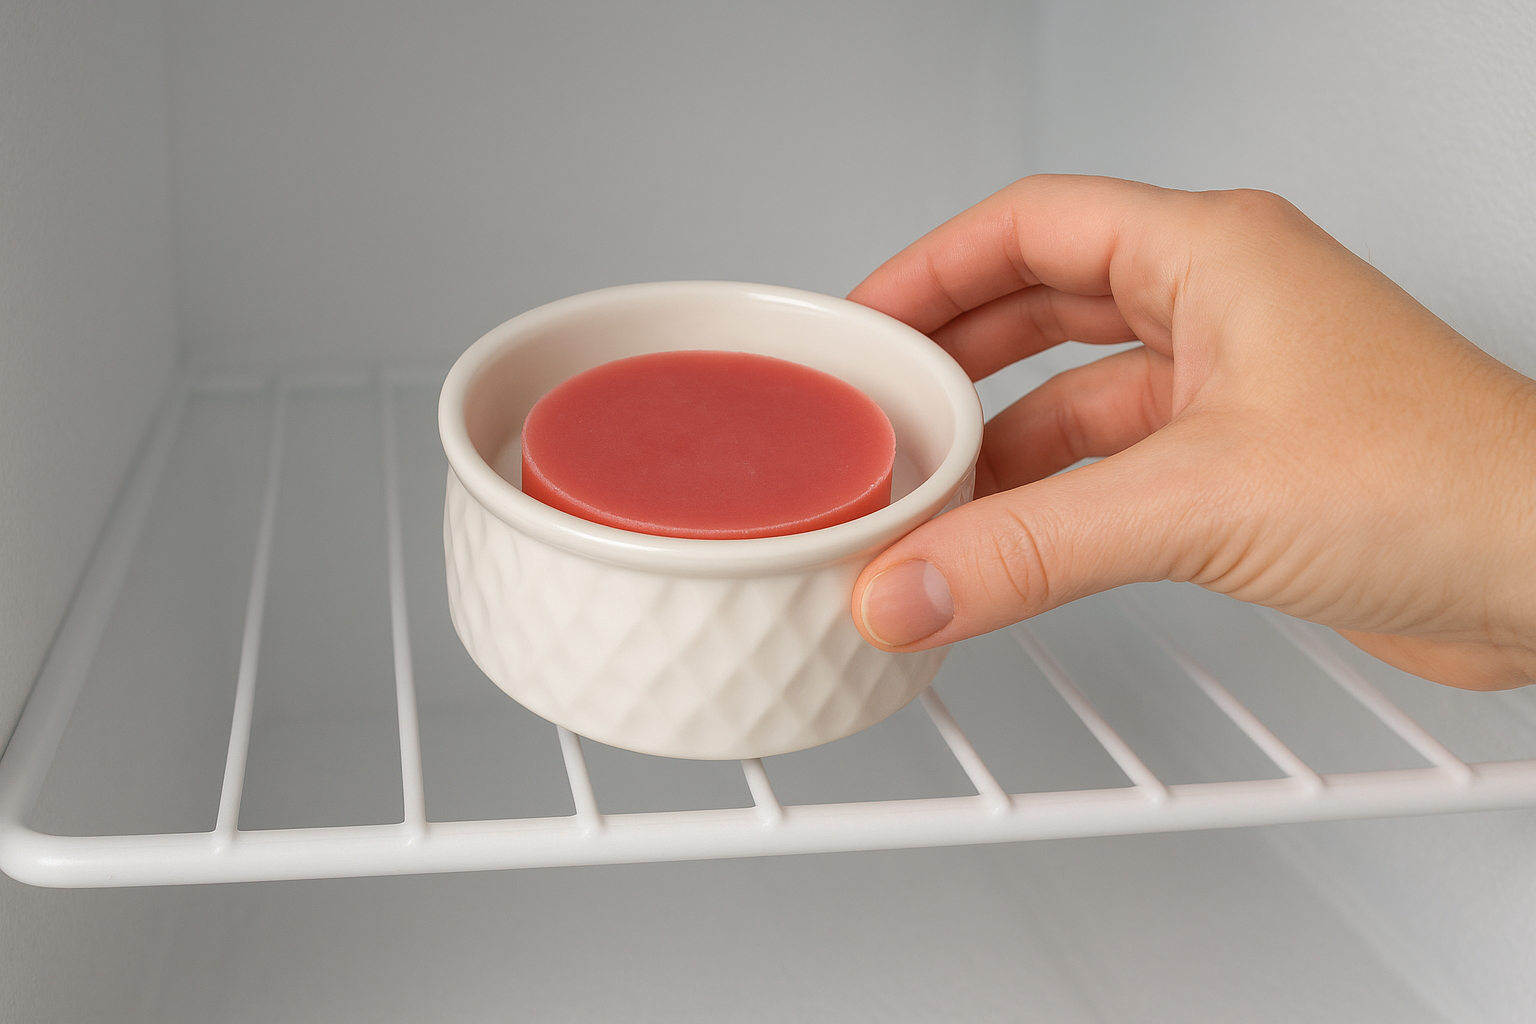
Ten minutes is usually enough; leaving the dish longer than 20 minutes rarely makes a noticeable difference.
Once you pull the dish out, press gently on one edge of the wax disc with your thumb. It should pop free in a single solid piece. Drop it directly into the trash.
When the wax sticks anyway
If a piece stays stuck, use a plastic spoon or wooden craft stick to apply light pressure around the edges. Avoid metal utensils entirely since they scratch glass and ceramic dish surfaces quickly. Work around the perimeter of the disc rather than pushing from the center, which can crack brittle wax into small fragments that are harder to collect.
Step 4. Clean the dish, base, and vents the right way
Once you've removed the bulk of the wax, a thin film usually stays behind on the dish. This final cleaning step is what keeps your warmer performing well and looking good, and it's the step most people skip when learning how to remove wax from a wax warmer.
Wipe the dish clean
Use a dry paper towel to wipe out any remaining wax film while the dish is still slightly warm. If the dish has cooled completely, place it back on the warmer for 30 to 60 seconds to soften the residue, then wipe again. Once the dish looks clear, it's ready for your next wax melt.
Avoid soap and water on the dish unless the manufacturer specifically says it's safe; moisture can cloud certain glass finishes over time.
Clean the base and vents
Wax drips on the base and clogged vents reduce your warmer's efficiency over time. Use a dry cotton swab to clear wax from vents and narrow gaps around the dish. For the outer surface, a dry microfiber cloth picks up residue without leaving lint behind. Keeping the base clean also prevents scent cross-contamination between wax changes, which matters most when you're switching between very different fragrance profiles.
Next Steps
Now that you know how to remove wax from a wax warmer cleanly and safely, the next move is keeping your warmer stocked with quality wax melts that are worth the effort. The method you choose matters, but so does what you put in the dish. Low-quality wax melts burn unevenly, leave more residue, and make every cleaning session harder than it needs to be.
Switching to a cleaner wax formula makes the whole process easier from start to finish. At Small Flame Candle Co., our wax melts use a coconut-soy wax blend with toxin-free fragrance oils that melt cleanly and wipe out with minimal residue. You get a stronger scent throw and less mess to deal with when it's time for a change. Browse our hand-poured coconut wax collection and find your next favorite scent today.