

7 Candle Pouring Techniques For Smooth, Even Burns Every Time
A candle that burns evenly from edge to edge doesn't happen by accident. It comes down to candle pouring techniques, the specific choices you make about temperature, timing, and method before the wax ever hits the jar. Get those wrong, and you'll end up with tunneling, sinkholes, wet spots, or frosting. Get them right, and every candle you make will look and burn the way it should.
At Small Flame Candle Company, we hand-pour every candle we sell. That means we've worked through the frustrations firsthand, the cracked surfaces, the uneven tops, the wicks that drown in their own wax pools. Years of pouring dozens of scent profiles (from bakery and fruit to novelty fragrances like Dr Pepper) have taught us what actually works and what's just repeated advice that doesn't hold up at the pour station. We built this guide from that experience, not from theory.
This article breaks down seven proven pouring techniques that address the most common problems candle makers face, whether you're filling your first container or looking to tighten up your process for consistent results at scale. We'll cover temperature control, single and double pours, layering methods, and the small adjustments that make a noticeable difference in your finished product.
1. Benchmark your pour with a reference candle
Before you adjust a single variable in your process, you need a clear picture of what success looks like. Most candle makers skip this step and end up chasing problems without knowing what they're actually trying to achieve. A reference candle gives you a concrete standard to compare your work against, so every change you make has a measurable target instead of a vague idea.
What to look for in a well-poured candle
A well-poured candle has a smooth, flat top surface with no cracks, sinkholes, or visible seams from a second pour. The wax should pull cleanly from the jar walls, with no white wet spots or opaque patches on the glass. Check the wick position as well. It should sit dead center, straight, and trimmed to the correct height before the first burn. These three visual checkpoints, surface, adhesion, and wick placement, give you a reliable baseline.
- Surface: flat and smooth with no cracks, divots, or rough patches
- Glass contact: minimal to no wet spots or wax separation along the walls
- Wick: centered, upright, and properly sized for the jar diameter
- Scent: detectable at room temperature without smelling sharp or chemical
How to use a sampler candle to set targets
A sampler candle is one of the most practical reference tools you have available. Light it, let it burn for two hours, and document what the melt pool looks like at that point. A full, even melt pool that reaches the jar edges without drowning the wick is your target. Write down the jar diameter, burn time, and wax depth so you have real numbers to work back from when troubleshooting your own batches.
A melt pool that reaches the jar edges within two to three hours of the first burn is the clearest sign that the wick size and pour were executed correctly.
How to translate what you see into your own pours
Once you have a solid reference point, use it to audit your own candles at each stage of production. Compare your top surface finish before the first burn and your melt pool shape after two hours of burning. If your candle produces a narrower melt pool or shows a rough top, you now have a specific gap to close. Applying structured candle pouring techniques is far easier when you measure against something real rather than guessing which variable caused the problem.
2. Control wax temperature with a double boiler
Temperature is the variable that controls almost everything about your finished candle. Using a double boiler instead of direct heat gives you the consistent, controllable warmth that solid candle pouring techniques require. Without it, your wax temperature will spike and drop unpredictably, making it nearly impossible to repeat good results from one batch to the next.
Why temperature control matters for smooth tops
Wax that's too hot when it hits the jar will shrink more as it cools, creating sinkholes and cracked surfaces. Wax that's too cool will trap air bubbles and produce frosting along the top and glass walls. Both problems trace back to the same root cause: inconsistent temperature at the moment of the pour.
Staying within a five-degree window of your target pour temperature is the single biggest factor in producing a smooth, consistent top.
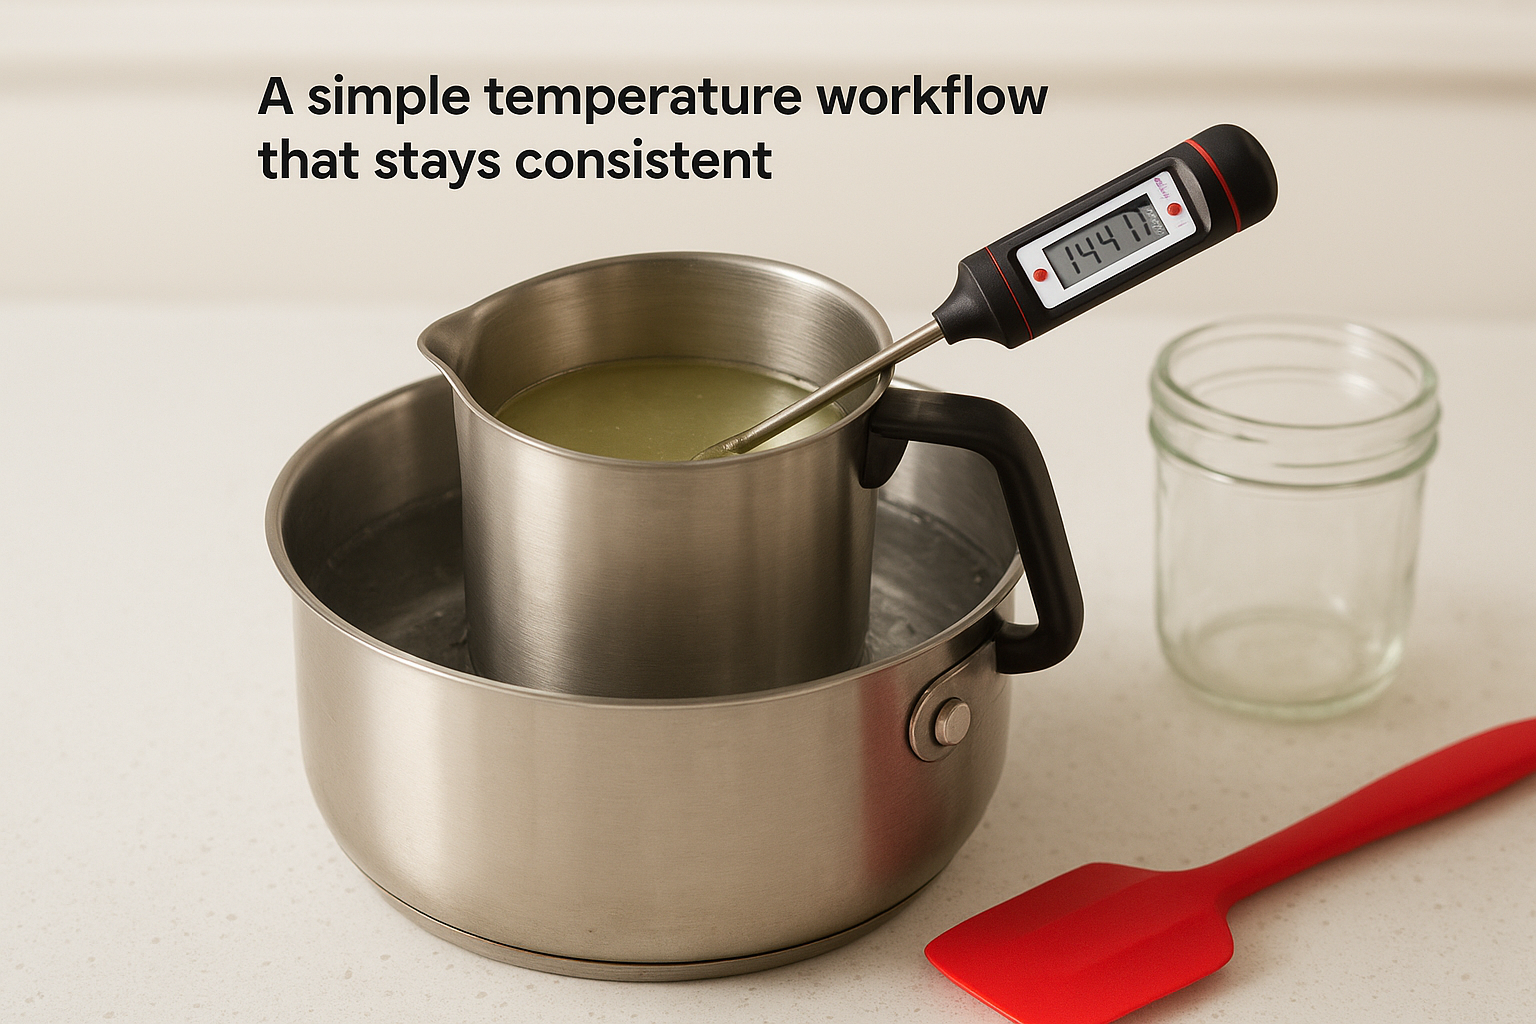
A simple temperature workflow that stays consistent
Heat your wax in a dedicated pouring pitcher placed inside a pot of simmering water. Clip a digital thermometer to the pitcher so you can monitor the temperature without holding it continuously. Once the wax reaches its melt point, cut the heat and let it drop to your target pour temp before filling your jars. Follow these steps in order every time:
- Melt wax to full melt point using the double boiler
- Add fragrance at the recommended bind temperature
- Watch the thermometer until the wax hits your pour window
- Pour steadily into prepped containers
Temperature ranges by wax type and what changes
Different waxes behave differently, so your pour temperature needs to match the specific wax you're using. Soy wax and coconut wax pour cooler, while paraffin and beeswax require higher temperatures to flow properly and adhere to container walls.
| Wax Type | Add Fragrance At | Pour Temperature |
|---|---|---|
| Soy wax | 180°F | 135-145°F |
| Paraffin | 185°F | 155-165°F |
| Coconut wax | 175°F | 125-135°F |
| Beeswax | 160°F | 145-155°F |
3. Prep and warm your vessels before you pour
Your containers need preparation before the wax arrives. A cold jar pulled straight from a shelf or storage box creates an immediate temperature difference the moment hot wax contacts it, and that gap causes more surface problems than most candle makers expect. Prepping your vessels is one of the most overlooked candle pouring techniques in beginner workflows.
How cold jars cause wet spots and sinkholes
When hot wax contacts a cold glass surface, it cools unevenly along the jar walls. That uneven cooling is what creates wet spots, those cloudy patches where wax has pulled away from the glass. A sharp temperature difference between your wax and your jar also accelerates sinkhole formation as the wax contracts faster than it can settle properly.
The closer your jar temperature is to your pour temperature, the better your wax will adhere to the glass and cool evenly from top to bottom.
Safe ways to warm containers and stabilize the room
Place your clean jars in an oven set to 150°F for about ten minutes before pouring. Remove them and let them rest on a heat-safe surface at room temperature rather than pouring immediately. Keep your workspace between 65°F and 75°F and avoid drafts from open windows or fans, since moving air cools the top surface faster than the rest of the candle.
Container choices that pour and burn more evenly
Straight-sided glass jars with a consistent diameter give you the most predictable melt pool because the wax depth stays uniform from edge to edge. Avoid containers with narrow necks or significant taper, since those shapes restrict airflow and make even burning much harder to achieve regardless of how carefully you pour.
4. Add fragrance and color at the right moment
The timing of when you add fragrance oil and color to your wax is not flexible. Add them too early and the heat will burn off your fragrance, reducing scent throw in the finished candle. Add them too late and the wax won't bind properly, leaving you with weak throw and uneven color distribution.
When to add fragrance oil for better binding
Most fragrance oils bind best when your wax sits between 175°F and 185°F, depending on the specific oil and wax combination. At this temperature, the wax is still fully liquid but cool enough to hold the fragrance compounds without breaking them down. Add your color blocks or liquid dye at this same point so the dye has time to fully incorporate while you stir.
Adding fragrance at the right temperature is one of the most impactful candle pouring techniques for improving scent throw without changing your formula.
How long to stir and how to avoid air bubbles
Stir your fragrance into the wax for at least two full minutes using a slow, steady motion. Fast stirring whips air into the wax, which shows up as small bubbles or a pitted top surface after the candle sets. Keep your stirring tool submerged and move it in long, controlled circles rather than quick back-and-forth strokes.
Common scent throw mistakes that start at the pour
Using too much fragrance oil is the most common mistake, starting from the assumption that more fragrance equals stronger throw. Most wax types max out at 6 to 10 percent fragrance load by weight. Exceeding that limit causes the oil to separate from the wax, producing a greasy surface, poor hot throw, and a potential fire hazard if excess oil pools around the wick.
5. Keep the wick centered and locked in place
A wick that drifts even a few millimeters off center will ruin an otherwise well-executed candle. It's one of the most common mistakes beginners make, and fixing it after the wax sets is far harder than preventing it at the start.
How wick position affects melt pool and tunneling
When your wick sits off-center, the melt pool develops unevenly, consuming wax faster on one side than the other. That imbalance leads directly to tunneling, where a narrow channel burns straight down through the candle while wax along the opposite wall remains completely untouched. Candle pouring techniques that prioritize wick placement early in the workflow prevent this problem before it starts.
Simple centering methods that do not slip
The most reliable approach is a wick centering bar laid across the top of the jar before you pour. Thread the wick through the slot, pull it taut, and secure the base to the jar bottom with a wick sticker or small dot of hot glue before adding any wax. Check the alignment from two angles, front to back and side to side, so you catch any lean before it gets locked in.
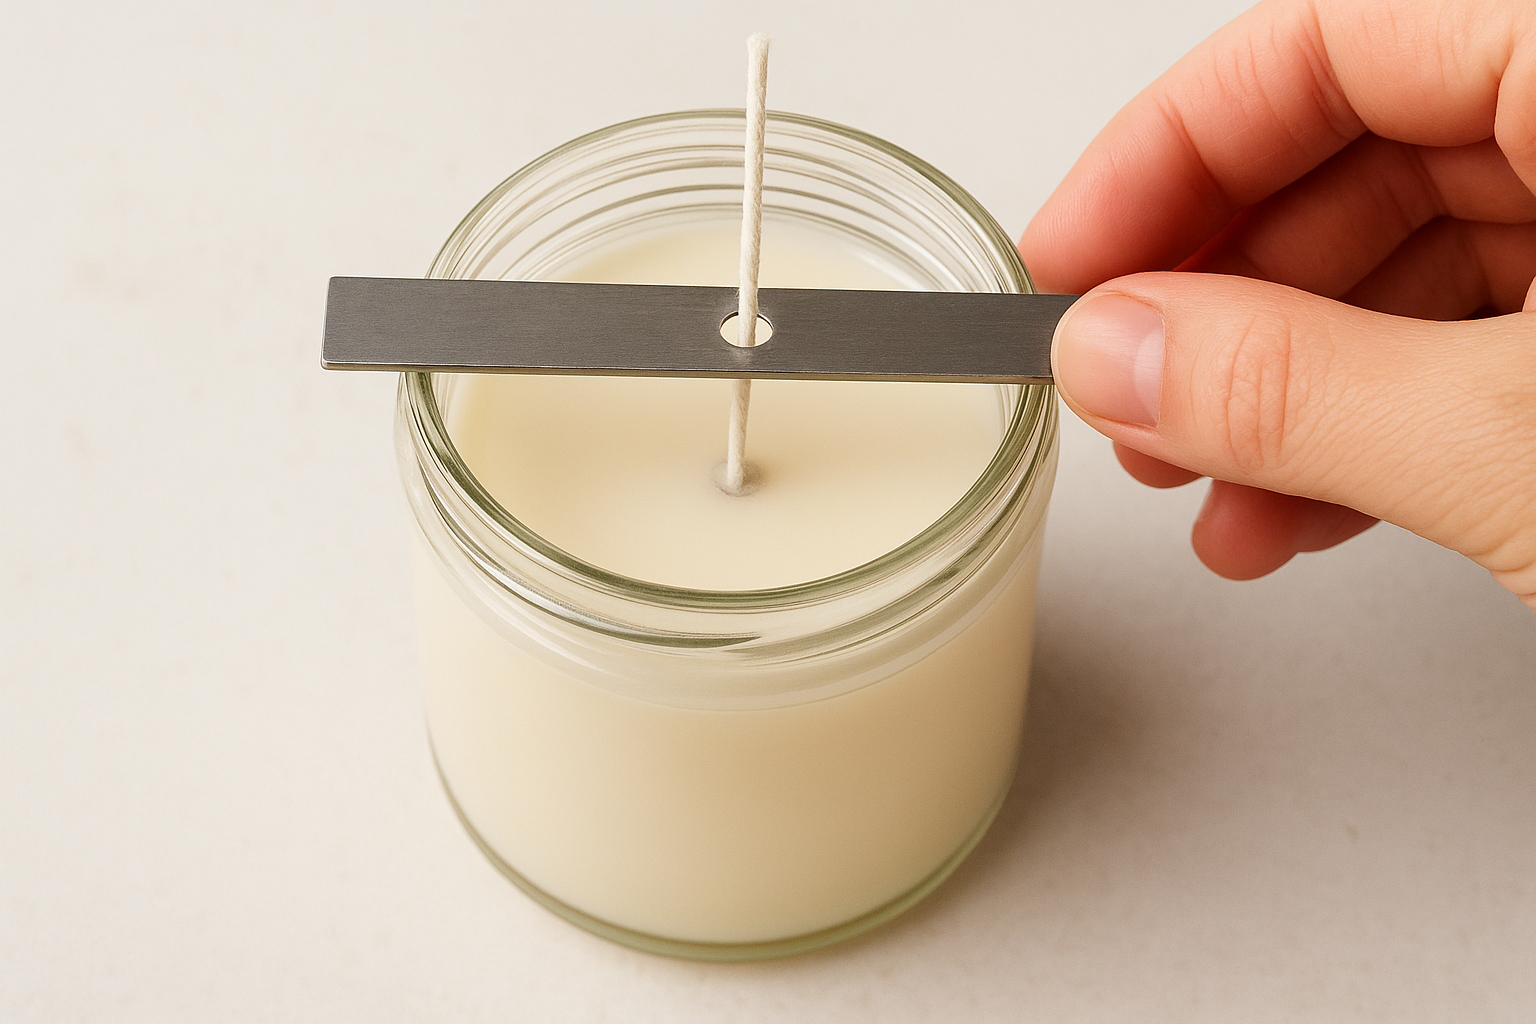
A wick that's straight and centered before the pour requires almost no correction afterward, which saves time across every batch.
Wick sizing basics for common jar diameters
Using the wrong wick size throws off your melt pool even when placement is perfect. Match your wick to your jar diameter using this reference:
| Jar Diameter | Recommended Wick Size |
|---|---|
| 2 inches | CD 10 or ECO 4 |
| 3 inches | CD 18 or ECO 10 |
| 4 inches | CD 24 or ECO 14 |
6. Pour slow, steady, and at the right pour temp
The actual moment of the pour is where many candle pouring techniques either succeed or fall apart. How fast you pour and where you direct the stream have a direct impact on the surface finish and structural integrity of your finished candle.
How pour speed affects frosting, bubbles, and lines
Pouring too quickly forces air into the wax as it hits the container, producing small bubbles and a rough, pitted surface after the candle sets. A fast pour also creates flow lines, visible rings in the finished wax that form when layers of wax cool at slightly different rates during the fill.
Slowing your pour to a thin, controlled stream is one of the simplest adjustments you can make to immediately improve surface quality.
Where to aim the stream and how to reduce splash
Direct your wax stream toward the inside wall of the jar rather than pouring straight down the center. Letting the wax run down the glass surface reduces splash, limits air introduction, and helps the wax settle evenly across the bottom. Tilt the jar slightly if needed, then return it to a flat, level surface before the wax firms up.
Batch pouring tips for making multiple candles fast
When filling several jars at once, pour each one halfway first, then go back and top each jar to its final fill line. This approach keeps your wax temperature consistent across the batch and gives each candle an even base before the surface layer is added. Keep your pouring pitcher at temperature between rounds using your double boiler setup.
7. Use a second pour and cure time to finish strong
A single pour rarely produces a finished surface on its own. Wax shrinks as it cools, pulling away from the center and leaving a cavity just below the top layer. A second pour and proper cure time are the final candle pouring techniques that separate a polished result from a rough one.
When to top off and how to prevent cavities
Let your first pour cool until the top surface has fully set but the wax is still slightly warm to the touch, typically one to three hours depending on room temperature and jar size. At that point, reheat your remaining wax to 5 to 10 degrees above your original pour temperature and fill in the depression with a thin, slow stream. Pouring too hot at this stage will melt the first layer and restart the shrinkage cycle.
Topping off while the first pour is still slightly warm helps the two layers bond cleanly instead of creating a visible seam.
How to fix rough tops with gentle surface heat
If your top surface looks uneven after the second pour, run a heat gun on its lowest setting in a slow, circular motion about two inches above the wax. This melts only the very top layer without disturbing the body of the candle. Avoid open flames for this step since direct heat from a lighter or torch is too concentrated and will scorch the wax.
Cure time and first-burn rules for even burns
Let your finished candles cure for a minimum of 48 hours before testing, and 72 hours is better for soy or coconut wax. On the first burn, let the melt pool reach the full jar diameter before extinguishing the flame. This sets the wax memory and prevents tunneling on every burn that follows.
A simple way to put this into practice
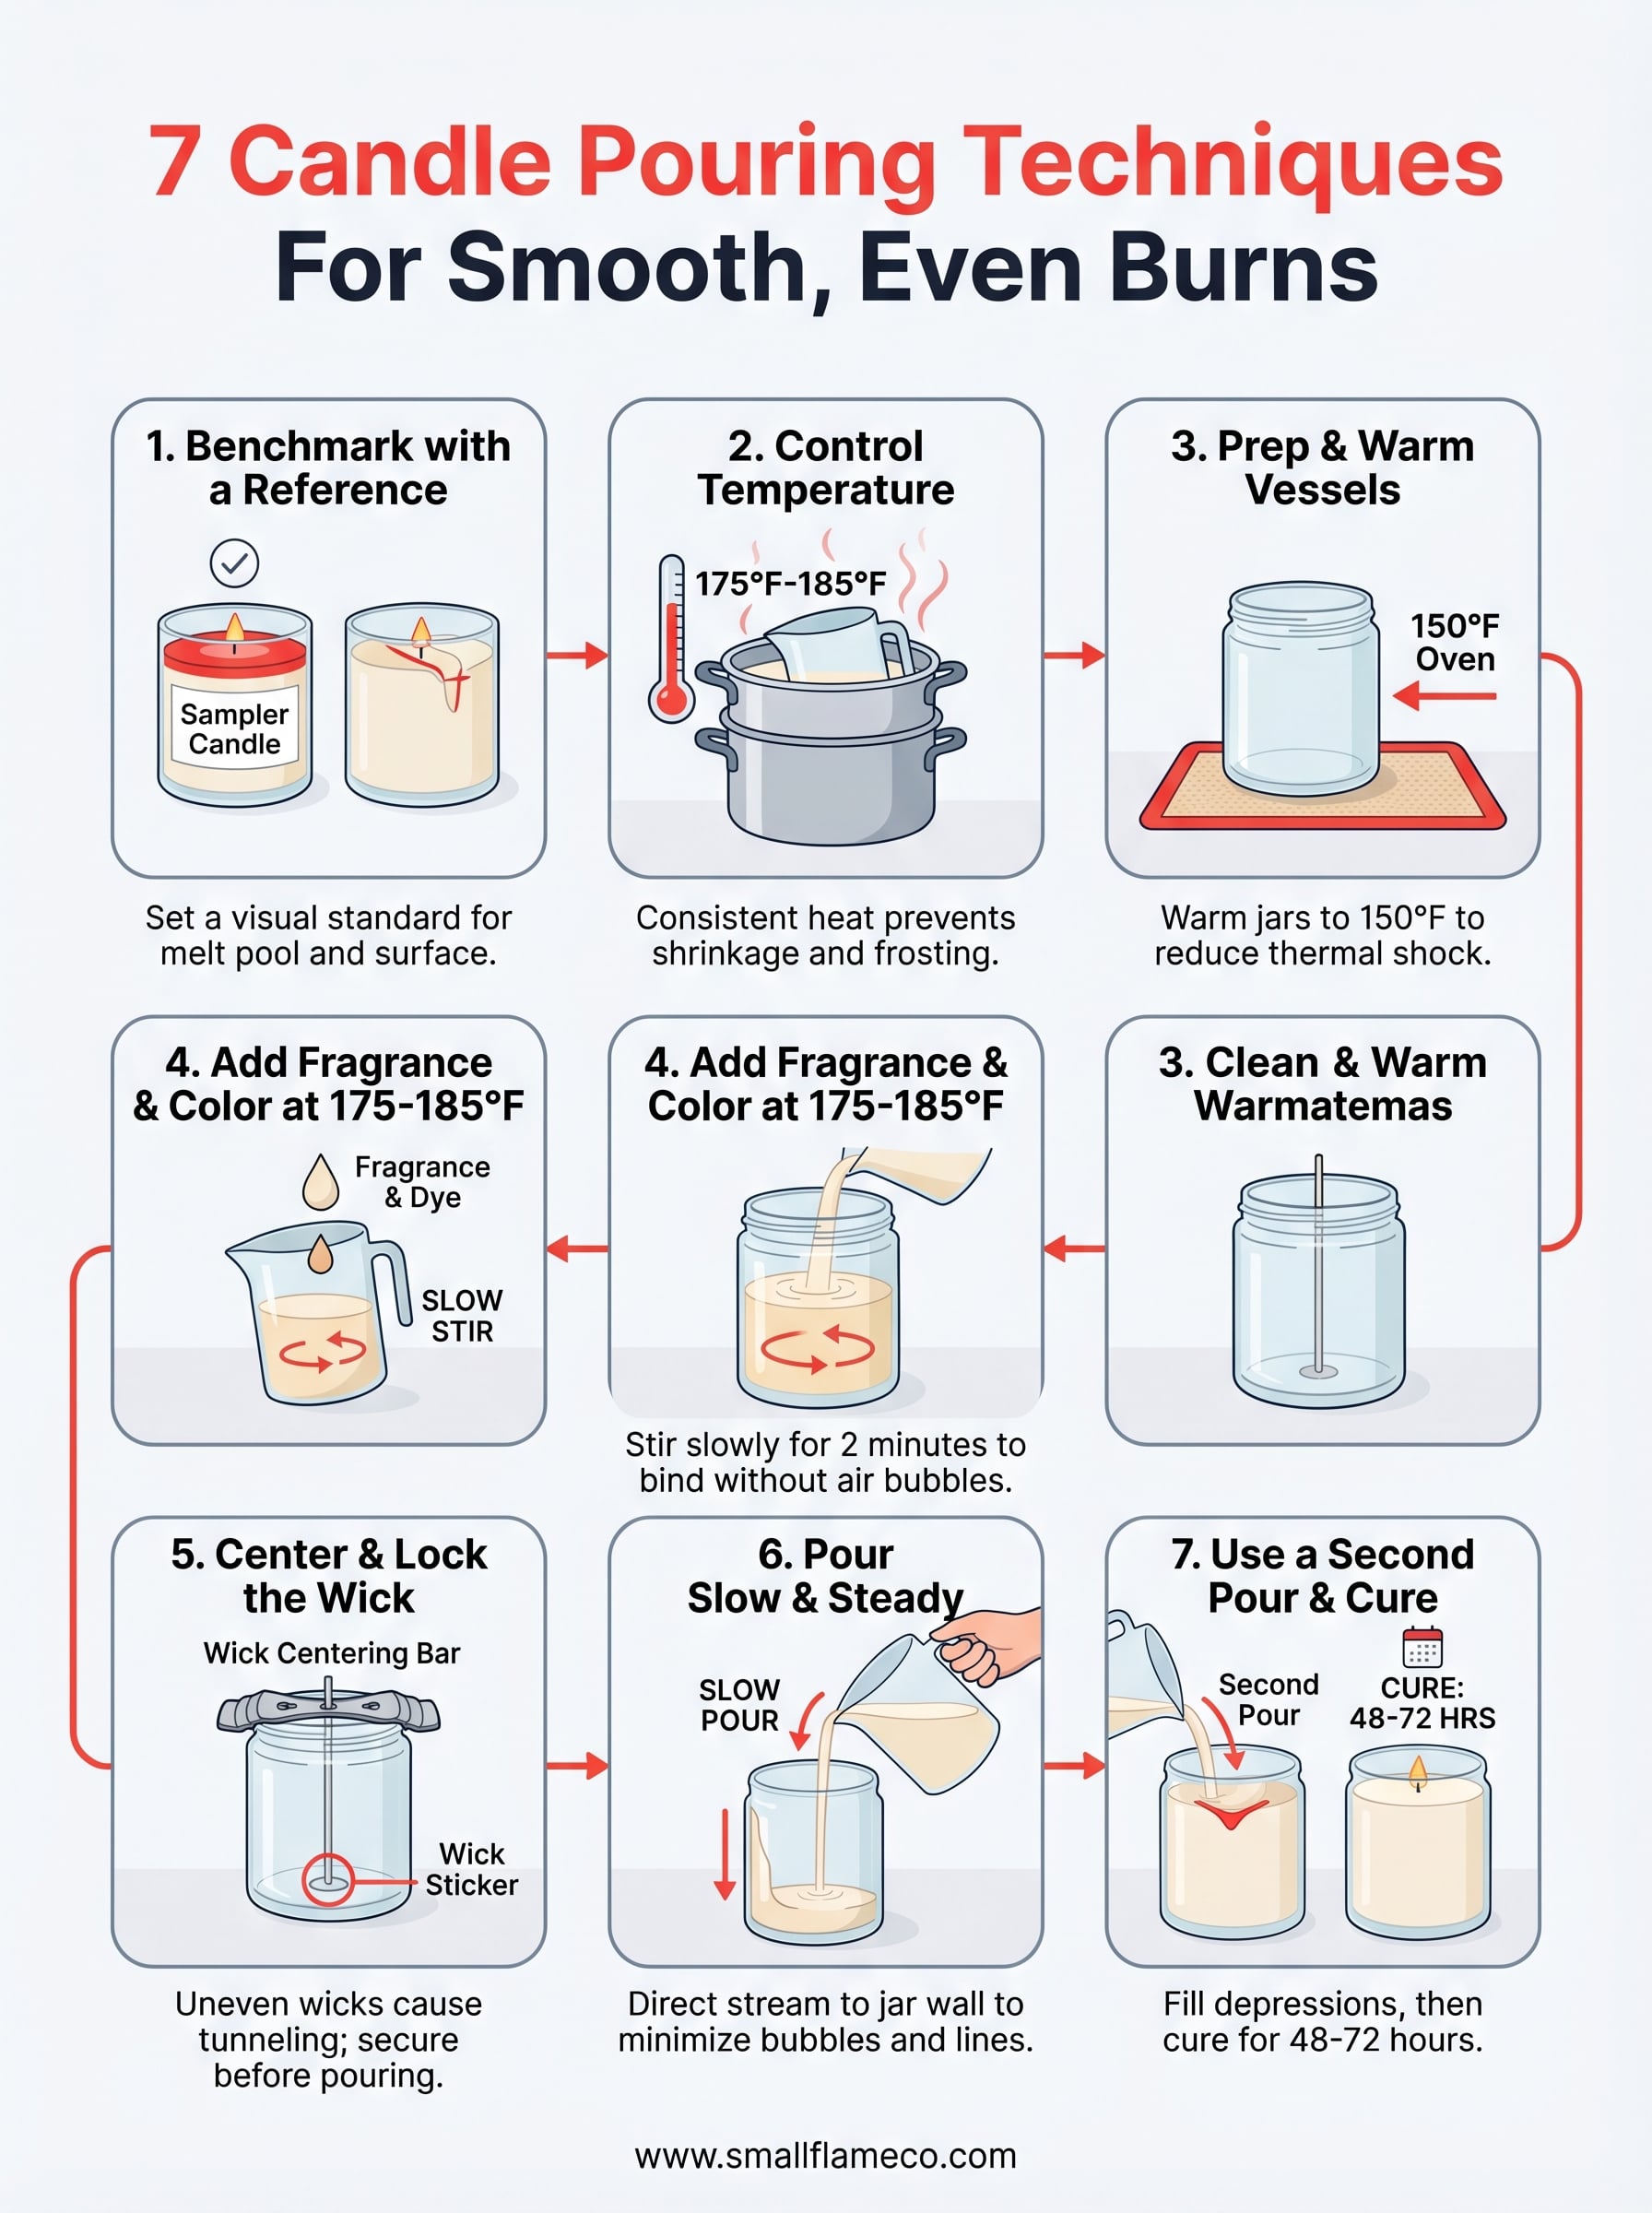
These seven candle pouring techniques work together, not in isolation. Start with a reference candle, lock in your temperature workflow, prep your containers, and time your fragrance addition correctly. Each step you get right reduces the variables that cause surface problems, tunneling, and uneven burns. You don't need to overhaul your entire process at once. Pick the technique that addresses your most common problem right now, apply it to your next batch, and measure the result against your reference candle.
Consistency is what separates a candle that burns well once from one that burns well every time. When you control your inputs, your finished candles reflect that care in every pour. If you want to see what that standard looks like in a finished product, browse the hand-poured coconut wax candles at Small Flame Candle Co. and use them as a benchmark for your own work.