
Taper Candle Storage: How To Store Taper Candles Safely
Taper candles add a timeless elegance to any room, until you pull them out of storage and find them bent, discolored, or stuck together. Knowing how to store taper candles correctly is the difference between lighting a flawless dinner table centerpiece and dealing with a warped, unusable mess. At Small Flame Candle Company, we hand-pour every candle we sell, so we understand exactly how wax responds to heat, humidity, and pressure over time.
Taper candles are more delicate than their jar or pillar counterparts. Their slim shape makes them especially prone to warping, even at room temperature if they're leaning against something or laid flat without support. Sunlight can fade dyed wax in a matter of weeks, and stacking them carelessly almost guarantees they'll fuse together in warmer months. These aren't hypothetical problems, they're the exact issues customers ask us about regularly.
The good news: proper storage isn't complicated. It just requires a few intentional choices about positioning, temperature, and packaging. This guide walks you through everything you need to keep your taper candles in perfect condition, whether you're storing them for a few weeks between dinner parties or tucking away a seasonal collection for months at a time.
What taper candles need in storage
Taper candles have four non-negotiable storage requirements: stable temperature, protection from light, vertical or fully supported horizontal positioning, and physical separation between individual candles. Skip any one of these, and you risk warped wax, faded color, or candles that arrive at the table stuck together. Understanding why each requirement matters helps you make smarter decisions about where and how you store them.
Temperature control
Wax softens at temperatures that feel perfectly comfortable to you. Most paraffin and soy-blend taper candles begin to lose their shape around 75 to 80 degrees Fahrenheit, which means a warm attic in July, a car trunk in summer, or even a sunny windowsill can do real damage within hours. Your storage space should stay below 70 degrees Fahrenheit year-round to keep tapers rigid and straight.
Aim for a consistent temperature between 50 and 70 degrees Fahrenheit. Fluctuating temperatures cause wax to expand and contract repeatedly, which weakens the candle and leads to surface cracks over time.
Humidity matters just as much as heat. High moisture levels cause wax to sweat, leaving a dull, oily film on the surface. A dry space with relative humidity below 60 percent is the sweet spot for long-term taper storage.
Light and UV exposure
Sunlight and strong indoor lighting fade dyed wax faster than most people expect. A colored taper candle left near a window can lose its vibrancy within a few weeks, even if it never gets warm enough to warp. Store your tapers in opaque containers or drawers to block UV exposure entirely.
Common light sources that damage stored candles include:
- Direct sunlight through windows or skylights
- Fluorescent overhead lighting in storage rooms
- Halogen or incandescent bulbs in enclosed spaces
Physical support and separation
Taper candles need to stay straight and apart from each other during storage. Gravity and pressure are the main culprits behind warped candles, and both act slowly enough that you might not notice the damage until you're ready to use them. If you store tapers horizontally without full-length support, the middle sags; if you bundle them together, the weight of neighboring candles pushes them out of shape.
Individual wrapping keeps candles separated and scratch-free, which matters most for tapered bases that need to fit snugly into a holder. The steps below cover exactly how to store taper candles using all of these principles.
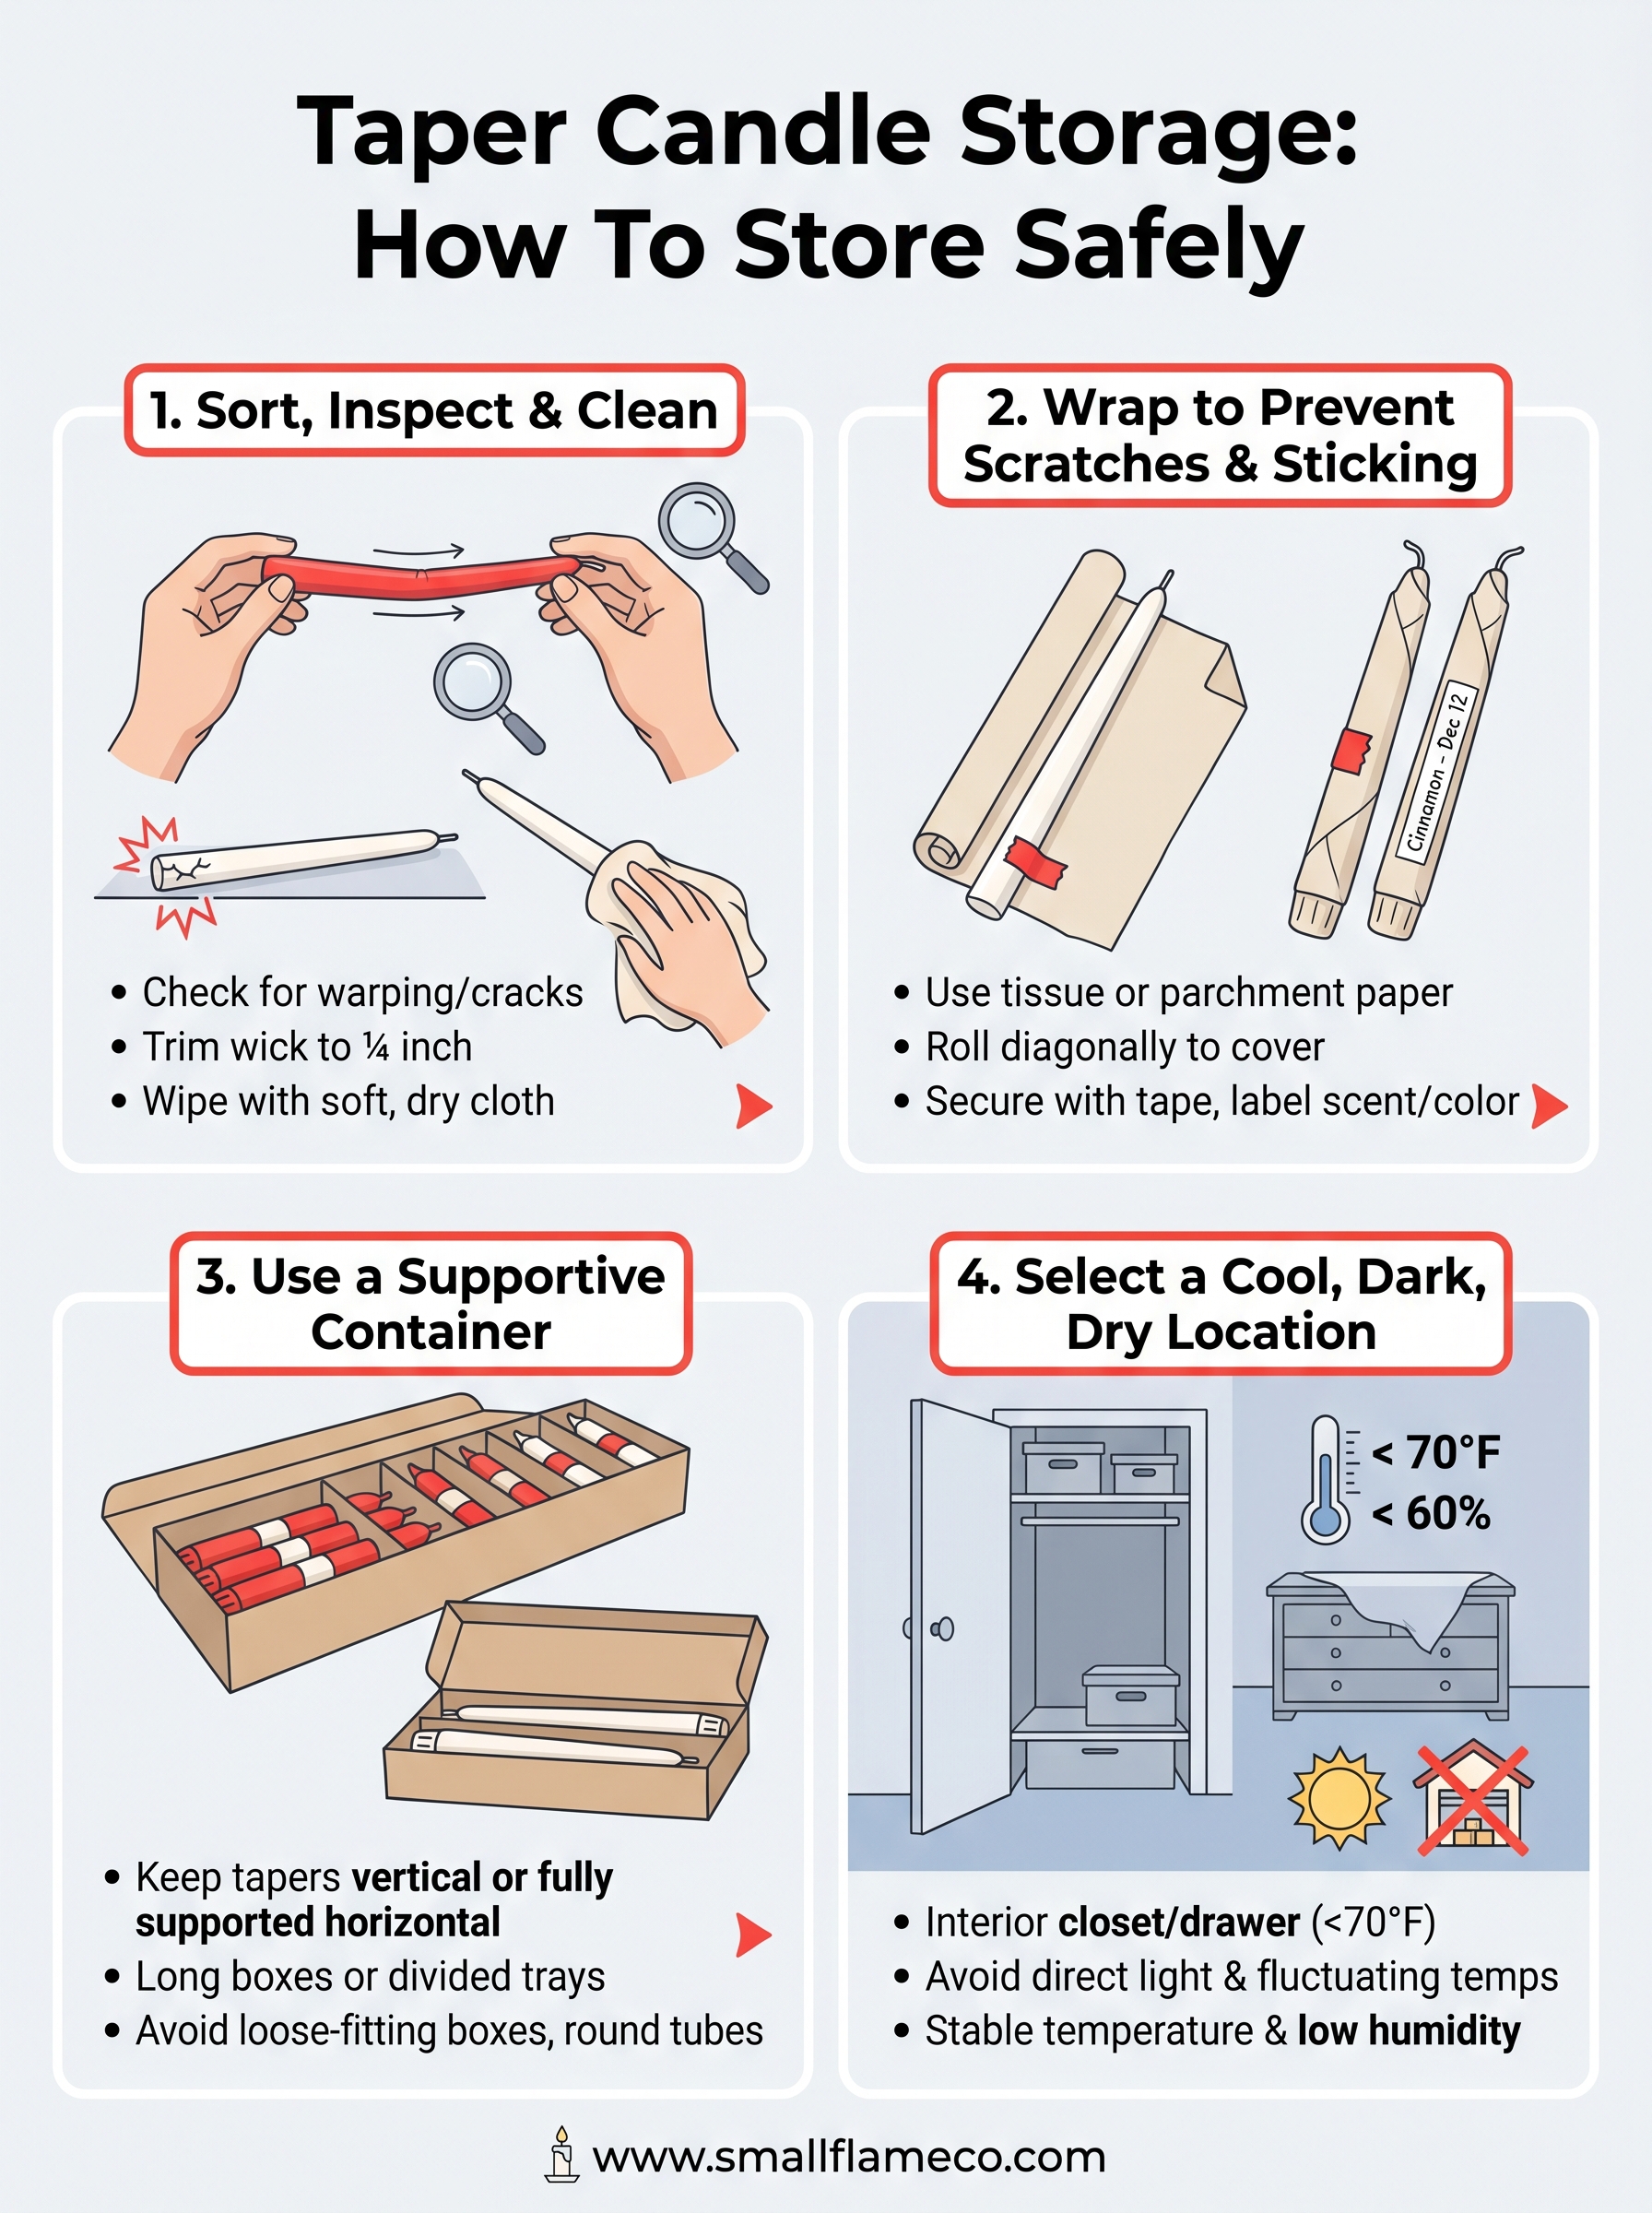
Step 1. Sort, inspect, and clean each candle
Before you think about containers or storage spots, spend a few minutes going through each candle individually. Knowing how to store taper candles correctly starts here, with filtering out damaged ones and preparing the rest for long-term storage. Skipping this part means potentially storing problem candles alongside perfect ones, which causes more issues later.
Check for warping and damage
Hold each taper vertically at eye level and look down its length like a level. Any bend or curve will be obvious from this angle. Lay it flat on a hard surface and check whether all four sides make full contact with the table. A candle that rocks or arches in the middle has already warped and will not sit straight in a holder. Set those aside; they are still usable for casual settings, but do not mix them with your straight candles during storage.
If a taper has deep surface cracks or a split base, replace it before storing the rest. A cracked candle can shed wax flakes onto neighboring candles and cause sticking.
Check each wick for fraying or mushrooming as well. Trim any charred wick down to a quarter inch with scissors before the candle goes into storage.
Remove dust and residue
Wipe each candle with a soft, lint-free cloth before packing it away. Dust and fingerprint oils trap moisture against the wax surface, which leads to that dull, greasy film mentioned earlier. A dry cloth is all you need for most candles; avoid water or solvents, as both can permanently dull the wax finish. This quick cleaning step keeps stored tapers looking display-ready the moment you pull them out.
Step 2. Wrap candles to prevent scratches and sticking
Wrapping each taper individually is one of the most important steps in how to store taper candles long-term. Without a barrier between candles, wax surfaces rub together, picking up scratches or fusing completely in warm conditions. A few seconds of wrapping per candle protects your investment and keeps each one looking fresh when you pull it out.
Best wrapping materials
Not every material works well against wax. Tissue paper and unbleached parchment paper are the two best options because they are soft, lint-free, and do not stick to wax surfaces even in warmth. Avoid plastic wrap and newspaper; plastic traps moisture against the candle, and newspaper ink can transfer directly onto light-colored wax.
Good wrapping materials to keep on hand:
- Acid-free tissue paper (widely available at craft supply stores)
- Unbleached parchment paper cut into six-inch strips
- Plain white paper towels (only for short-term storage)
How to wrap each candle
Start at the base of the candle and roll it diagonally across the paper, angling slightly so each layer overlaps by about half an inch. This technique keeps the entire surface covered without bunching at the tip. Secure the end with a small piece of tape rather than folding, which can leave creases in soft wax.

Wrap the base with an extra half-sheet of tissue before rolling. The base takes the most pressure inside a container, so that extra padding prevents the hairline cracks that make a taper difficult to fit into a holder.
Once wrapped, write the scent or color directly on the paper with a pen if you are storing multiple varieties or sets. This small step saves you from unwrapping every candle just to identify it.
Step 3. Choose a container that keeps them straight
The right container does two jobs at once: it keeps tapers vertical or fully supported horizontally, and it prevents them from shifting during storage. When you're figuring out how to store taper candles for more than a few days, the container choice matters as much as the wrapping. A loose-fitting box lets candles roll and knock against each other, undoing all the prep work from the previous steps.
Containers that work well
Long, narrow boxes are the most practical option for taper candles. Cardboard gift boxes designed for wine bottles, wrapping paper tubes with end caps, and divided craft boxes all work well because they match the candle's length and limit movement on every side. If you're storing tapers horizontally, the container needs to be long enough that neither end overhangs the edge of the support.
Here are four container options ranked by how well they protect tapers:
| Container Type | Support Level | Best For |
|---|---|---|
| Divided craft storage box | Excellent | Multiple candles, long-term |
| Wine gift box (12-inch+) | Good | Pairs or small sets |
| Wrapping paper tube with caps | Good | Single candles, seasonal storage |
| Shoebox (tapers laid flat) | Fair | Short-term only |
What to avoid
Avoid any container where candles can slide freely from end to end. Round tubes without caps and open bins are the two most common mistakes. Plastic storage bins without dividers also create pressure points where stacked tapers lean against each other, causing warping over several weeks, especially in warmer months.
If your container has extra space after loading, fill the gaps with crumpled tissue paper to keep each candle firmly in place.
Step 4. Pick the right storage spot at home
Once your tapers are wrapped and loaded into the right container, location determines everything about how well they hold their shape long-term. Knowing how to store taper candles is only half the job; the other half is choosing a consistent, controlled environment inside your home where temperature and light stay predictable.
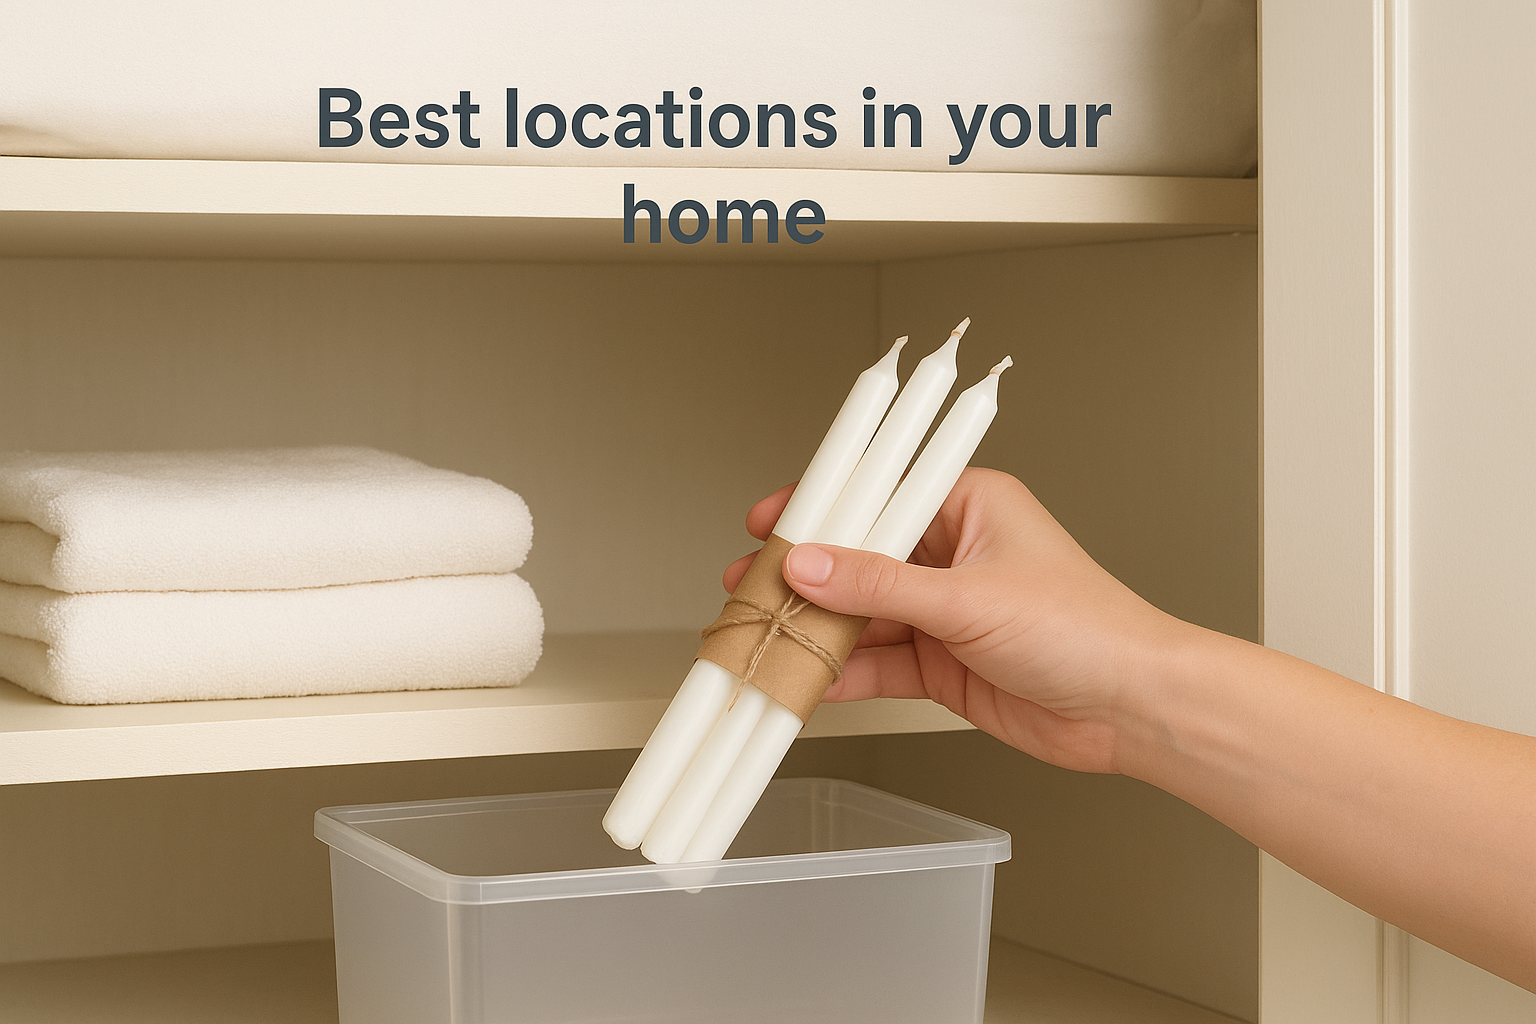
Best locations in your home
The ideal spot keeps your tapers cool, dark, and dry without requiring any special equipment. Interior closets on the ground floor work extremely well because they avoid the temperature swings common in attics and garages. A linen closet, bedroom wardrobe shelf, or under-bed storage drawer all fit that description, provided the space stays below 70 degrees Fahrenheit year-round.
Basements can work if they are climate-controlled and dry. Avoid unfinished basements with humidity issues, since moisture causes wax to develop a dull, sweaty surface that is difficult to remove.
Use the following checklist to confirm your chosen spot qualifies:
- Temperature stays consistently below 70°F
- No direct sunlight or strong artificial light reaches the container
- Humidity stays below 60 percent
- The surface is flat and stable so tapers remain fully supported
Spots to skip entirely
Garages, attics, and cars cycle through extreme temperatures with the seasons, making them poor choices even for short-term storage. The interior of a parked car in summer can exceed 130 degrees Fahrenheit, which is enough to warp an entire set of tapers within a single afternoon.
Kitchen cabinets near the stove or above the refrigerator also run warmer than the rest of your home. Heat rising from appliances keeps those spots several degrees higher than the ambient room temperature, which adds up quickly over weeks of storage.
Keep your tapers ready to use
Knowing how to store taper candles correctly means you spend less time dealing with bent or fused wax and more time enjoying a well-set table. The four steps in this guide handle every real risk: warping, sticking, fading, and cracking. Sorting, wrapping, containerizing, and picking the right location each do a specific job, and together they keep your tapers in display-ready condition for months.
Pull your candles out a few hours before use and let them reach room temperature gradually, especially if you store them somewhere cool. This prevents minor condensation from forming on the wax surface. Inspect each candle quickly before placing it in a holder, check for any warping that developed during storage, and trim the wick to a quarter inch if you have not done so already.
For hand-poured candles worth storing and displaying with care, browse the Small Flame Candle Co. collection and find a scent that suits your space.