

Why Is My Candle Tunneling? Causes, Fixes, And Prevention
You lit your candle, walked away, and came back to find a narrow hole burning straight down the center, wax clinging stubbornly to the sides of the jar. If you've ever asked yourself "why is my candle tunneling," you're dealing with one of the most common (and most frustrating) candle problems out there. The good news: it's almost always fixable, and entirely preventable once you understand what's going on.
Tunneling wastes wax, shortens burn time, and buries the wick until it can barely stay lit. At Small Flame Candle Company, we hand-pour every candle we sell, so we spend a lot of time thinking about how wax behaves, and helping our customers get the most out of each jar. That hands-on experience is exactly what shaped this guide.
Below, we'll walk through the specific reasons candles tunnel, from first-light mistakes to wick sizing issues. Then we'll cover proven methods to rescue a candle that's already tunneling, and simple habits that keep it from happening again.
What candle tunneling is and why it happens
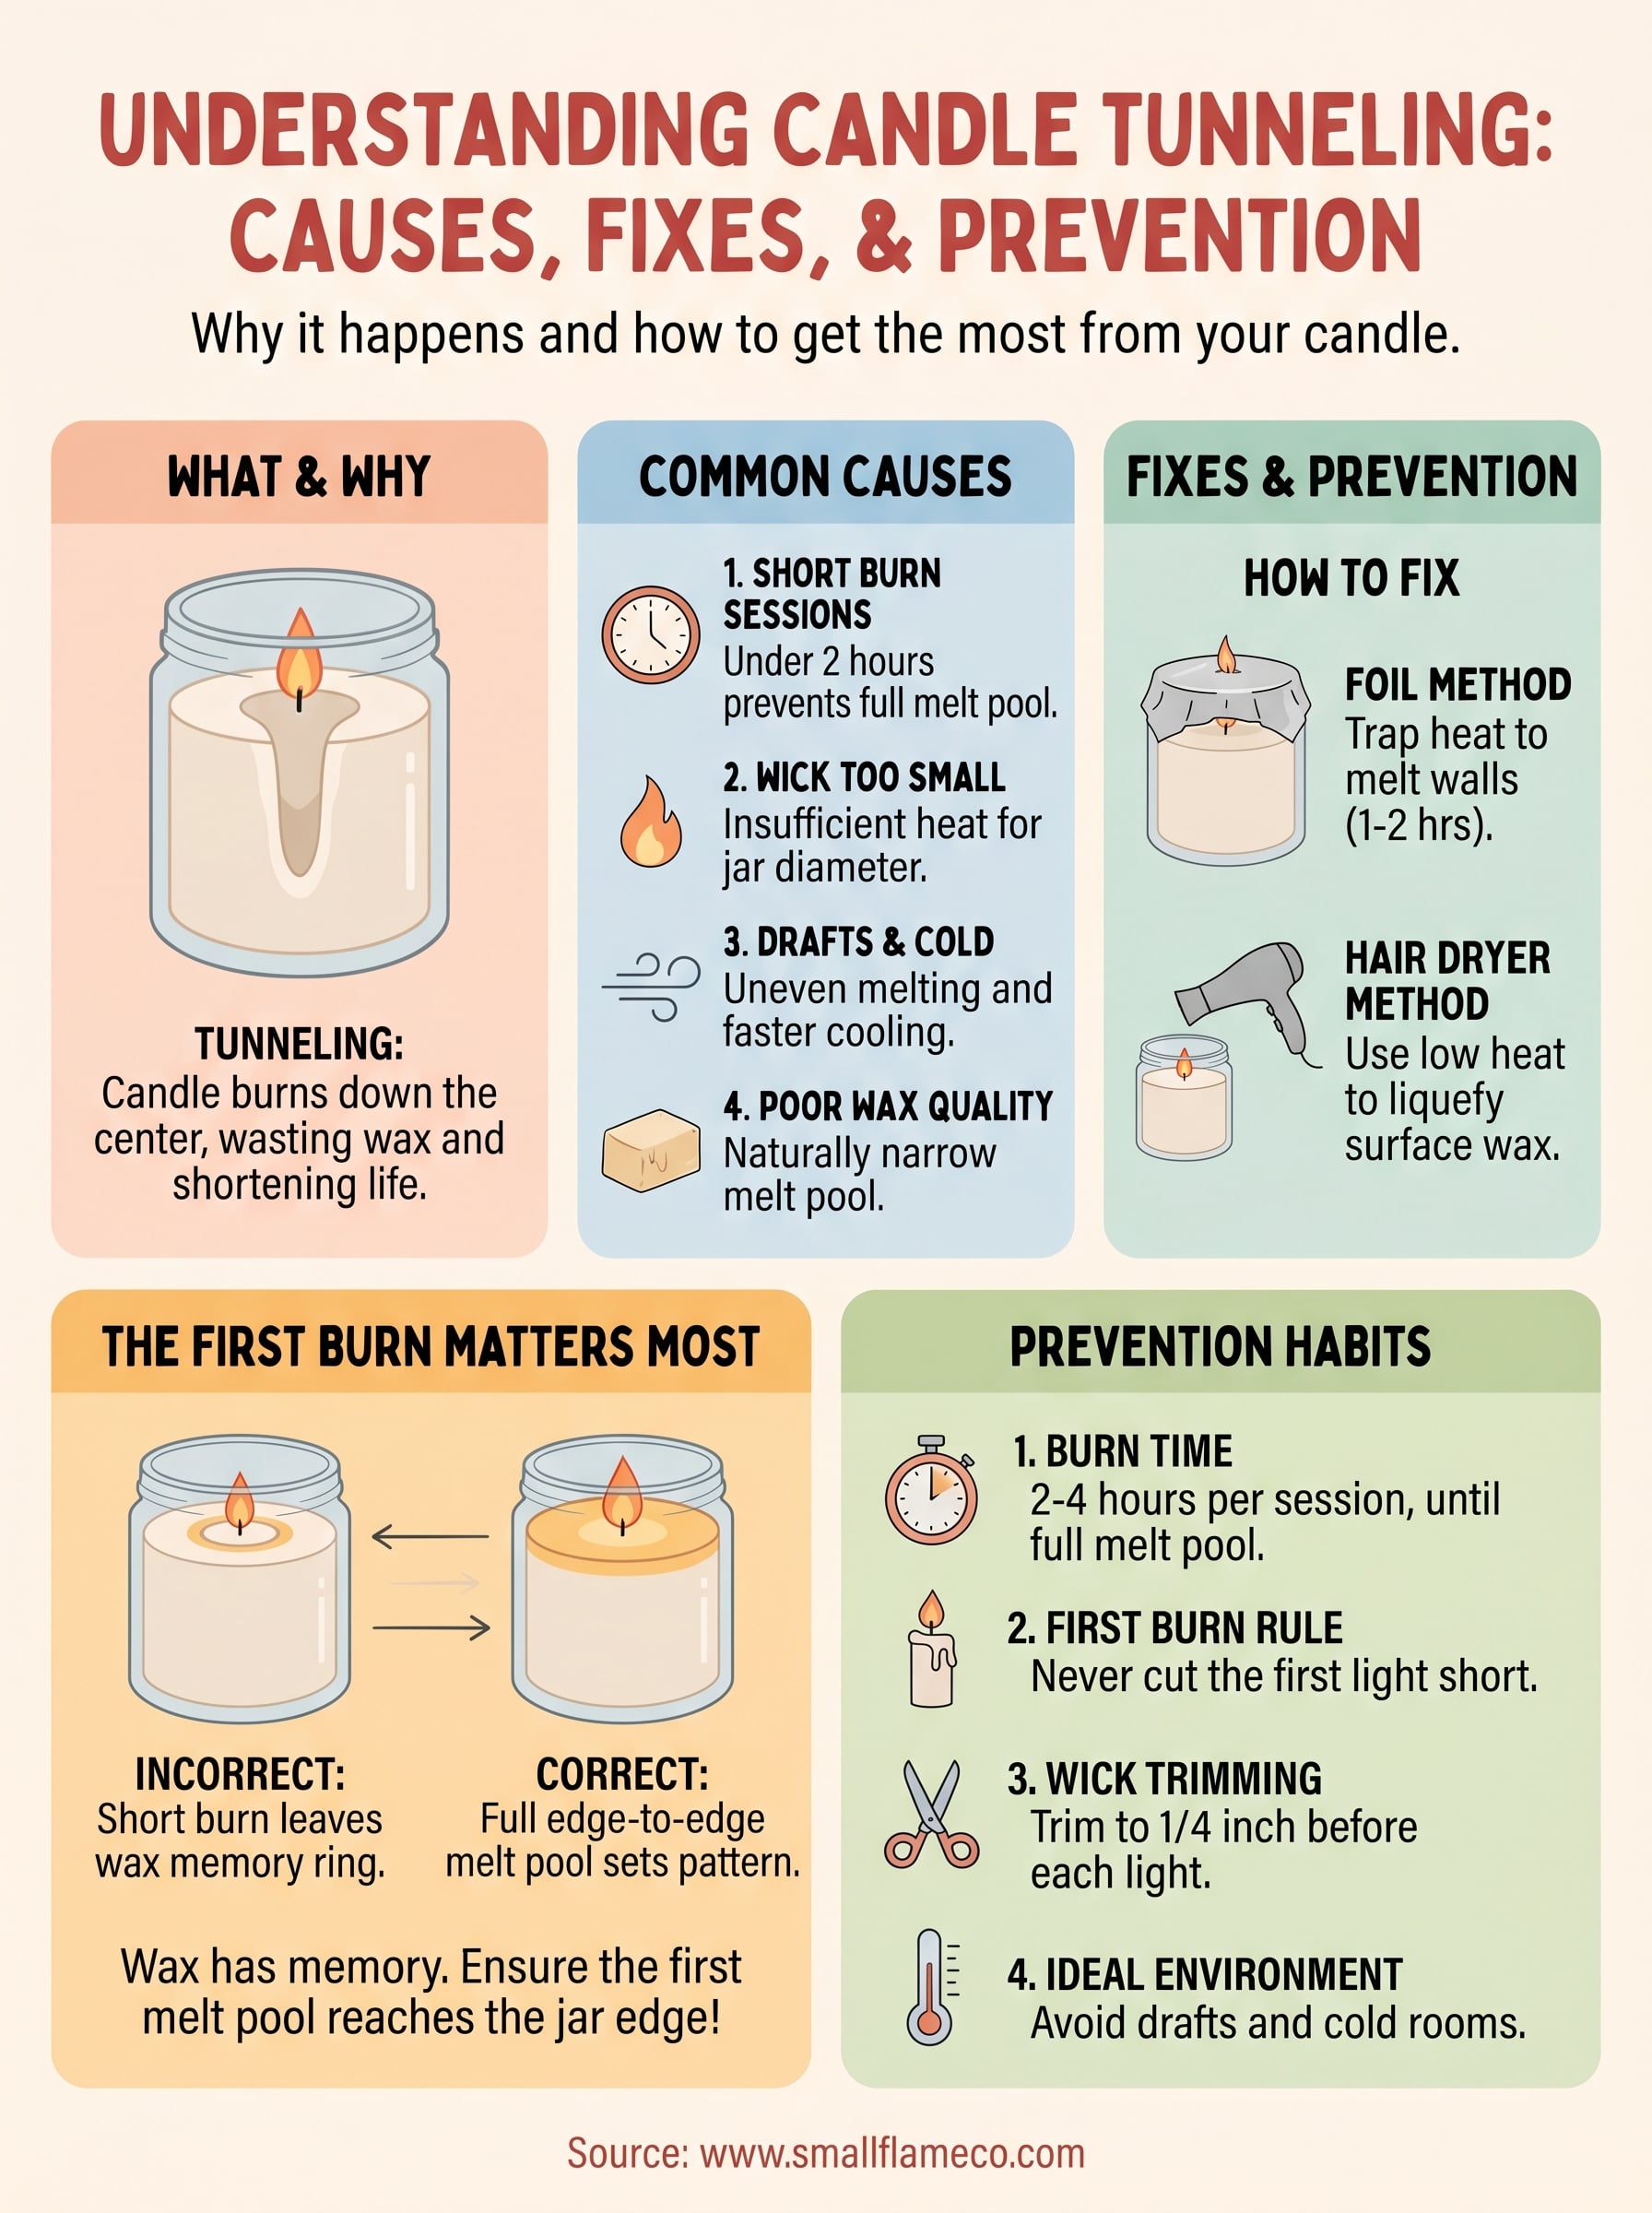
Candle tunneling is when your candle burns straight down the center instead of melting the wax evenly across the entire surface of the jar. You're left with a deep, narrow hole surrounded by a thick ring of unused wax clinging to the sides. That wasted wax means you're losing both fragrance throw and total burn time, sometimes cutting a candle's usable life in half before the wick even gets close to the bottom.
Why the first burn matters most
The single biggest reason people ask "why is my candle tunneling" comes down to the very first time they light it. Wax has a memory effect: the melt pool from the first burn sets a physical pattern in the wax, and every burn after it follows that same pattern. If you extinguish your candle before the wax melts all the way out to the jar's edge, you leave a raised ring of solid wax around the perimeter, and the candle keeps following that ring on every subsequent burn.

Always let your candle burn long enough on the first light to form a complete, edge-to-edge melt pool before you blow it out.
Other common causes of tunneling
Short burn sessions are not the only culprit. Several other factors can push a candle toward tunneling, and knowing them helps you pinpoint exactly what went wrong in your specific situation.
- Wick too small for the jar diameter: An undersized wick can't produce enough heat to pull the melt pool to the edges, regardless of how long you burn it.
- Cold or drafty environment: Moving air pulls heat away unevenly, which causes inconsistent melting across the wax surface.
- Very cold room temperature: A cold space makes the wax re-solidify faster, reinforcing tunnel patterns with each burn.
- Low-quality or poorly formulated wax: Some wax blends have a naturally narrow melt pool that no burn time can fully correct.
Step 1. Figure out what's causing your candle to tunnel
Before you fix anything, you need to identify the root cause of the problem. Not all tunneling comes from the same place, and the fix you choose depends entirely on what triggered it in your situation.
Ask yourself these diagnostic questions
Think back to how you've been burning your candle. If you're wondering why is my candle tunneling, these four questions will point you toward the specific cause:
| Question | What it reveals |
|---|---|
| Did you blow it out before the melt pool reached the jar edge? | First-burn wax memory |
| Have your burn sessions been under two hours? | Insufficient heat buildup |
| Is the candle sitting near a vent, fan, or open window? | Draft interference |
| Does the room stay below 65°F regularly? | Cold ambient temperature |
Check the wick size
Look at the flame height while your candle burns. A healthy flame sits roughly 3/4 to 1 inch tall and produces a full, steady heat across the wax surface. If yours looks small and barely flickers, the wick is likely too narrow for the jar diameter, and extended burn sessions alone won't fix that problem.
If your burn habits check out, a weak or undersized wick is the next most likely reason for tunneling.
Step 2. Fix a candle that has already tunneled
Once you've confirmed why is my candle tunneling, you can take action to rescue the wax still clinging to the sides. Two reliable methods work on most tunneled candles, and both require items you likely already own.
The aluminum foil method
This is the most effective fix for deep tunneling. Fold a piece of aluminum foil over the top of the jar, leaving a small opening in the center to let the wick breathe. Light the candle and let it burn for one to two hours. The foil traps heat and forces the surface temperature to climb high enough to melt the wax walls back into the pool.
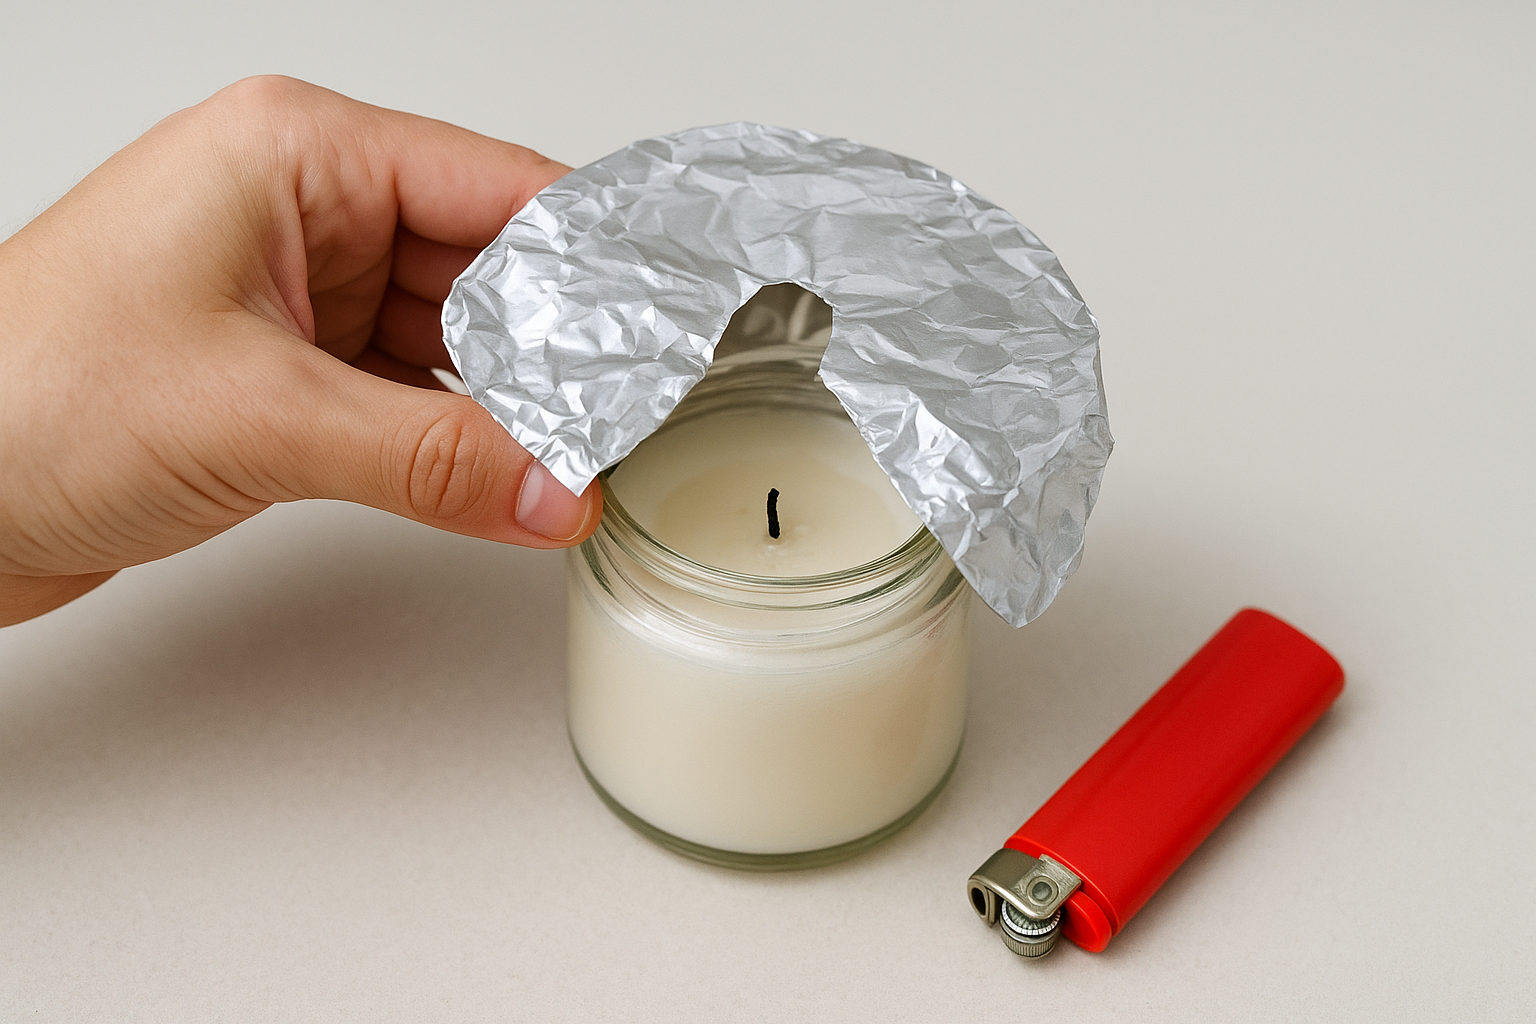
This method works best when the tunnel is less than one inch deep. Deeper tunnels may need two separate burn sessions to fully level out.
The hair dryer method
If the tunnel is shallow, a hair dryer set to low heat can melt the wax walls without lighting the candle at all. Hold the dryer four to six inches away from the jar opening and move it in slow circles around the edge. Once the surface wax liquefies and levels out, let the jar cool completely on a flat surface before your next burn.
Step 3. Prevent tunneling on every future burn
Once you understand why is my candle tunneling, prevention is simple. A few consistent habits keep the wax melting evenly all the way to the jar's edge on every single burn.
Follow the right burn time every session
Burn time is the most controllable factor in preventing tunneling. Let the wax pool reach the full edge of the jar before you extinguish the flame each time you light it.
Plan for two to four hours per session, depending on the jar's diameter.
- First burn: Never cut it short. A complete edge-to-edge melt pool on the first light sets the wax memory correctly for every burn after it.
- Ongoing burns: Keep sessions between two and four hours. Under two hours risks an incomplete melt pool every time.
- Wick care: Trim the wick to 1/4 inch before each burn to maintain a steady, even flame height.
Keep your candle away from drafts and cold
[Air movement and cold temperatures](https://www.smallflameco.com/blogs/news/why-does-my-candle-burn-unevenly) both disrupt how heat spreads across the wax surface. Place your candle on a flat, stable surface away from vents, fans, and open windows.
Avoid storing candles in cold spaces between burns. A chilled jar takes longer to build a full melt pool, which raises your tunneling risk from the very first light of each session.
When tunneling points to a candle issue
Sometimes you've done everything right, and your candle still tunnels. When correct burn habits and a draft-free environment don't solve the problem, the answer to why is my candle tunneling may lie in the candle's construction itself rather than how you use it.
Signs the wick or wax is the problem
A wick that's too small for the jar's diameter is the most common manufacturing issue. You'll notice a consistently weak flame that never pulls the melt pool past the center, no matter how long the session runs. Similarly, low-quality wax blends with a high melt point can resist spreading to the jar's edge entirely.
If you've burned your candle correctly three times in a row and the melt pool still doesn't reach the edges, the candle itself is the problem.
Watch for these specific warning signs:
- Flame sits shorter than 1/2 inch throughout most of the burn
- Melt pool stalls two or more inches from the jar wall
- Wax walls never soften even after three-hour sessions
At that point, contact the brand directly and ask about their wick sizing standards before buying again.
Wrap it up and burn evenly next time
Now you know why is my candle tunneling and exactly what to do about it. The answer almost always comes down to burn habits and wick sizing. Let the melt pool reach the jar's edge on the first burn, keep sessions between two and four hours, trim your wick to 1/4 inch before each light, and keep the candle away from drafts and cold. If your candle still tunnels after following all of that correctly, the problem lives in the candle's construction, not in how you use it.
Choosing a well-made candle from the start cuts your risk significantly. Small Flame Candle Company uses lead-free cotton wicks and a premium coconut-soy wax blend in every hand-poured candle, both selected specifically to produce clean, even burns from the very first light. Browse the hand-poured coconut wax candles to find a candle that's built to burn the right way every time.