
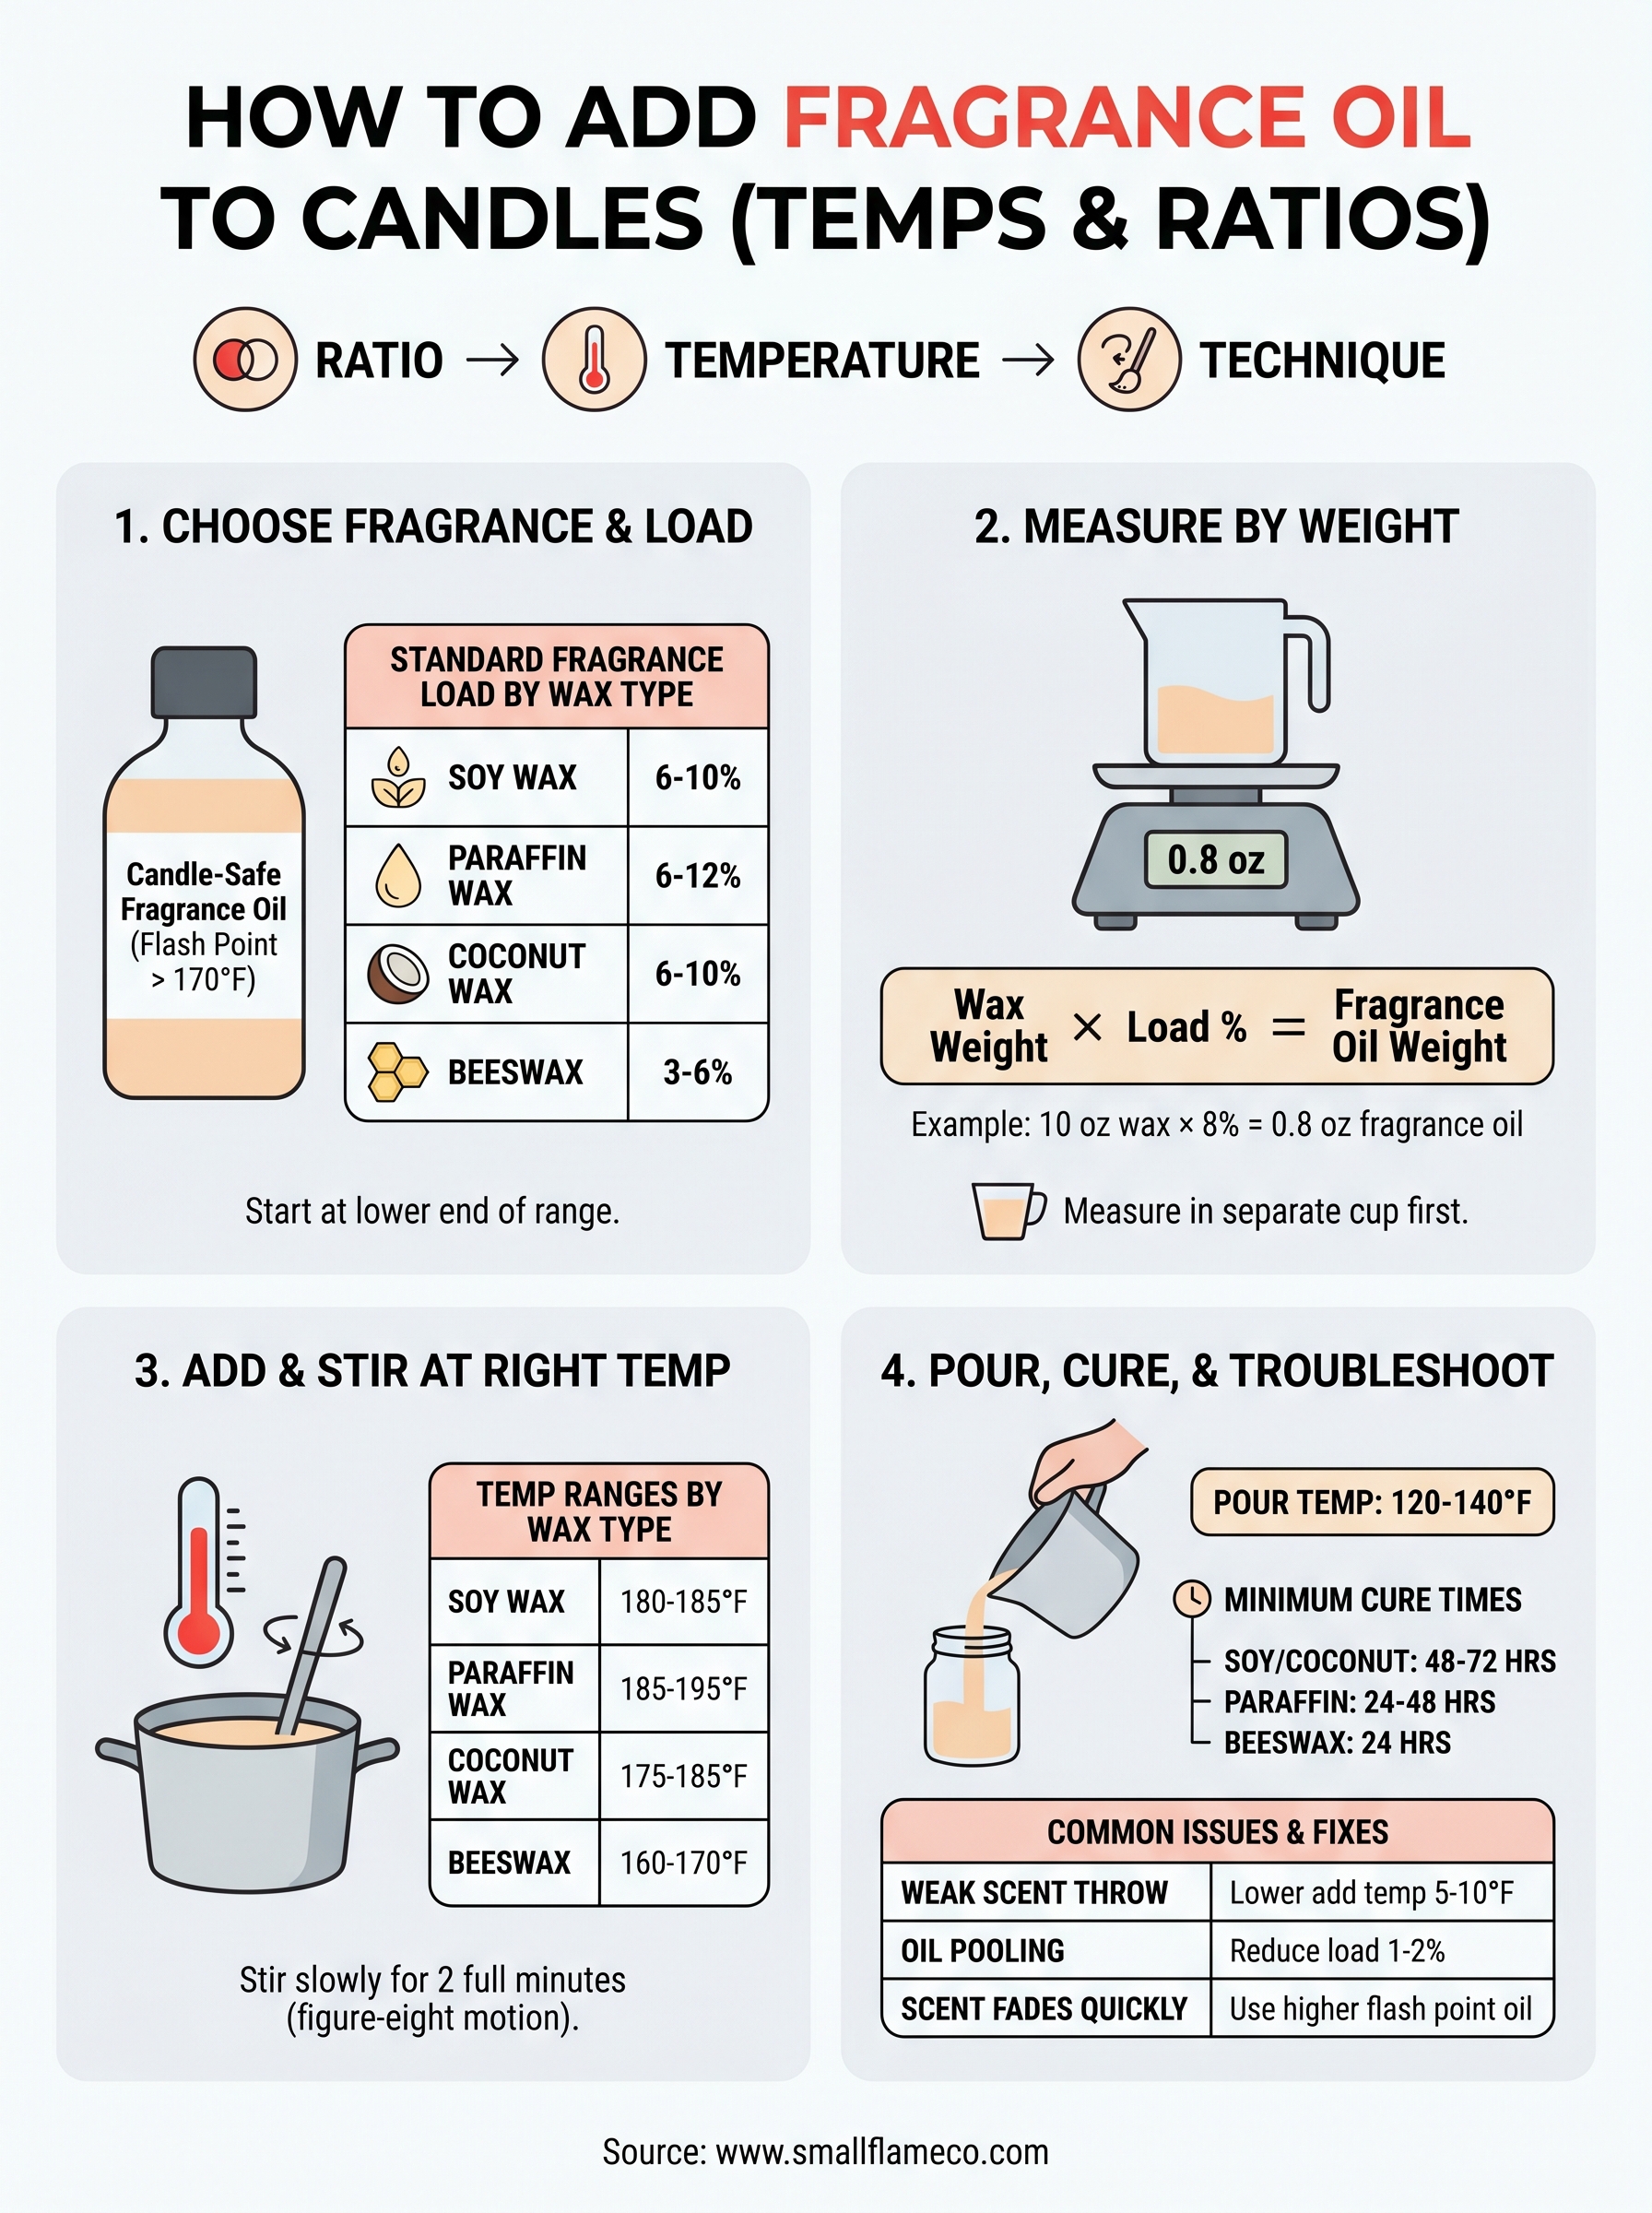
How To Add Fragrance Oil To Candles (Temps & Ratios)
Getting the scent right is the difference between a candle that fills a room and one that barely registers. Knowing how to add fragrance oil to candles comes down to three things: the right ratio, the right temperature, and the right technique. Miss any one of those, and you'll end up with a weak throw or, worse, a candle that sweats oil. At Small Flame Candle Company, we hand-pour every candle in our collection, so we've worked through these variables hundreds of times to lock in scents that actually perform, from our bakery line to novelty favorites like Dr Pepper.
This guide breaks down the full process so you can do the same in your own workspace. You'll get specific temperature windows for adding fragrance oil to different wax types, the standard ratio most chandlers use (and when to adjust it), and the stirring method that helps the oil bind properly. Whether you're pouring your first batch or troubleshooting a scent that won't stick, every step here is based on hands-on practice, not guesswork.
What you need before you start
Before you add fragrance oil to candles correctly, gather everything upfront. Stopping mid-pour to hunt for a thermometer or a scale throws off your timing and temperature, which directly affects how well the scent binds to the wax. Set your workspace up completely before you melt a single ounce.
Equipment you'll need
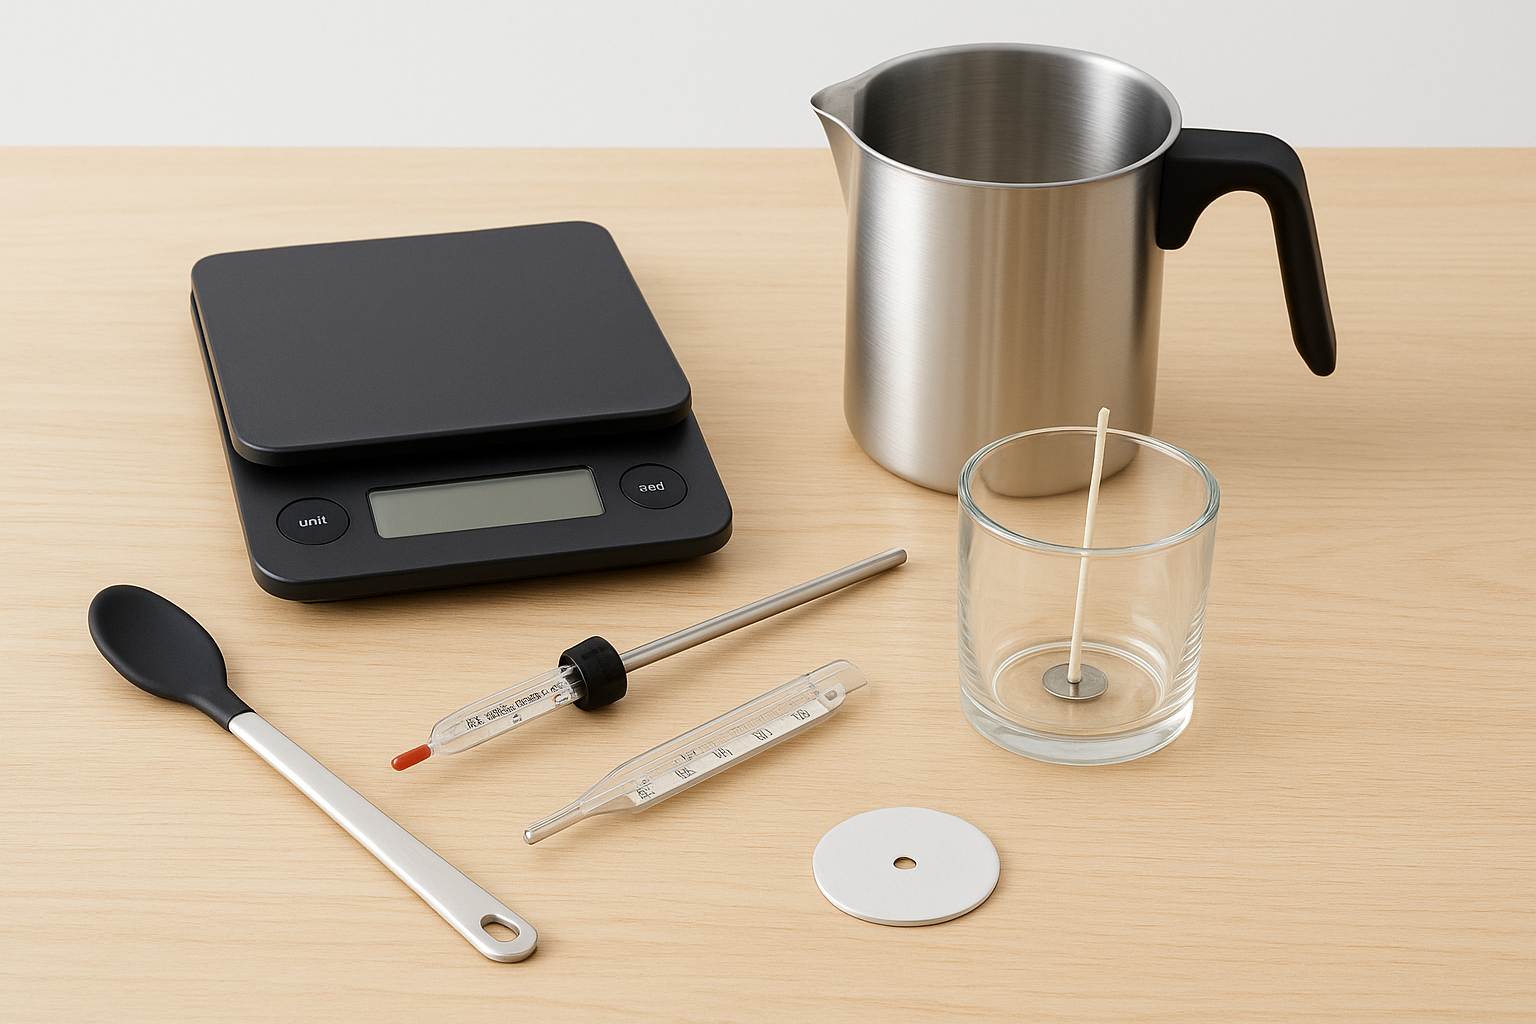
Your tools determine how consistent your results are. A kitchen scale is non-negotiable since eyeballing fragrance oil leads to weak scent throw or oil pooling on the surface. You'll also need a dedicated pour pot, a thermometer, a heat-resistant stirring utensil, and your candle molds or containers.
Here's a quick checklist to have ready before your first pour:
- Kitchen scale that reads in ounces or grams
- Double boiler or dedicated stainless steel pour pot
- Candy thermometer or infrared thermometer
- Silicone or stainless steel stirring utensil
- Candle molds or heat-safe glass containers
- Pre-tabbed wicks and a wick centering tool
A thermometer is the one tool you should never skip. Pouring fragrance at the wrong temperature is the most common reason a candle loses scent throw.
Materials you'll need
Your three core materials are wax, fragrance oil, and wicks. Each one affects the final result differently. Wax type (soy, paraffin, coconut, or beeswax) determines both the temperature at which you add fragrance and how much fragrance load the wax can absorb. Fragrance oil must be candle-safe and phthalate-free to avoid performance problems and safety concerns, so check the product spec sheet before you buy.
Wicks need to match your container's diameter. An undersized wick creates tunneling, where the candle burns straight down the center and leaves wax on the walls. An oversized wick burns too hot, which causes fragrance oil to flash off too quickly before it can throw scent properly. Most wick suppliers publish size charts based on container width, so use those as your starting point and test from there.
Step 1. Pick a candle-safe fragrance and ratio
Not every fragrance oil works in candles. When you learn how to add fragrance oil to candles, the first decision you make is whether the oil you've chosen is actually rated for candle use. Fragrance oils labeled for soap, lotion, or diffusers may contain compounds that don't bind to wax correctly, cause discoloration, or burn unevenly. Always buy from a supplier that lists a flash point above 170°F and confirms candle compatibility on the product page.
A low flash point means the fragrance burns off before it can throw scent, so always confirm this number before you buy.
How to choose your fragrance load
Your fragrance load is the percentage of fragrance oil relative to the total weight of wax you're pouring. Most wax types have a maximum load they can absorb before the excess oil pools on the surface or causes the wick to clog. Start at the lower end of your wax's recommended range and increase only after you've tested the first batch.
Standard fragrance load by wax type
Different waxes absorb fragrance at different maximum rates. Use this table as your starting point, and never exceed the upper end of the range or you'll see oil pooling on the surface of your finished candle.
| Wax Type | Recommended Fragrance Load |
|---|---|
| Soy wax | 6-10% |
| Paraffin wax | 6-12% |
| Coconut wax | 6-10% |
| Beeswax | 3-6% |
Step 2. Measure wax and fragrance the right way
Measuring by weight is the only reliable method when you add fragrance oil to candles. Volume measurements like teaspoons or cups shift depending on temperature and oil density, which throws off your fragrance load percentage and produces inconsistent results from batch to batch. Put your pour pot on the scale, zero it out, and measure both wax and fragrance in ounces or grams every single time.
Use weight, not volume
Your scale does the heavy lifting here. Tare it to zero with your empty pour pot on top, then add wax until you hit your target weight. Never eyeball this step. A difference of even a half-ounce in fragrance can shift your load percentage enough to cause oil pooling or a weak cold throw on the finished candle.
Always measure your fragrance oil separately in a small cup before adding it to the wax, so you can confirm the exact weight without second-guessing yourself mid-pour.
The calculation formula
Use this formula to find your fragrance oil weight for any batch size:
Fragrance oil weight = Wax weight × Fragrance load %
Example: 10 oz wax × 8% = 0.8 oz fragrance oil
Plug in your wax type's recommended range from Step 1, and you have a precise starting measurement for every pour going forward.
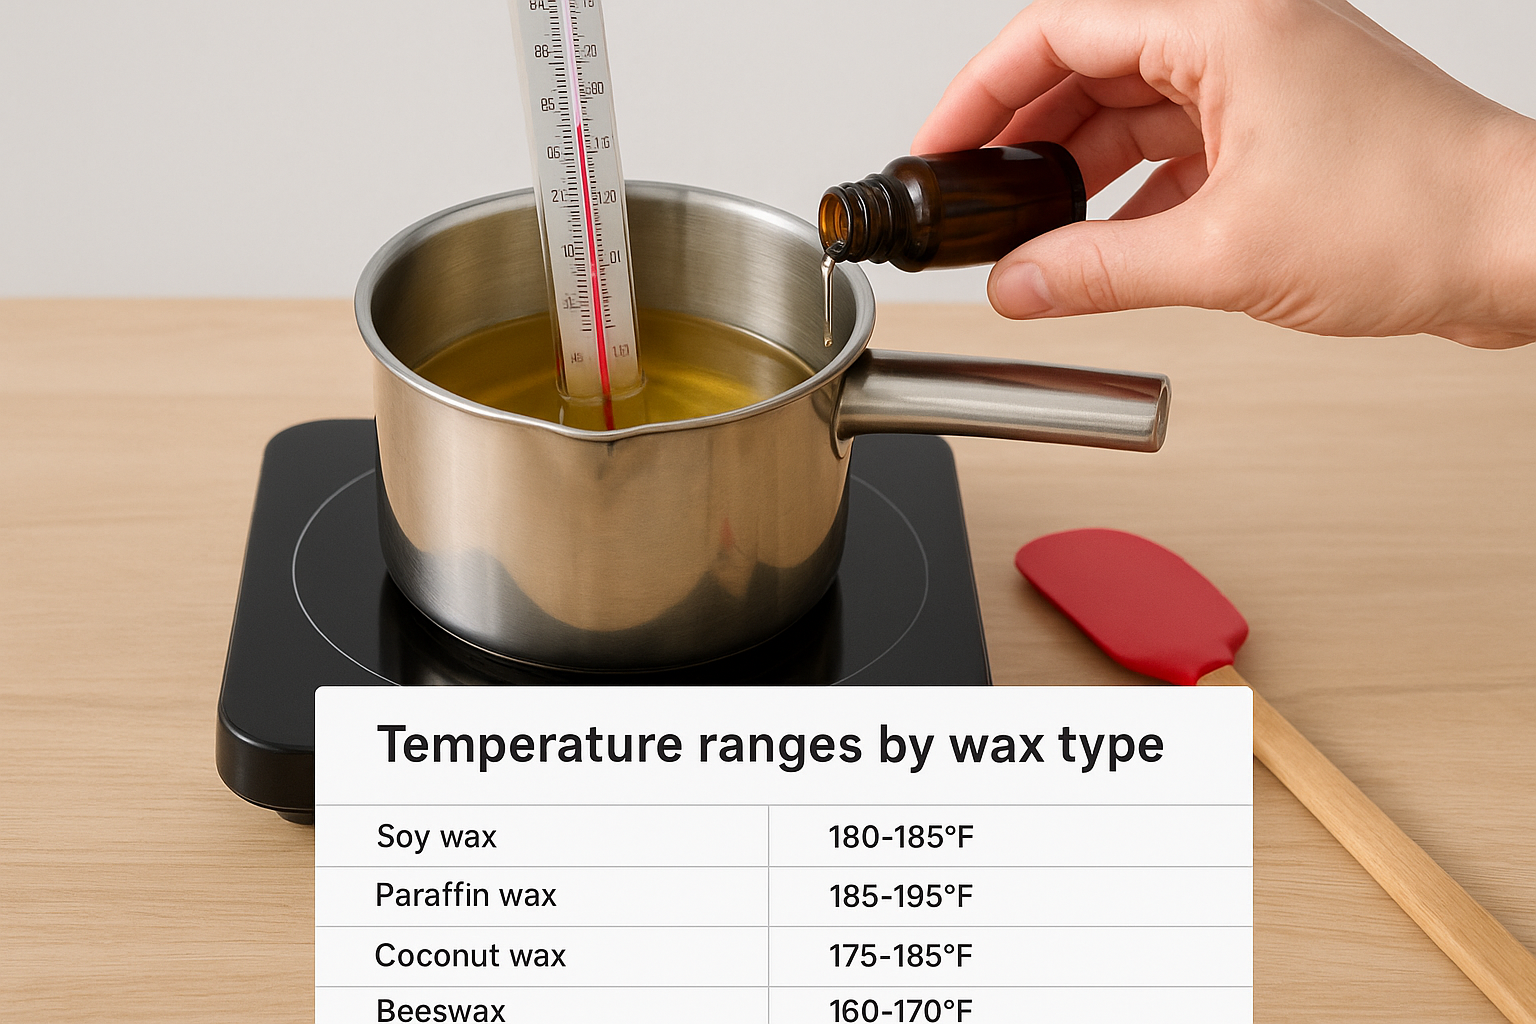
Step 3. Add fragrance at the right temperature
Temperature is where most batches go wrong. When you learn how to add fragrance oil to candles, you'll find that the temperature window is narrow: too hot and the fragrance flashes off before the wax sets, too cool and the oil won't bind properly. Pull your wax off heat and let it drop to your target temperature before you add anything.
Temperature ranges by wax type
Every wax type has a sweet spot for fragrance addition, and staying inside that range keeps your scent compounds intact. Use this table as your reference point, then keep your thermometer in the pot the entire time you work.
| Wax Type | Add Fragrance At |
|---|---|
| Soy wax | 180-185°F |
| Paraffin wax | 185-195°F |
| Coconut wax | 175-185°F |
| Beeswax | 160-170°F |
Never add fragrance oil above 200°F regardless of wax type, or you risk burning off the scent compounds before the wax even reaches your mold.
How to stir correctly
Once you add your measured fragrance oil, stir slowly and steadily for at least two full minutes. Fast stirring introduces air bubbles that cause surface imperfections in the finished candle. A slow, consistent figure-eight motion from the bottom of the pot ensures the oil fully incorporates into the wax before you pour.
Step 4. Pour, cure, and fix common scent issues
Once your wax and fragrance are fully combined, pour slowly and steadily into your container from a low height to avoid air pockets. Aim for a pour temperature of 120-140°F for soy and coconut waxes, slightly higher for paraffin. A controlled pour also reduces the chance of sinkholes forming around the wick as the wax cools.
Cure your candles before testing
Curing gives the fragrance oil time to fully bond with the wax at a molecular level. Skipping this step is the most common reason a candle seems weak on the first burn. Follow these minimum cure times before you test any candle:
- Soy wax: 48-72 hours
- Coconut wax: 48-72 hours
- Paraffin wax: 24-48 hours
- Beeswax: 24 hours
A proper cure makes a bigger difference in scent throw than almost any other single variable in the entire process.
Fix common scent problems
Even when you follow the correct steps for how to add fragrance oil to candles, issues can still appear. Use this table to diagnose and correct the most frequent problems before scrapping a batch:
| Problem | Likely Cause | Fix |
|---|---|---|
| Weak scent throw | Fragrance added too hot | Lower your add temperature by 5-10°F |
| Oil pooling on surface | Fragrance load too high | Reduce load by 1-2% |
| Scent fades quickly | Flash point too low | Switch to a higher flash point oil |
| Wet spots on glass | Poured too hot | Pour 5-10°F cooler |
Next steps
You now have everything you need to know about how to add fragrance oil to candles the right way: the correct fragrance load by wax type, the temperature window to hit before you pour, and the stirring technique that keeps your scent bound to the wax. Apply each step in sequence, cure your candles fully before testing, and use the troubleshooting table to correct problems without scrapping a batch.
Your first few pours will teach you more than any guide can. Start with a small test batch, take notes on your temperature readings and fragrance load, and adjust one variable at a time so you know exactly what changed each result. That process is how consistent, high-performing candles actually get made.
If you want to see what a well-executed fragrance process looks like in a finished product, browse our hand-poured coconut wax candle collection for scent and wax inspiration.