
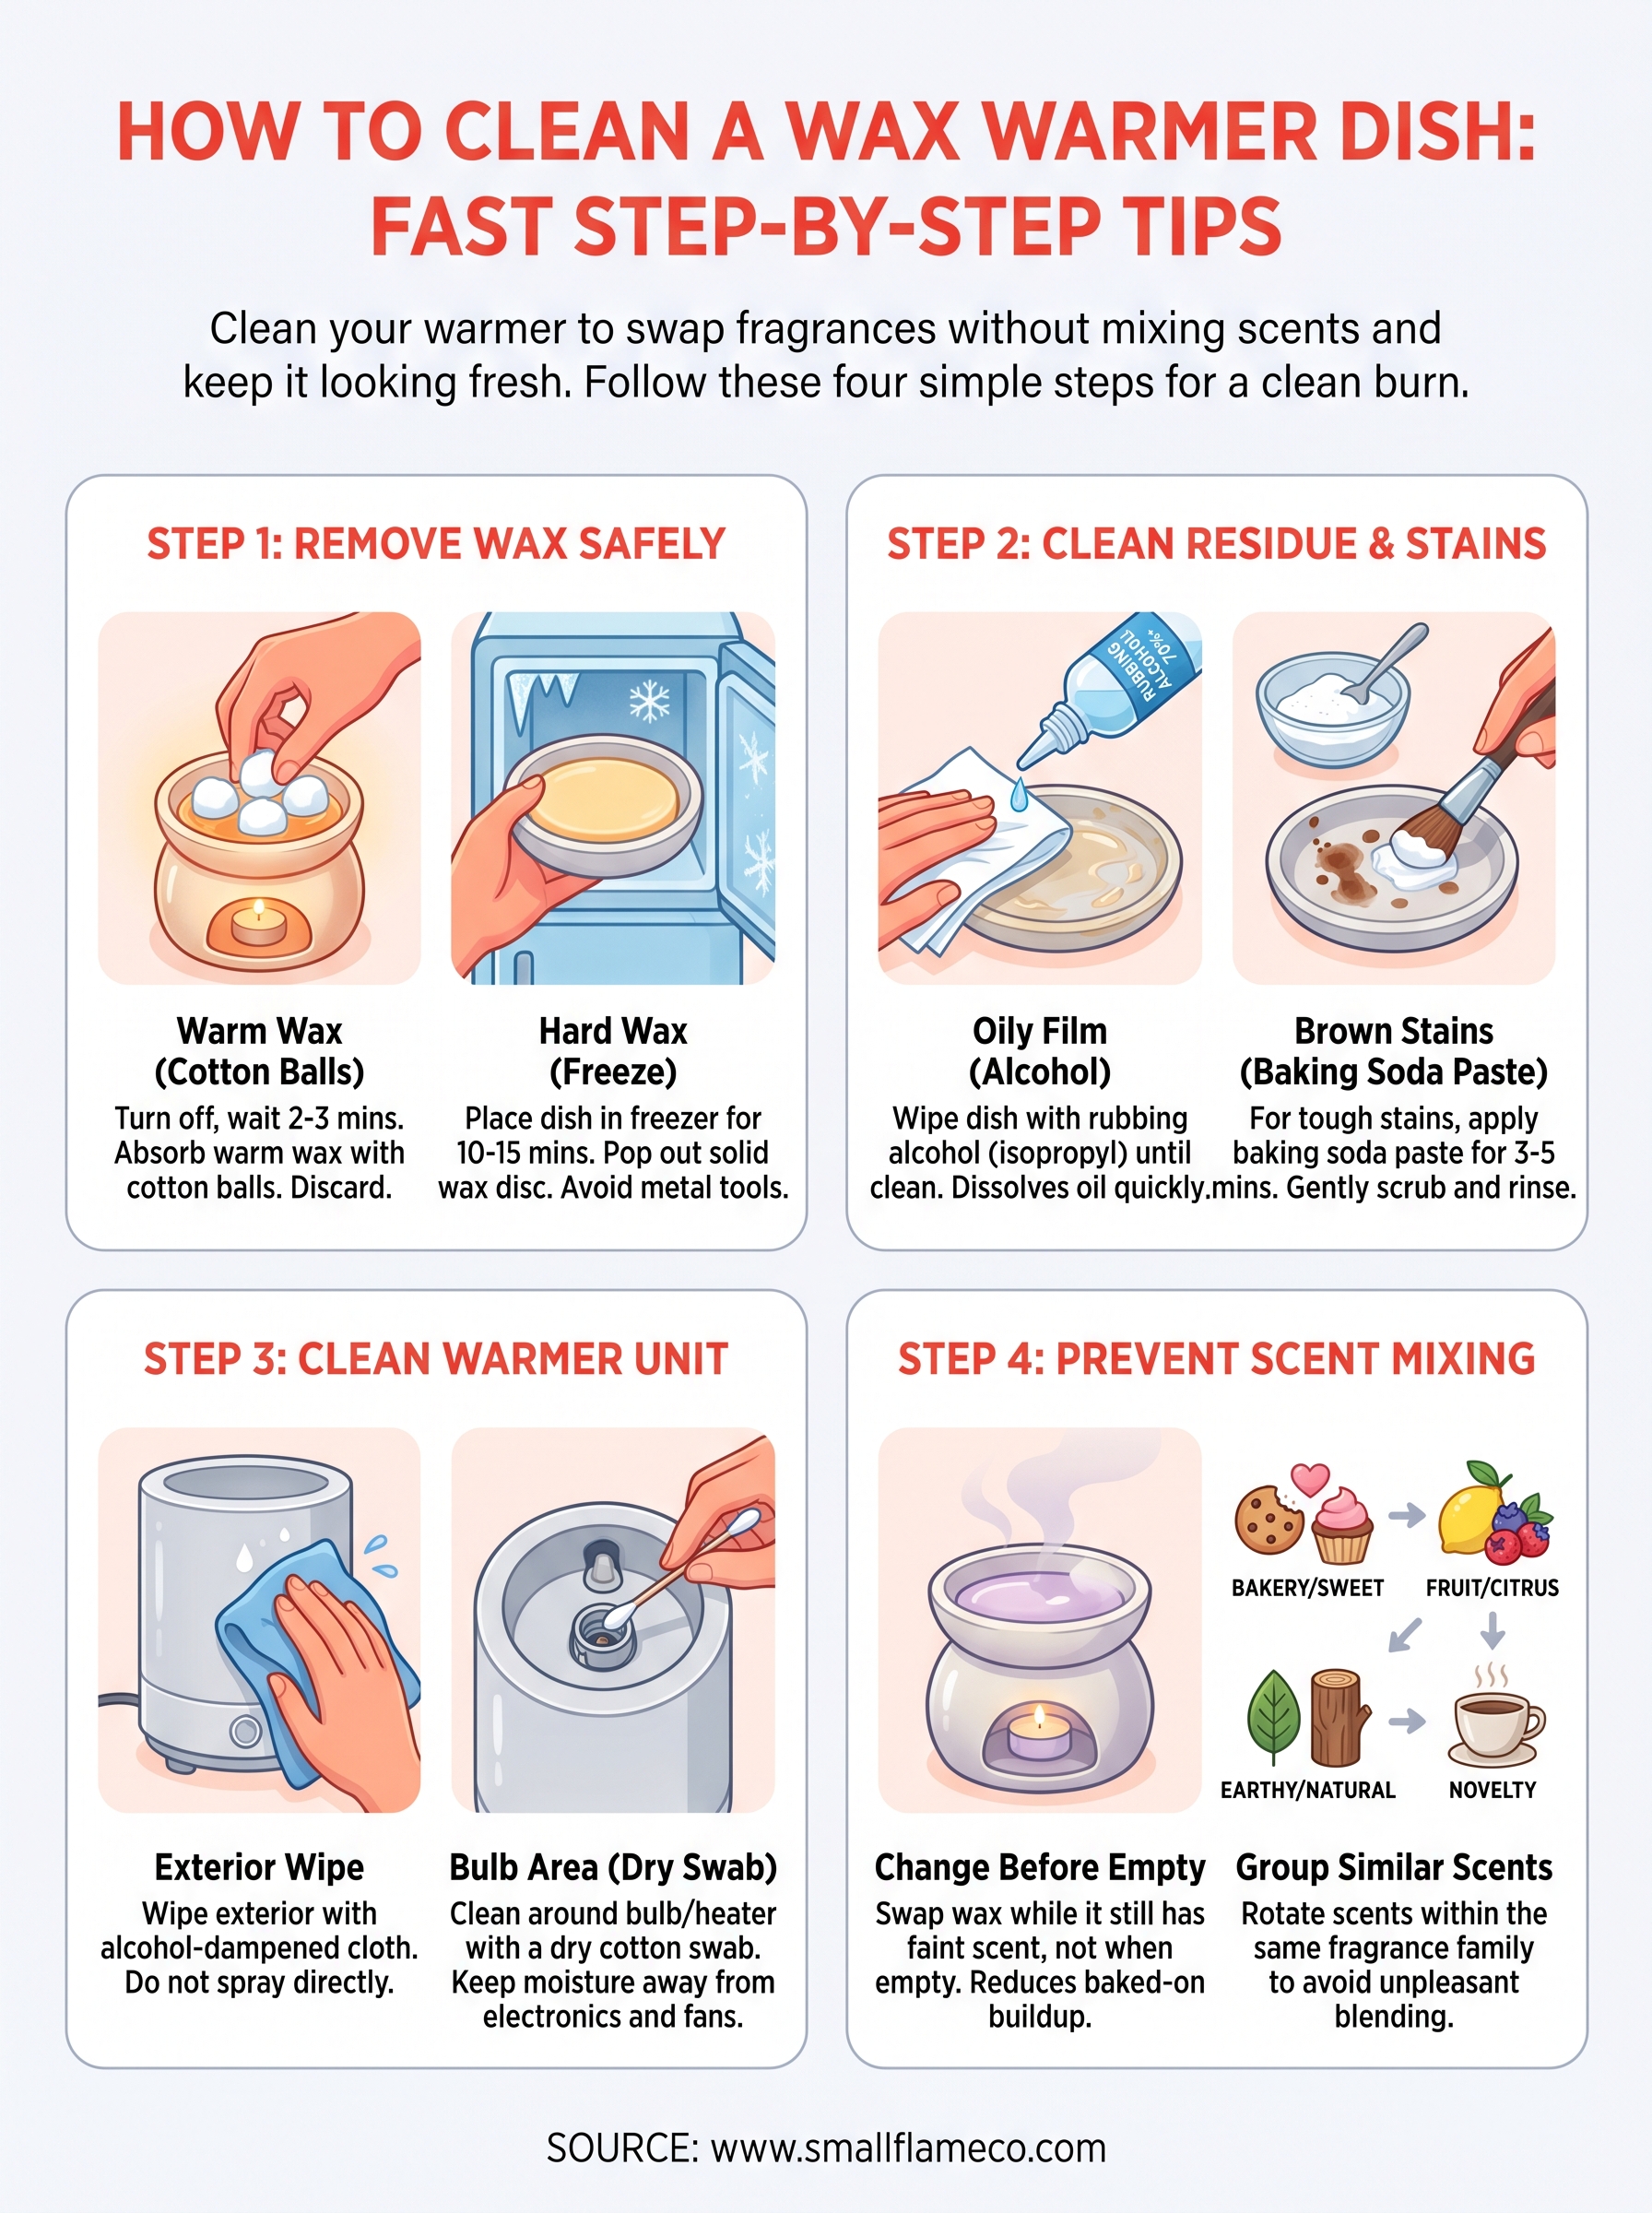
How To Clean A Wax Warmer Dish: Fast Step-By-Step Tips
If you use wax melts on a regular basis, you've hit this moment before: the scent fades out, and a pool of used wax just sits in the dish. Knowing how to clean a wax warmer dish the right way means you can swap fragrances without blending old and new scents, and keep your warmer looking fresh for the long haul. The good news is it takes almost no time once you know the trick.
At Small Flame Candle Company, we sell everything from Edison bulb warmers to fan-powered units alongside our hand-poured wax melts. We clean warmer dishes constantly, cycling through new scents, testing fragrance batches, and prepping display units. That hands-on repetition has taught us what actually works and what's just a messy waste of effort.
This guide breaks down several reliable methods for removing wax from your warmer dish, along with tips for dealing with stubborn residue and discoloration. Whether you're using one of our warmers or a completely different brand, these steps work across the board, so grab a cotton ball and let's get that dish ready for a fresh melt.
What to know before you start
Before you pick up a cotton ball or reach for a cleaning spray, take a minute to review the basics. Cleaning a wax warmer dish correctly depends on two things: the method you choose and the type of warmer you own. Skipping this prep step often leads to cracked dishes, blown fuses, or water damage inside electric units, so it's worth a quick read before you touch anything.
The tools you'll need
You don't need any specialized products to get this done. Most of what you need is already sitting in your home, and the few items you might not have are cheap and easy to find. Having everything ready before you start keeps the process fast and stops you from improvising mid-clean with something that could scratch or damage the dish.
Here's what to have on hand:
- Cotton balls or cotton rounds (the most effective wax absorbers for the warm method)
- Paper towels or a microfiber cloth
- Rubbing alcohol (isopropyl, 70% or higher)
- Mild dish soap
- A soft silicone scraper or an old gift card
- Freezer access (for the freeze method)
- A small shallow bowl for liquid wax disposal
Safety rules to follow first
Working with a heated wax warmer means you're dealing with hot liquid wax and an active heat source, and both carry real risk if you're not careful. Burns from wax happen fast and hurt more than most people expect, so take these safety points seriously before you do anything else.
Never attempt to clean a wax warmer dish while the unit is still plugged in or while a flame is still burning underneath it.
Turn off your warmer and allow it to cool for at least 15 to 20 minutes before you begin. The one exception is the cotton ball absorption method, which works best when the wax is still slightly warm and soft. In that case, the warmer should be off but the wax should not be fully hardened yet. If the wax has already set solid, skip ahead to the freeze method described in Step 1.
Know your warmer type before you clean
Not all wax warmers are built the same, and the cleaning approach shifts depending on which type you own. The three most common types are electric bulb warmers, electric fan warmers, and tealight warmers. Each one uses a different heat source and has a different set of parts to work around when you clean.
Here's a quick breakdown:
| Warmer Type | Heat Source | Key Cleaning Consideration |
|---|---|---|
| Electric bulb warmer | Light bulb beneath the dish | Keep all liquids away from the bulb socket |
| Electric fan warmer | Built-in heating element with a fan | Never let moisture reach the fan or air vents |
| Tealight warmer | Small candle underneath | Dish is usually removable; clean it separately from the holder |
Knowing which type you own also tells you how much of the warmer needs attention beyond the dish itself. For electric models, Step 3 of this guide on how to clean a wax warmer dish covers the full unit wipe-down. For tealight warmers, your focus stays almost entirely on the dish and the ceramic or metal holder beneath it.
Step 1. Remove old wax safely
The first task in learning how to clean a wax warmer dish is getting the old wax out without scratching the dish or making a mess. You have two reliable options, and the one you pick depends on the current state of the wax: still soft and warm, or fully hardened and solid. Neither method requires special tools, and both take under five minutes.
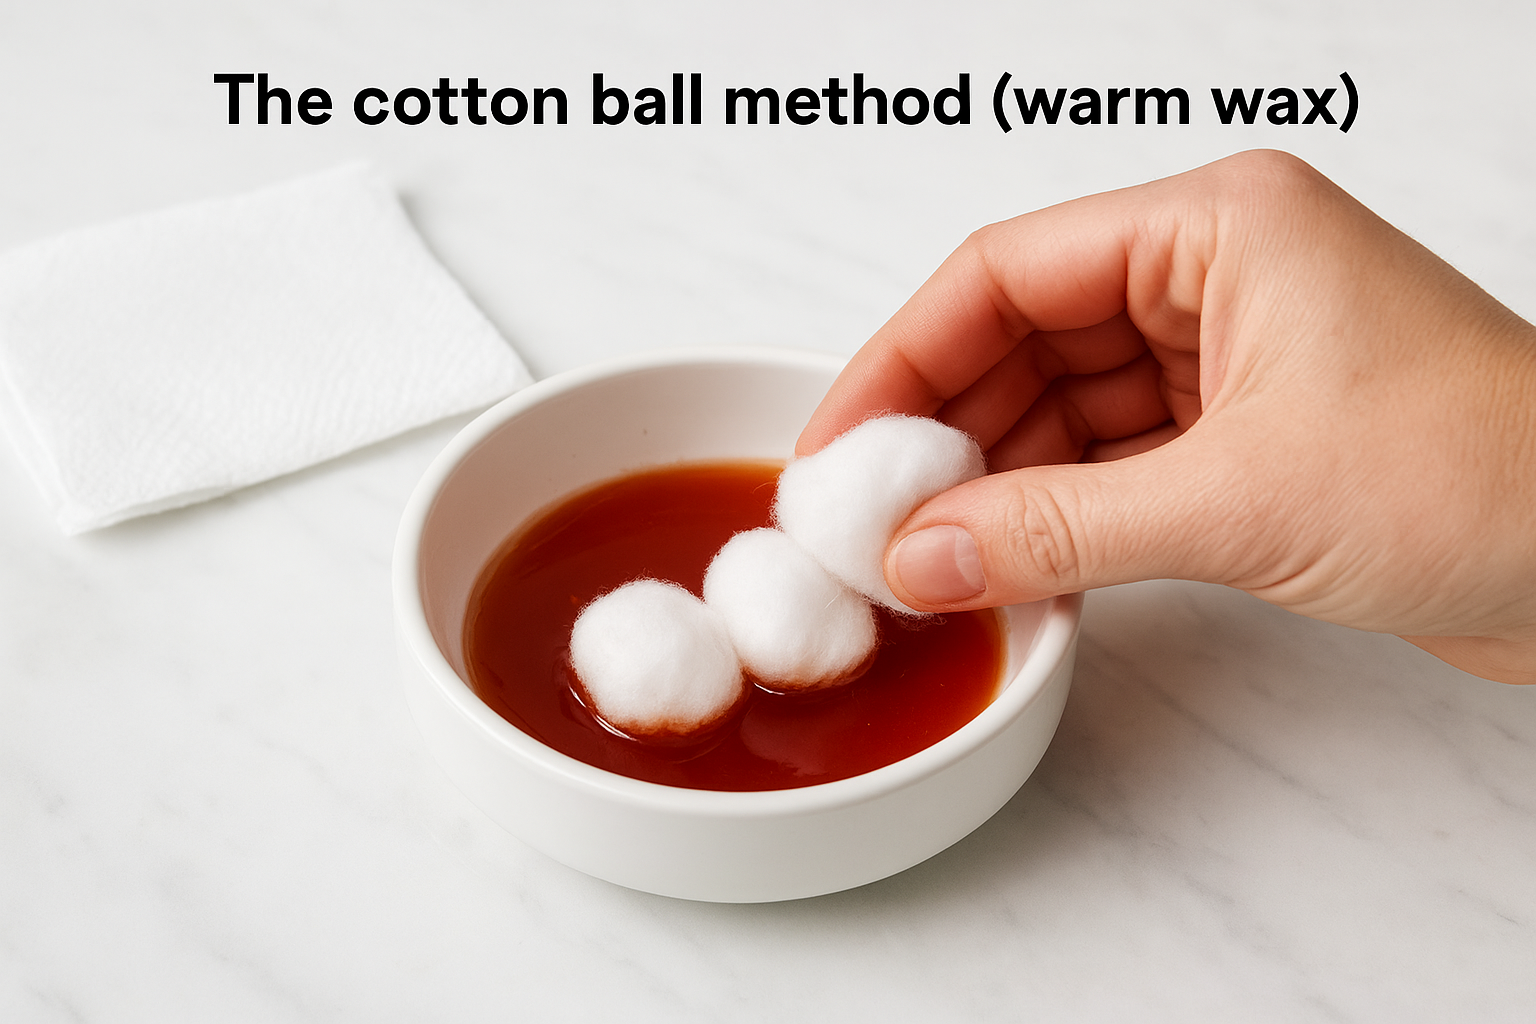
The cotton ball method (warm wax)
This method works when the wax is still slightly liquid or soft after you turn off the warmer. Cotton balls absorb warm wax quickly and pull it out of the dish in just a few passes. Turn your warmer off, wait about two to three minutes so the wax stops active heating, then press two or three cotton balls directly into the wax and let them soak it up. Drag them across the dish and discard.
Do not pour liquid wax down the sink drain. It cools and solidifies in your pipes, which causes clogs over time.
Use a paper towel to wipe up any thin wax film left behind. If the dish still feels greasy, that's fine for now. Step 2 covers that residue in detail.
The freeze method (hardened wax)
If the wax in your dish has already set solid, skip the cotton balls entirely and use cold instead of heat. Place the dish in your freezer for 10 to 15 minutes. The wax contracts slightly as it cools, which causes it to separate from the dish surface on its own.
Once the dish comes out of the freezer, follow these steps:
- Hold the dish over a trash can or lined bowl.
- Press the center of the wax disc gently with your thumb.
- The wax should pop free in one or two solid pieces.
- If it sticks, slide a silicone scraper or an old gift card along the edge to lift it.
- Discard the wax pieces in the trash.
Avoid metal tools like knives or forks when prying out hardened wax. They scratch ceramic and glass dishes permanently, which makes future cleaning harder and affects how the dish looks in your space.
Step 2. Clean residue and brown buildup
Once the wax is out, you'll notice the dish still has a thin oily film or, depending on how long you've been using the same melts, visible brown discoloration along the bottom and sides. That buildup comes from fragrance oils that burn and oxidize against the heated dish surface over time. Skipping this step leaves a contaminated surface that will change the smell of your next melt, so it's worth doing thoroughly every single time.
Remove the oily film with rubbing alcohol
Rubbing alcohol is the fastest and most effective tool for cutting through the waxy residue left after you remove the bulk of the wax. Pour a small amount of 70% or higher isopropyl alcohol onto a cotton ball or folded paper towel, then wipe the inside of the dish in slow circular motions. The alcohol dissolves the oil film on contact and evaporates quickly, so it leaves no moisture behind that could cause problems when you heat the warmer again.
Avoid soaking the dish in alcohol or any liquid if the dish is still attached to an electric warmer unit.
Wipe the dish two or three times with fresh cotton until nothing transfers onto the cotton anymore. At that point, the oily layer is fully gone and the surface is ready for the next step.
Tackle brown buildup with a baking soda paste
If you see dark brown or yellowish staining that rubbing alcohol doesn't fully lift, the fragrance oil has baked into the dish surface. A simple baking soda paste handles this without scratching the dish. Mix one teaspoon of baking soda with just enough water to form a thick paste, then apply it directly to the stained areas with your finger or a soft cloth.
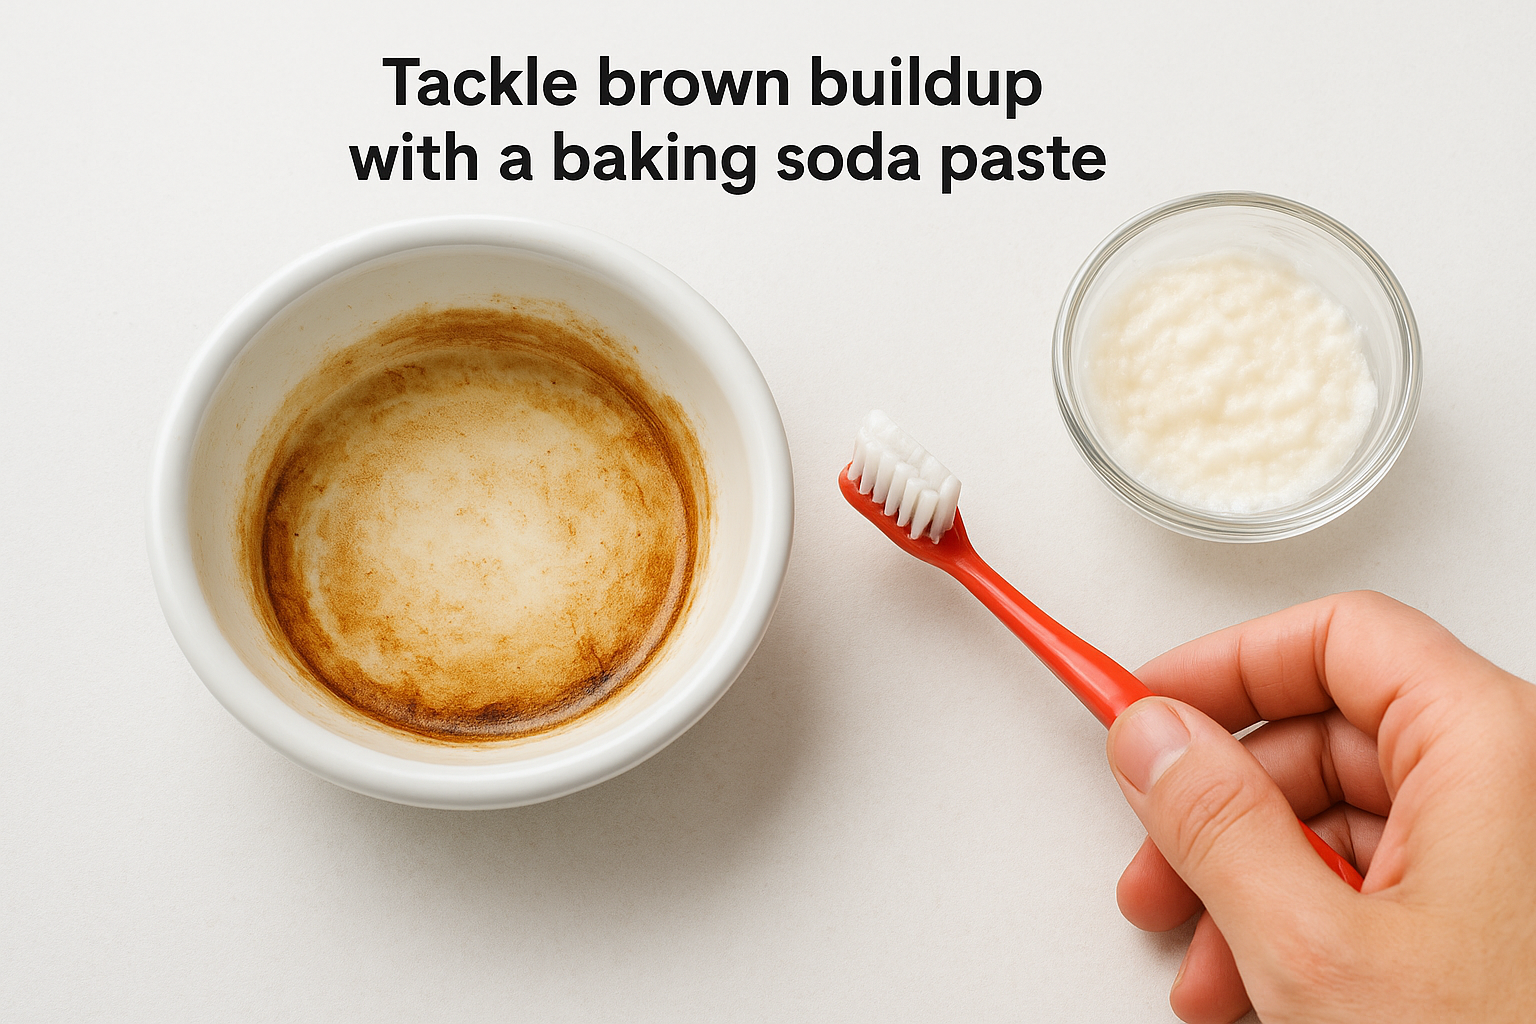
Let the paste sit on the stain for three to five minutes, then scrub gently in small circles with a soft cloth or old toothbrush. Rinse the dish with warm water and dry it completely with a paper towel before placing it back on the warmer. This approach is safe for ceramic, glass, and most metal dishes, and it handles the toughest part of knowing how to clean a wax warmer dish the right way.
Step 3. Clean electric warmer parts
Once the dish is clean, the rest of the warmer needs attention too. Fragrance oil vapor and wax splatter travel beyond the dish during every use, and that residue builds up on the warmer's exterior, base, and heat source over time. Skipping this part of how to clean a wax warmer dish leaves your unit looking worn and can affect how it performs over months of regular use.
Wipe down the exterior
Start with the outer body of the warmer before you touch anything near the heat source. Dampen a soft microfiber cloth with a small amount of rubbing alcohol and wipe down the sides, top rim, and base of the unit. Work in slow, even strokes rather than scrubbing, since most warmer surfaces are painted, glazed, or coated and aggressive rubbing can dull the finish over time. Pay extra attention to the area directly around the dish opening, where wax drips tend to harden into small bumps that are easy to overlook.
Never spray any liquid directly onto the warmer body. Always apply your cleaning solution to the cloth first, then wipe the surface.
Clean around the bulb or heating element
This step varies depending on whether your warmer uses a light bulb or an internal heating element with a fan. In both cases, the goal is to remove any waxy film without introducing moisture into the electrical components. Use a dry cotton swab to clean around the bulb socket or the inner walls of the warming cavity. The narrow tip reaches into corners and seams that a cloth simply cannot.
Follow this order when cleaning the inside cavity:
- Confirm the unit is unplugged and fully cool.
- Look inside the cavity and identify any visible wax residue or oil buildup.
- Run a dry cotton swab along the interior walls in small circles.
- Switch to a lightly alcohol-dampened cotton swab if dry passes leave residue behind.
- Let the interior air dry for at least 10 minutes before plugging the unit back in.
For fan warmers specifically, keep all damp cloths and swabs away from the air vents entirely. Moisture near the fan motor shortens the life of your warmer significantly and is not a fixable problem once the damage is done.
Step 4. Prevent scent mixing next time
Cleaning is reactive. The smarter move is to build habits that reduce how much cleaning your dish needs between scent changes. Understanding how to clean a wax warmer dish properly takes care of the mess after it happens, but a few consistent practices stop fragrance oil buildup before it starts and make every scent change faster and cleaner.
Change wax at the right time
Most people wait until their wax melt has completely lost its scent before swapping it out. That's actually the worst time to switch. Spent wax sits on a heated dish longer, which means more fragrance oil burns off and bonds to the surface, creating the brown buildup you dealt with in Step 2. Change your wax while it still carries a faint scent rather than waiting for it to go completely neutral.
Changing wax at roughly 80% spent rather than fully spent cuts your cleaning time in half because far less oil has baked into the dish surface.
A good rule of thumb: if you have to move close to the warmer to detect any scent at all, it's time to swap. At that stage, the cotton ball method from Step 1 removes the wax in under two minutes and leaves very little residue behind.
Group your scents by fragrance family
Scent blending happens most noticeably when you switch between very different fragrance families, such as going from a bakery scent directly to a fresh pine or citrus melt. Pairing scents within the same family reduces the chance of an unpleasant blend during the first few minutes of a new melt. Here's a simple way to organize your rotation:
| Fragrance Family | Example Scents | Safe to Follow With |
|---|---|---|
| Bakery and sweet | Vanilla, cinnamon, brown sugar | Other sweet or spice scents |
| Fruit and citrus | Lemon, berry, orange | Light floral or fresh scents |
| Earthy and natural | Cedar, sandalwood, moss | Warm spice or woody scents |
| Novelty and beverage | Dr Pepper, coffee, fruity cereal | Bakery or sweet scents |
Following a logical scent sequence keeps your transitions cleaner and lets each new fragrance perform the way it was intended from the first warm-up.
Keep your wax warmer dish fresh
Knowing how to clean a wax warmer dish comes down to three consistent habits: remove old wax before it fully hardens, wipe the dish with rubbing alcohol every time you swap scents, and give the warmer body a quick wipe-down weekly. None of these steps take more than a few minutes, and together they keep your dish looking clear and your fragrance performing exactly as intended.
The wax you use matters just as much as the cleaning routine you build. High-quality melts with clean fragrance oils leave far less residue and discoloration than cheaper alternatives. If you want melts that are easy on your dish and genuinely great-smelling, check out the hand-poured wax melts and candles at Small Flame Candle Co. Every product uses a coconut-soy wax blend with toxin-free fragrance oils, which means less buildup, cleaner burns, and a warmer dish that stays easier to maintain over time.