
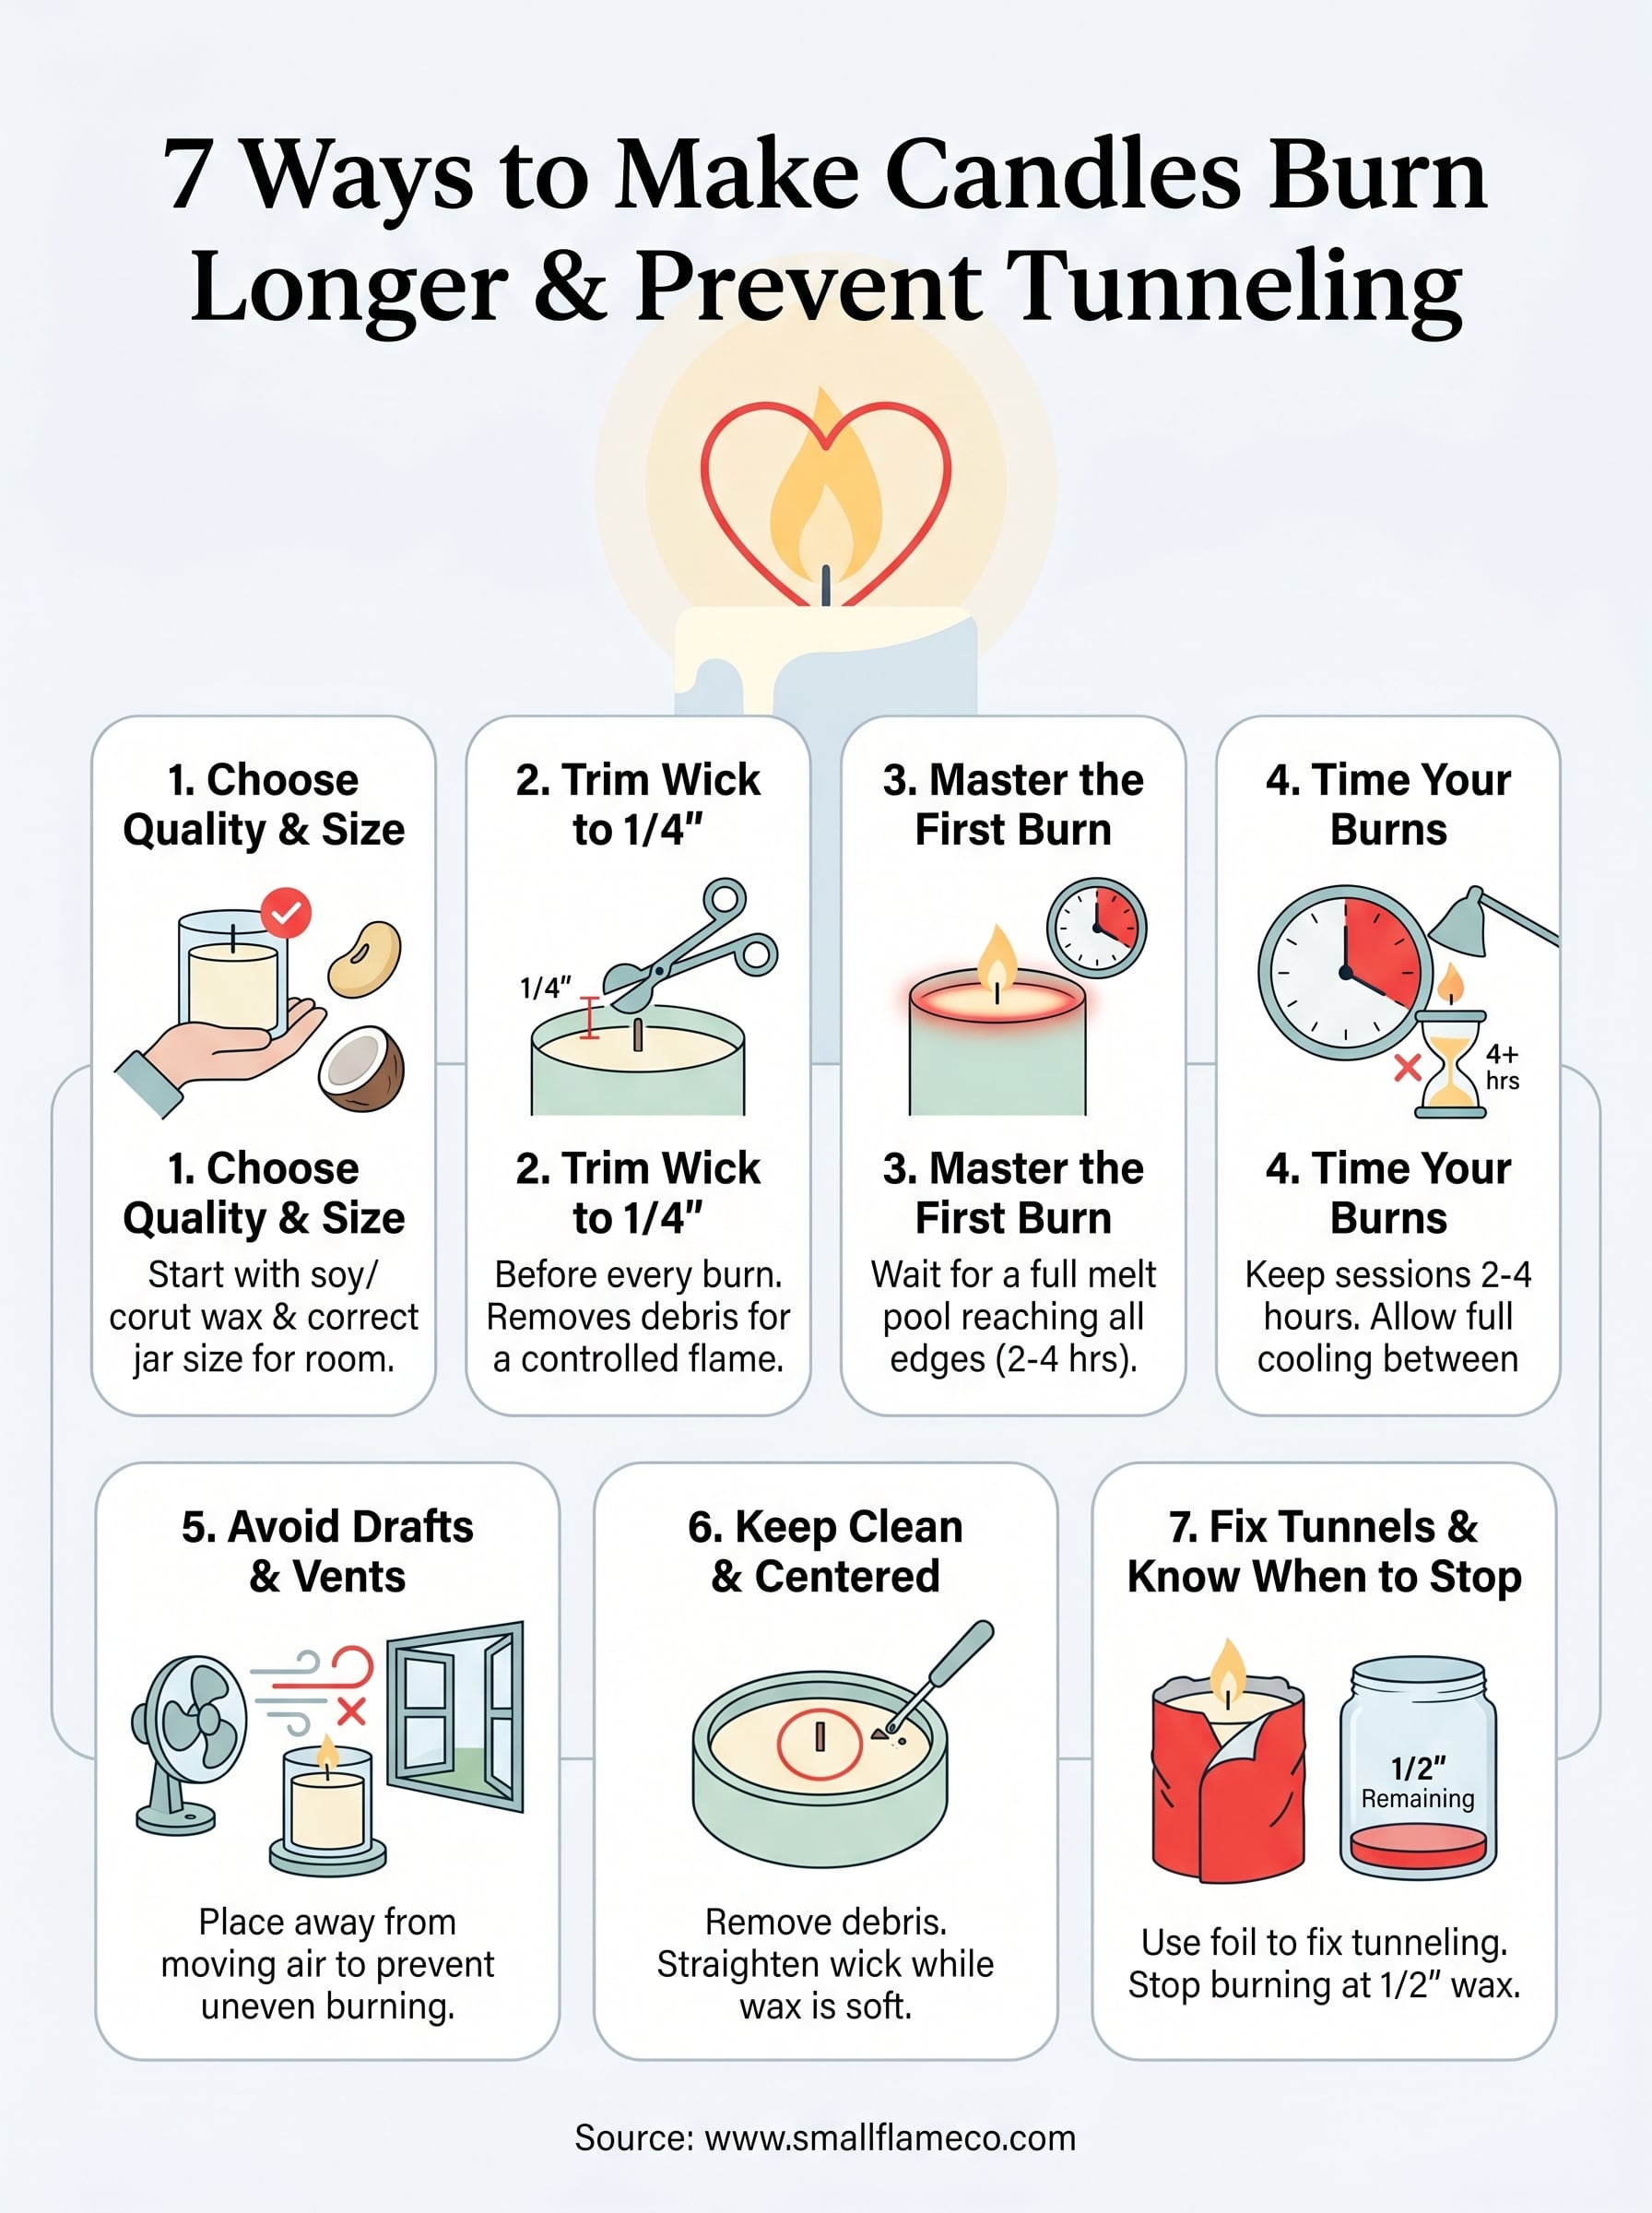
7 Ways: How To Make Candles Burn Longer Without Tunneling
You spent good money on a candle you love, then watched it burn down the center, waste half the wax, and fizzle out way before it should have. That tunneling problem isn't a defect. It's almost always a care issue. Learning how to make candles burn longer starts with a few small habits that most people never think about, and the difference in burn time can be surprisingly dramatic.
At Small Flame Candle Company, we hand-pour every candle we sell, so we know exactly how these products are supposed to perform. We've tested burn techniques across our entire scent library, from bakery favorites to novelty fragrances, and the same core principles apply every time. When you treat a candle right, it rewards you with a full, even melt pool and hours of extra fragrance.
This article covers seven practical ways to extend your candle's life and prevent tunneling for good. No gimmicks, no complicated tools, just straightforward adjustments to how you light, maintain, and store your candles that'll make every jar worth the investment.
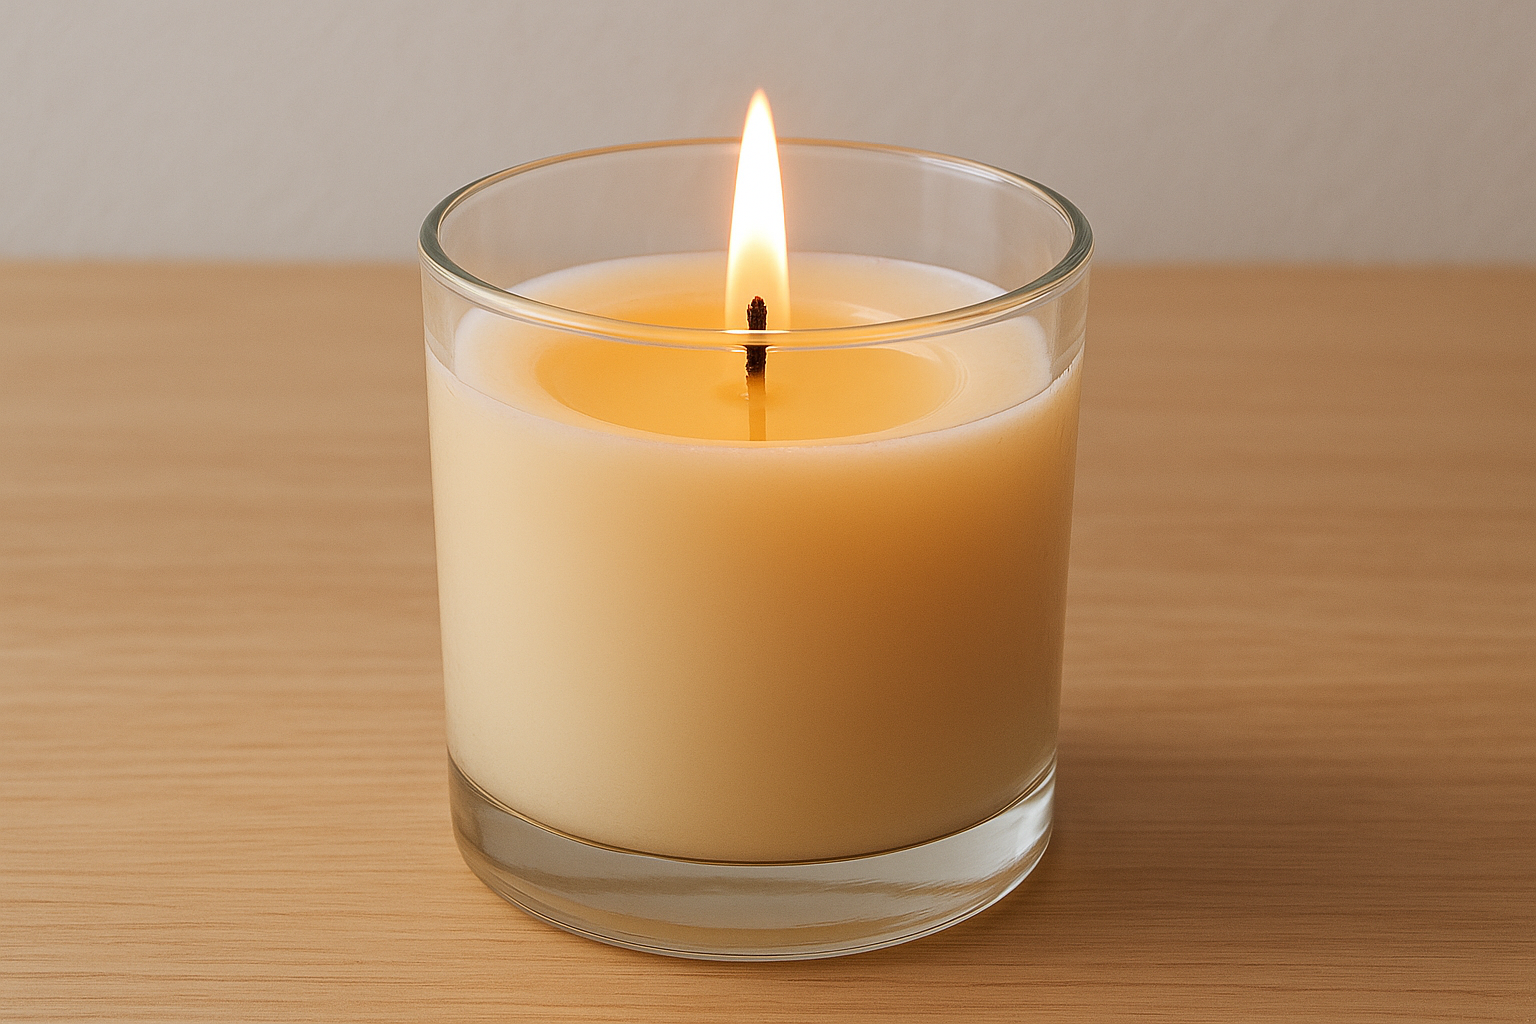
1. Start with a quality candle in the right size
Everything about how to make candles burn longer starts before you even light the wick. The candle you pick determines the ceiling on burn time, fragrance throw, and how evenly the wax melts through the jar. Cheap wax blends, poor wick sizing, or oversized vessels will undercut every care habit you build, no matter how careful you are after lighting.
What to do
Look for candles made with quality wax blends such as soy, coconut, or high-grade paraffin, since these burn more consistently than cheap alternatives. Match the candle size to the room and how often you plan to burn it. A small 4 oz jar works well on a desk or bathroom shelf, while a larger 8 to 16 oz vessel suits a living room or bedroom with longer sessions. Before you buy, confirm the wick looks straight and centered in the jar, since an off-center wick will cause uneven burning from the very first light.
- Choose soy or coconut-based wax for a slower, more even melt rate
- Match vessel diameter to your typical burn sessions so wax reaches the edges consistently
- Look for hand-poured construction where wick placement is deliberate rather than automated
- Confirm the wick is centered in the jar before you commit to a purchase
Why it works
Wax quality directly controls melt rate. Higher-quality waxes burn at a more stable temperature, so the candle creates a full melt pool without racing down the center. When the wick is correctly sized for the vessel's diameter, the flame pulls wax evenly from every direction rather than tunneling straight down.
A candle whose wick is undersized for the jar's diameter will almost always tunnel, wasting half the wax regardless of how carefully you burn it.
Mistakes to avoid
Many buyers assume the largest candle gives the most burn time, but vessel diameter matters more than total wax volume. A wide, shallow jar requires a stronger wick than a tall, narrow one of the same weight.
Grabbing a decorative candle without checking wax type or wick placement regularly leads to tunneling, weak scent throw, and wasted wax within the first few burns. If the wick looks visibly off-center at purchase, skip it regardless of how appealing the fragrance sounds.
2. Trim the wick to the right length every time
Wick length is one of the simplest levers you have for how to make candles burn longer, and most people ignore it completely. A long wick burns hotter, faster, and unevenly, which shortens your candle's life and deposits unnecessary soot on the jar walls.
What to do
Before every single burn, trim your wick to 1/4 inch above the wax surface. Use a wick trimmer, small scissors, or nail clippers to make a clean, flat cut. Remove any trimmed bits from the wax pool before lighting, since debris in the melt pool disrupts the flame and can cause uneven burning.
- Trim to 1/4 inch before every single burn session
- Remove all clippings and debris from the jar before lighting
- Straighten the wick back to center if it has drifted to one side
Why it works
A shorter wick produces a smaller, more controlled flame that melts wax at a slower, steadier rate. That controlled heat prevents the wick from creating a lopsided flame that tunnels down one side while leaving wax untouched along the edges.
A consistently trimmed wick can add several hours to your candle's total burn time compared to one that is never trimmed.
Mistakes to avoid
Skipping the trim just once sends carbon buildup onto the wick tip, which causes mushrooming and an oversized flame on the next burn. You should also avoid cutting the wick too short, below 1/8 inch, since a flame that is too small won't generate enough heat to pull the melt pool to the jar's edges.
3. Let the first burn create a full melt pool
The first time you light a candle sets the burn pattern for every session that follows. Candle wax has a memory, meaning if the first burn tunnels down the center, the wax will keep following that same path every time you relight it. Getting that initial session right is one of the most powerful steps in how to make candles burn longer.
What to do
On the first burn, keep the candle lit until the melt pool reaches the jar's edges on all sides. For most candles, this takes between two and four hours, depending on the vessel's diameter. Set aside enough time before you light it so you're never forced to blow it out early.
- Wait for the melt pool to touch all jar walls before extinguishing
- Plan your first burn for a two-to-four-hour window you can commit to
- Avoid moving or covering the candle while the wax is still liquid
Why it works
Wax solidifies in the exact shape it last melted. A complete first melt pool programs an even baseline across the entire surface, so every burn after starts flat rather than picking up where a tunnel left off.
Skipping the full first burn is the single most common reason candles tunnel from the very beginning.
Mistakes to avoid
Burning a new candle for only 30 to 45 minutes on the first session almost guarantees tunneling later. Avoid placing the candle anywhere you'll feel rushed to extinguish it early, since an incomplete first burn creates a pattern that becomes harder to correct with every session after.
Setting a timer before you light it removes the guesswork. If you know you only have an hour, hold off on lighting the candle entirely until you have the time to do it right.
4. Stick to smart burn sessions and cool-downs
Burn time is not just about total hours on the clock. How long you burn your candle in a single session and how you let it cool between uses both play a direct role in how to make candles burn longer. Burning a candle too long overheats the wax, weakens the fragrance oils, and stresses the wick, all of which cut into your total burn life faster than almost any other mistake.
What to do
Keep each burn session between two and four hours. After you extinguish the candle, let the wax cool and fully re-solidify before the next burn. Most candles need at least two hours of cooling time before you relight them.
- Burn for 2 to 4 hours per session, never beyond 4
- Allow full wax solidification before relighting
- Extinguish with a candle snuffer rather than blowing, which can push the wick off-center
Why it works
Extended burn sessions overheat the fragrance oils, causing them to evaporate faster and reducing scent throw over time. Giving the wax time to cool and reset maintains the candle's structure and keeps the wick anchored in place.
Burning past four hours in one sitting can cause the wick to destabilize and the jar to overheat, creating a real safety concern.
Mistakes to avoid
Relighting a candle while the wax is still liquid disrupts the surface and can let the wick drift off-center. Short sessions under one hour are also a problem, since the wax won't reach the jar edges and tunneling will pick up right where it left off.
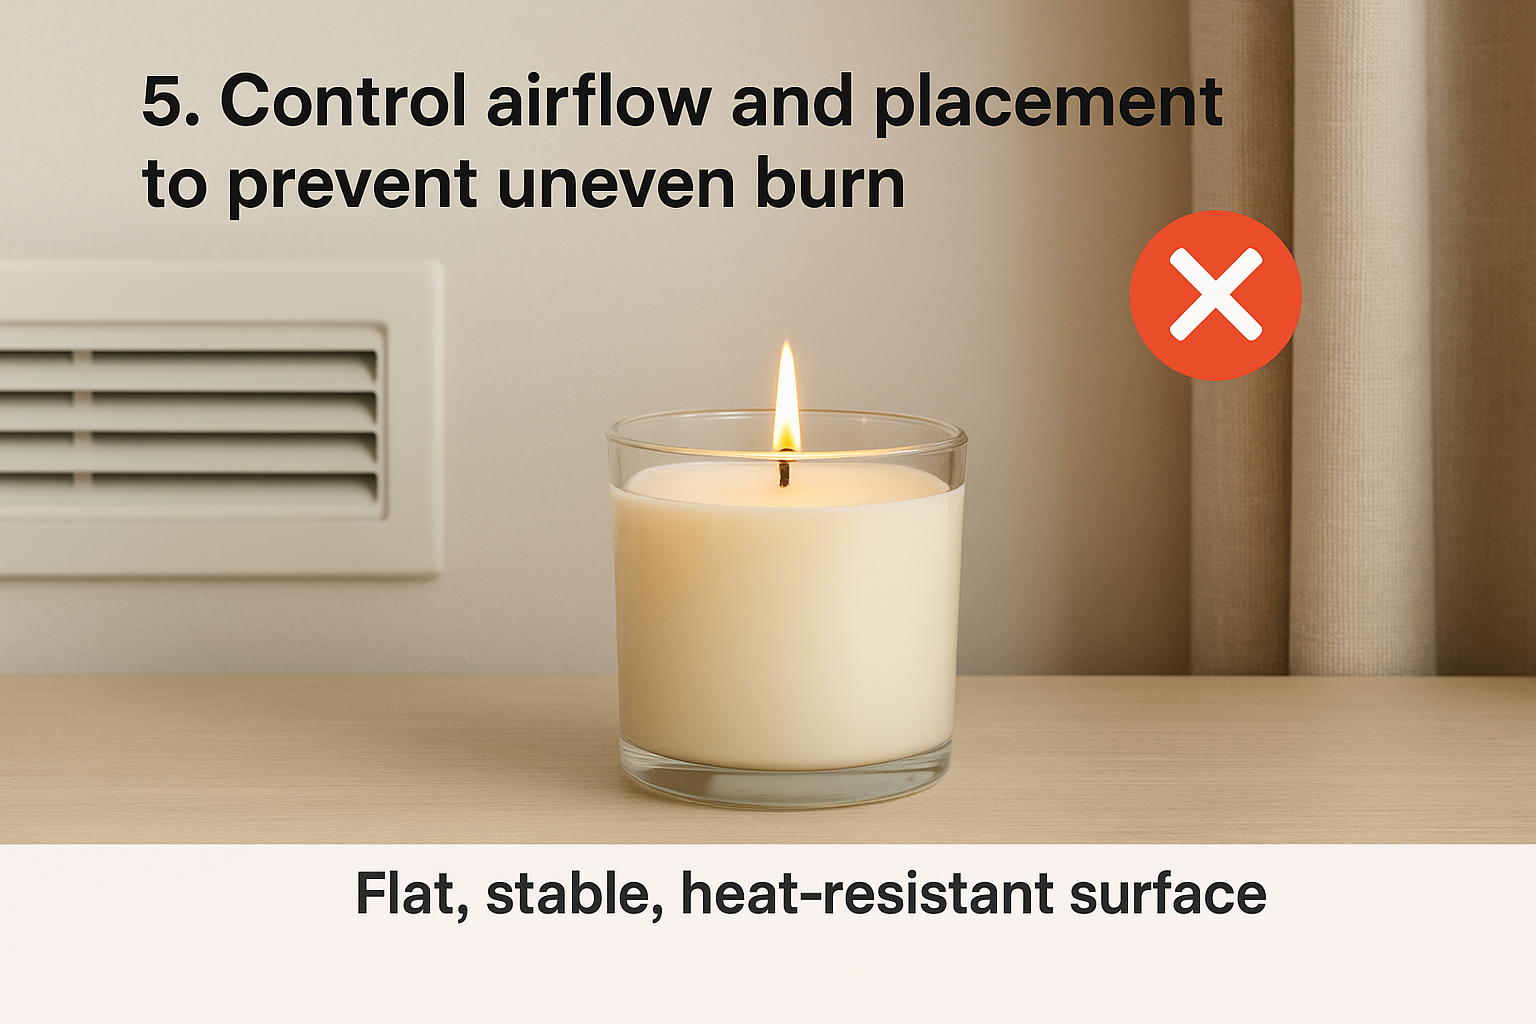
5. Control airflow and placement to prevent uneven burn
Where you place your candle affects burn quality more than most people realize. Moving air from vents, fans, open windows, or even foot traffic pushes the flame sideways, creating uneven heat distribution across the wax surface. Knowing how to make candles burn longer includes knowing exactly where not to light them.
What to do
Set your candle on a flat, stable, heat-resistant surface away from drafts, air conditioning vents, ceiling fans, and open windows. Keep at least six inches of clearance on all sides from walls, curtains, or anything flammable. If you burn multiple candles in the same room, space them at least three inches apart so the heat from each jar doesn't interfere with the others.
- Place on a level, stable surface that won't shift mid-burn
- Stay away from vents, fans, and open windows
- Keep three inches of separation between multiple candles
Why it works
A flame exposed to consistent airflow bends in one direction, which heats that side of the wax faster and pulls the melt pool off-center. Stable placement gives the flame a straight, controlled burn path that draws wax evenly from the entire surface.
Even a subtle air current from an HVAC vent running across the room can cause your candle to tunnel within a single session.
Mistakes to avoid
Windowsills look like ideal candle spots, but they expose the flame to outdoor drafts and direct sunlight, both of which distort your burn pattern. Placing candles directly on wood surfaces without a protective tray risks heat damage to furniture and can destabilize the jar during a long session.
6. Keep the wax pool clean and the wick centered
A dirty wax pool quietly cuts into your candle's performance over time. Debris in the melt pool, including wick trimmings, match heads, and dust, creates irregular heat zones that pull the flame off its path. Keeping the wax surface clean and the wick straight is a simple part of how to make candles burn longer that takes less than thirty seconds per session.
What to do
Before each burn, check the wax surface for foreign debris and remove it with a toothpick or small spoon while the wax is still solid. If the wick has tilted to one side, gently straighten it while the wax is soft after extinguishing but before it fully hardens.
- Remove all debris from the wax pool before lighting
- Straighten a drifted wick while wax is soft, not fully liquid
- Wipe soot from the jar walls after every two to three sessions
Why it works
Debris in the melt pool acts as a secondary fuel source, causing the flame to spike and burn unevenly. A centered wick distributes heat symmetrically across the wax surface, which keeps the melt pool level and prevents one side from pulling ahead of the other.
A wick that drifts just a few millimeters off-center can create noticeable tunneling within two or three sessions.
Mistakes to avoid
Repositioning the wick while the wax is fully liquid risks flooding the wick base, making it harder to light and shortening its effective burn life. Never use paper or cardboard to scoop debris from the pool since both leave behind fibers that cause problems on the next burn.
Avoid letting soot accumulate on the jar walls for more than a few sessions, since heavy buildup absorbs heat unevenly and distorts the flame behavior in the same way a draft would.
7. Fix tunneling early and stop burning at the right time
Tunneling doesn't always mean a candle is ruined. If you catch it early enough, you can correct the problem and recover most of the wax that would otherwise go to waste. Acting fast on a tunnel and knowing exactly when to stop burning are both essential parts of how to make candles burn longer.
What to do
When you notice a tunnel forming, wrap the candle in aluminum foil with a small opening at the top and burn it for two to three hours. The foil traps heat and forces it back toward the edges, melting the raised wax walls down to a flat, even surface. Once the tunnel closes, remove the foil carefully and let the candle cool fully before relighting.
- Stop burning any candle when 1/2 inch of wax remains at the bottom
- Never burn past that point since the jar overheats and creates a safety risk
Why it works
The foil method works because it redirects heat laterally across the wax surface instead of letting it escape upward. That concentrated warmth softens the hardened wax walls and pulls the melt pool wide enough to reset the entire surface back to a flat baseline.
Stopping at 1/2 inch of remaining wax protects your furniture and prevents the jar from cracking under direct heat.
Mistakes to avoid
Never substitute plastic wrap or tape for foil since both materials melt and contaminate the wax pool. Burning a heavily tunneled candle without intervention deepens the problem with every session, until there is no practical way to recover the wax along the walls.
Keep your candles burning clean and even
Every tip in this article works together. Knowing how to make candles burn longer comes down to consistent habits: trim the wick, protect the first burn, control airflow, and catch tunneling before it takes hold. None of these steps require special equipment or a lot of time, just a little attention before and after each session.
The candle you start with still matters. A hand-poured candle built with quality wax and a properly sized wick gives every technique here room to work. If you're shopping for candles that are designed to burn clean and even from the first light, browse the Small Flame hand-poured coconut wax candle collection. Each candle is crafted with a coconut-soy wax blend and lead-free cotton wicks so you get the most out of every burn session, right from the start.